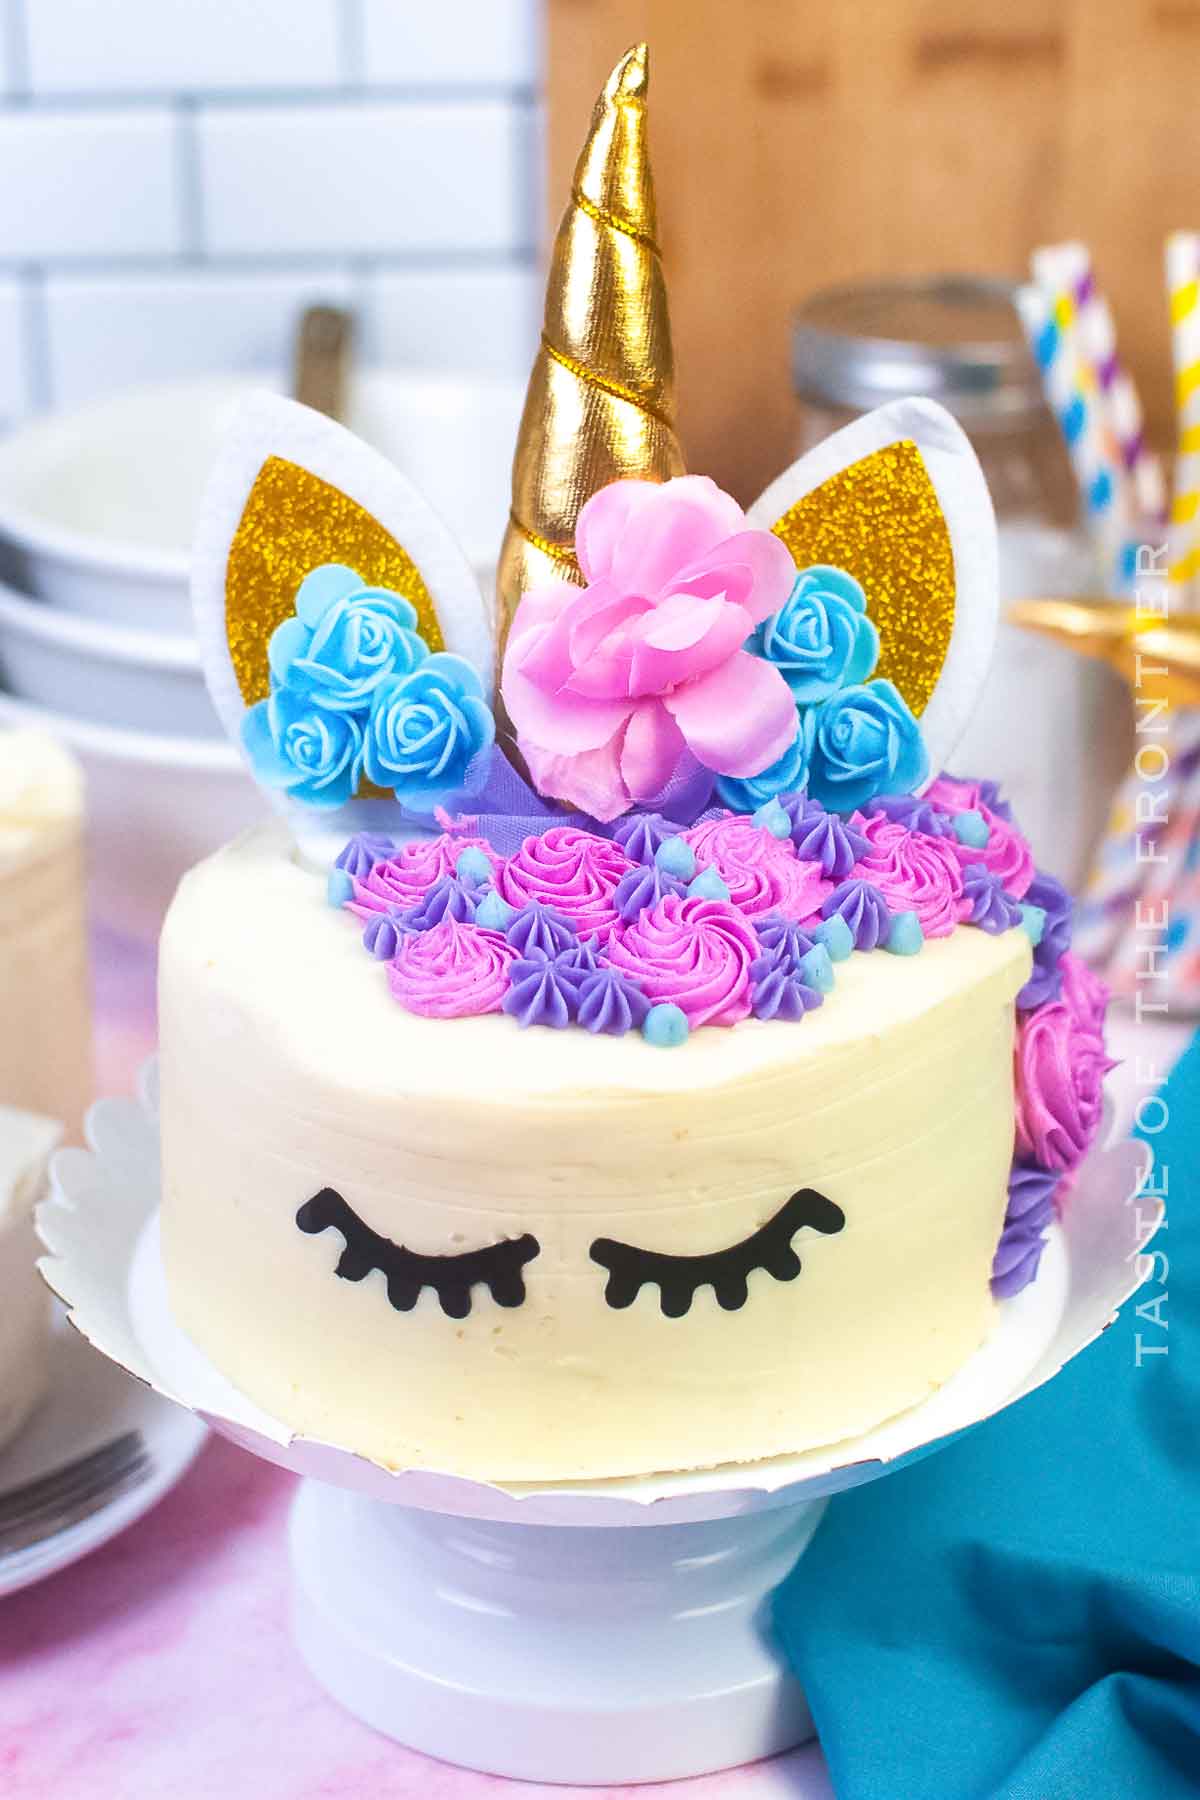
Creating this Unicorn Cake Design is nothing short of a magical adventure. It’s the perfect cake to make for special occasions, such as a child’s birthday or a whimsical baby shower.
This cake is a feast for the eyes with its colorful mane and fondant horn. It also tantalizes the taste buds with its delicate vanilla cake and creamy frosting. We made it for my little girl’s birthday and you should have seen her face when it came out!
This unicorn-themed cake will have your kids and family members jumping up and down as you reveal it on your next special day!
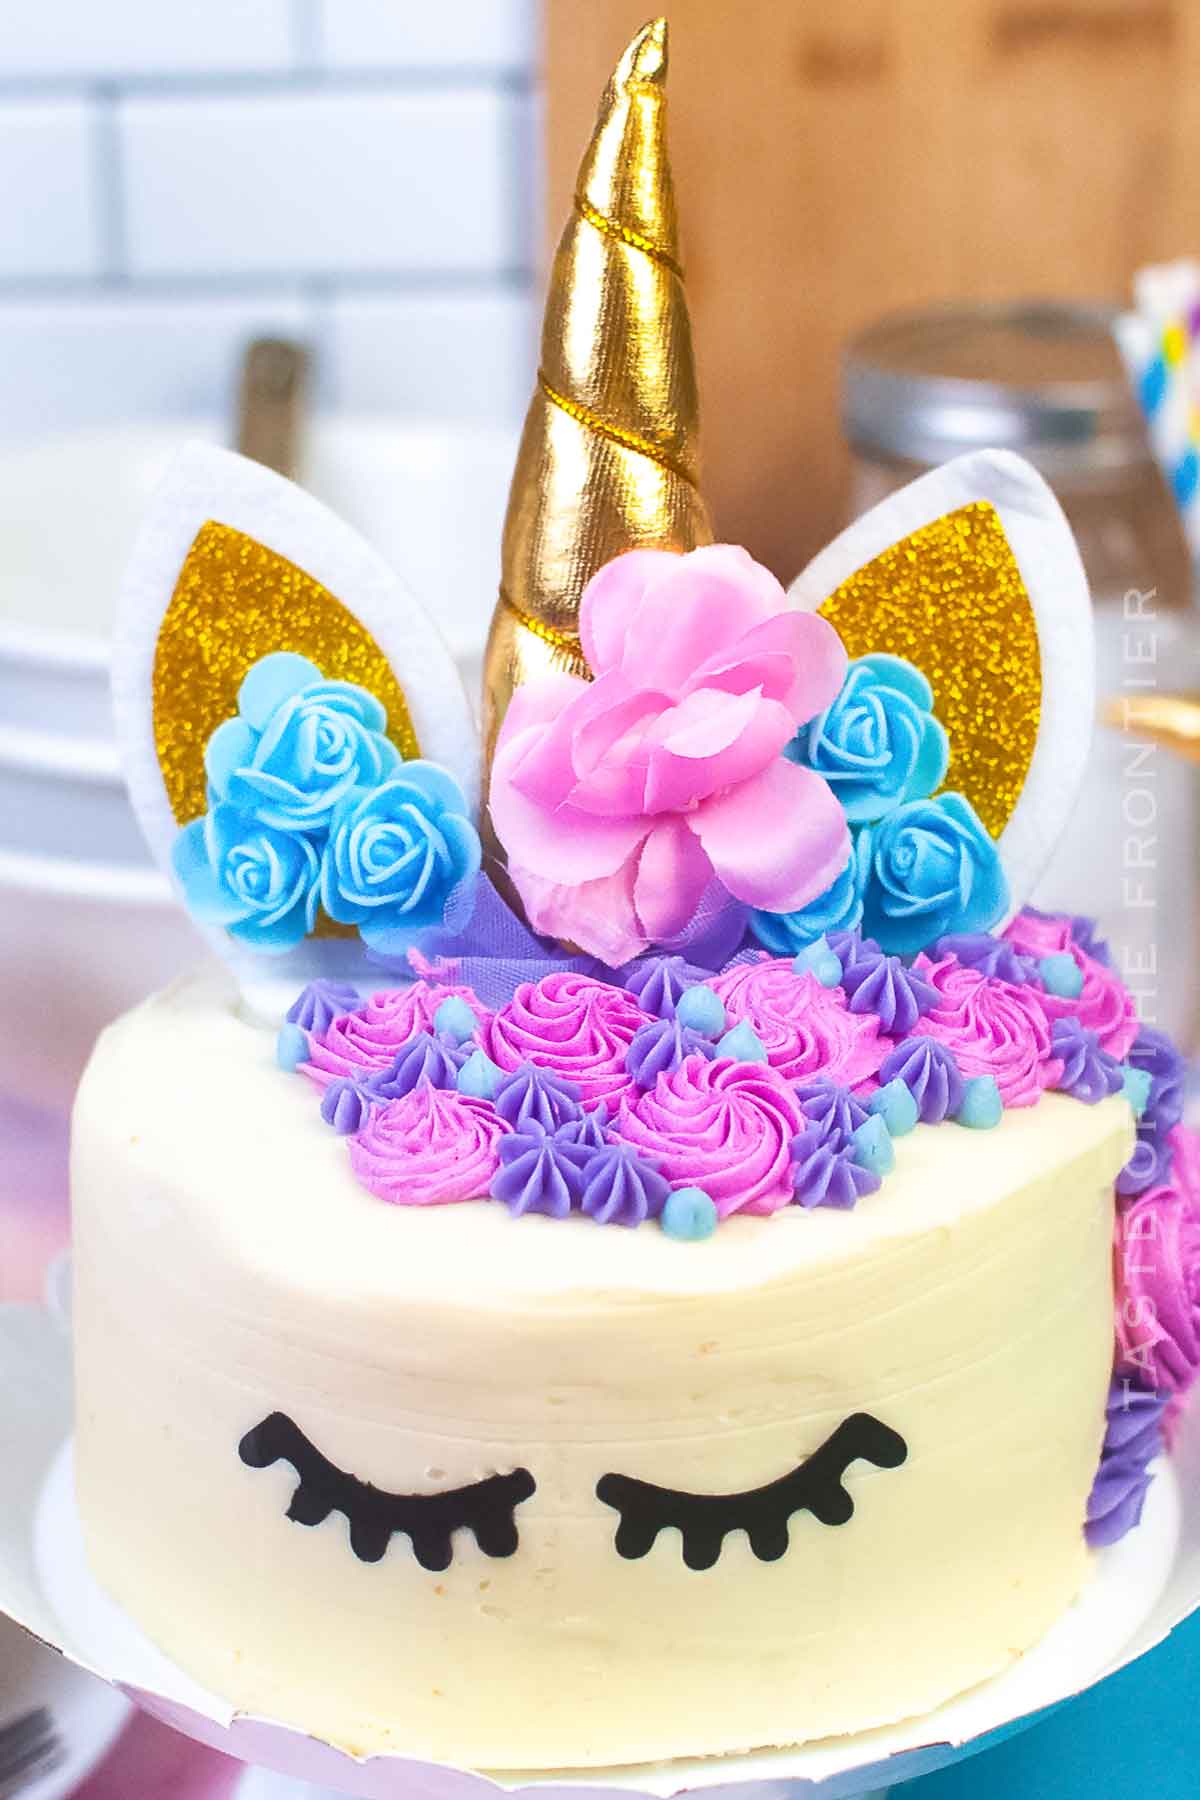
Unicorn Cake
Making a unicorn cake design is not just about baking a cake; it’s about creating a magical creature that will be the highlight of any special occasion. And the best part is that it’s a cake that looks complex but is quite simple to make.
In past years it was the easiest way to satisfy my unicorn-loving daughter on her birthday. So roll up your sleeves, gather your ingredients, and get ready to bring some magic to your kitchen!
This unicorn cake will undoubtedly be a hit at any birthday celebration, turning it into a truly memorable day. Your little princess or prince will never forget the experience. Enjoy the process, have fun with it, and remember, every unicorn is unique, just like your cake!
Common Questions About Unicorn Cake Design
There are always a few queries that pop up when it comes to making such a captivating cake. Let’s delve into those:
Can I make an eggless version of the Unicorn Cake?
Absolutely! This recipe can easily be adapted to be eggless. You can replace the eggs with applesauce, mashed bananas, or a commercial egg substitute.
How can I make the best unicorn cakes?
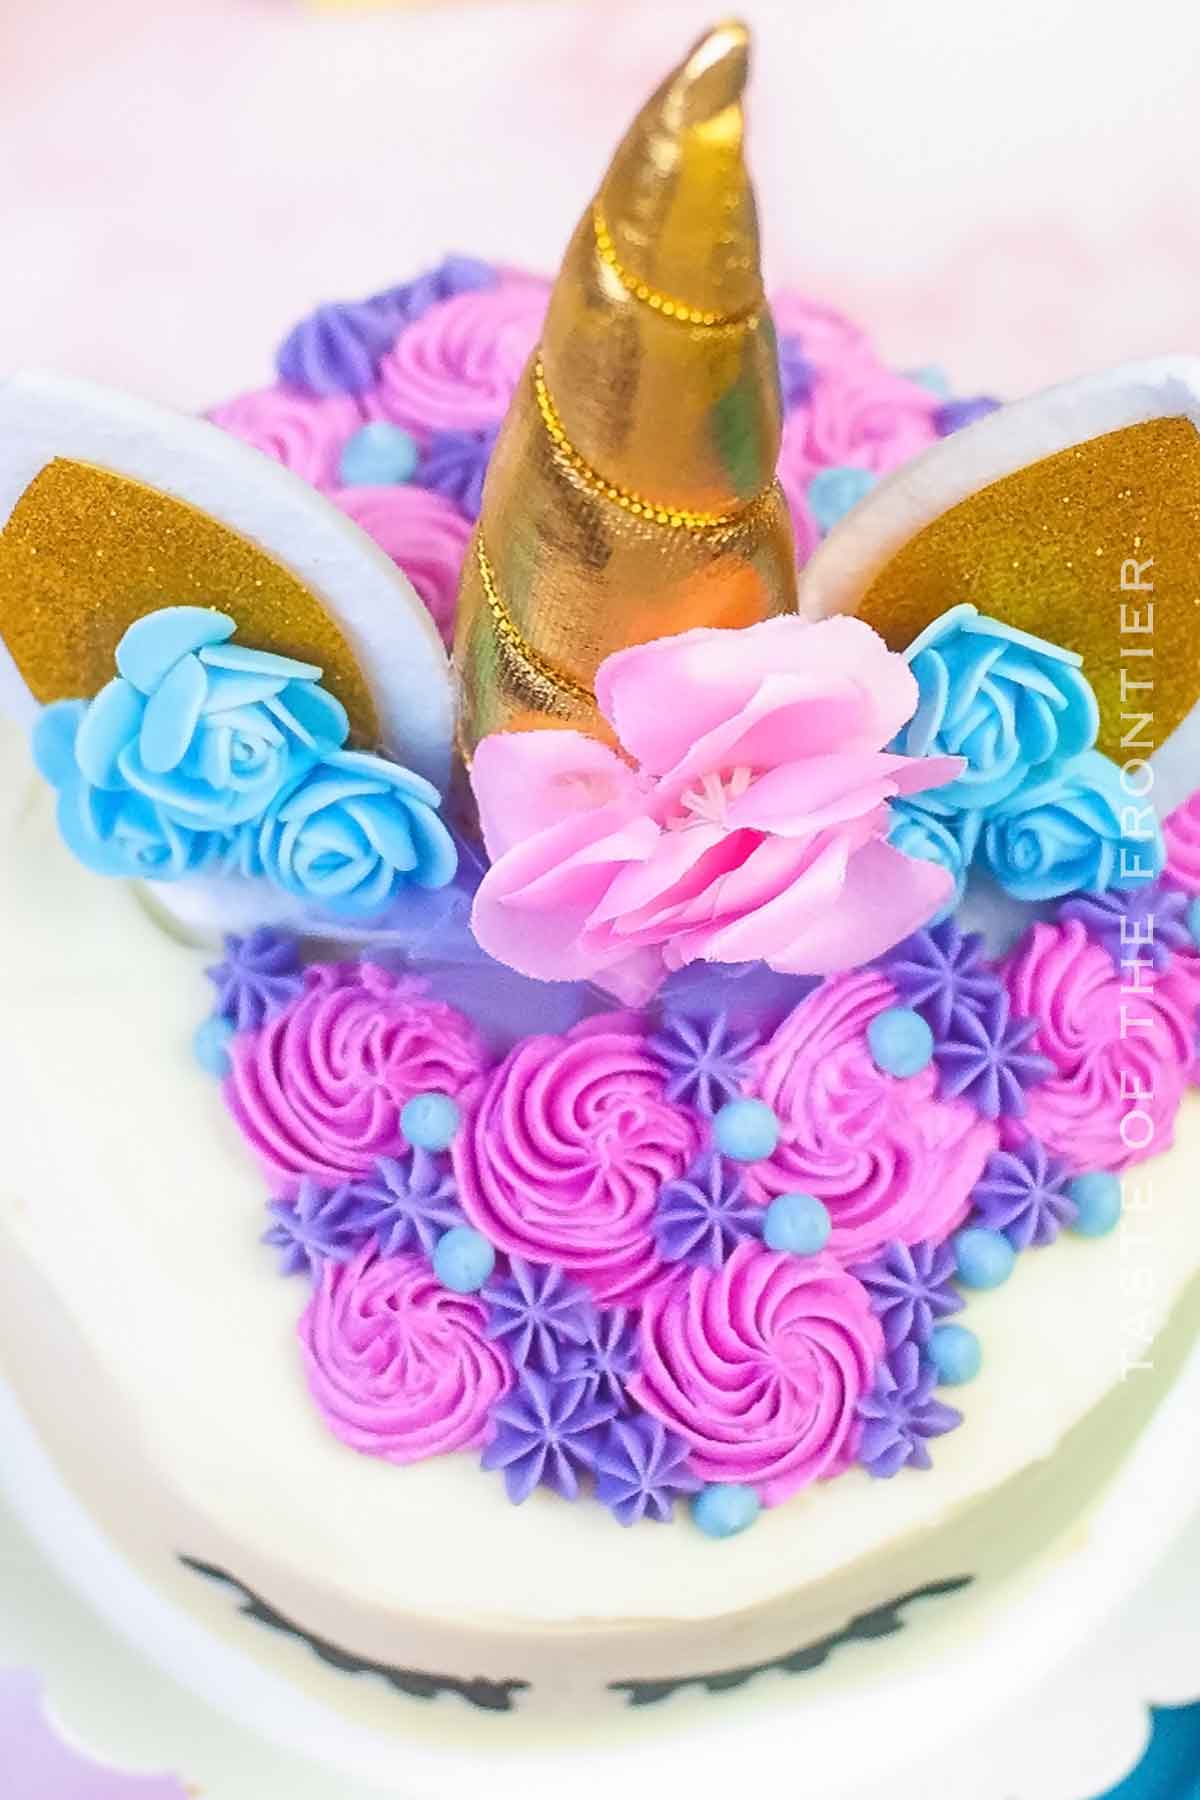
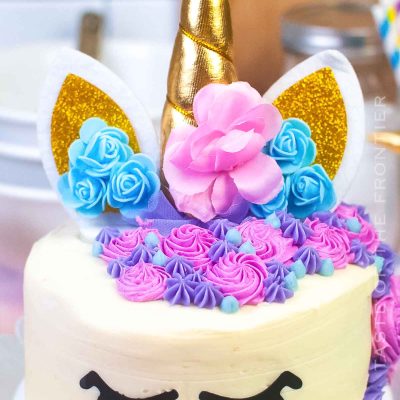
The best unicorn cakes are not just about the taste, but also about the design. Take your time to craft a gorgeous mane using different colors of frosting, and don’t forget the unicorn horn!
unicorn birthday cake
Can I make this cake in advance?
Yes, you can make the cake layers in advance and freeze them. You can also prepare the frosting a day in advance and refrigerate it. On the day of the event, all you need to do is assemble and decorate.
Storage
This recipe is perfect for the unicorn lover in your family.
Refrigerator: Keep the finished product in the refrigerator to ensure it stays fresh. The cake will keep for up to a week when properly stored.
Freezer: If you want to prepare the cake in advance, the cake layers can be baked, cooled, and then stored in the freezer for up to a month.
easy unicorn cake
Tips
This easy unicorn cake is a great way to impress the crowd as they realize you were the cake designer for this masterpiece.
- Coloring: Use natural food coloring to get vibrant hues for your frosting.
- Decorating: Be patient and take your time while decorating to get the perfect unicorn mane and facial features.
- Cake Topper: Add a touch of magic to your cake with a unicorn cake topper.
Ingredients
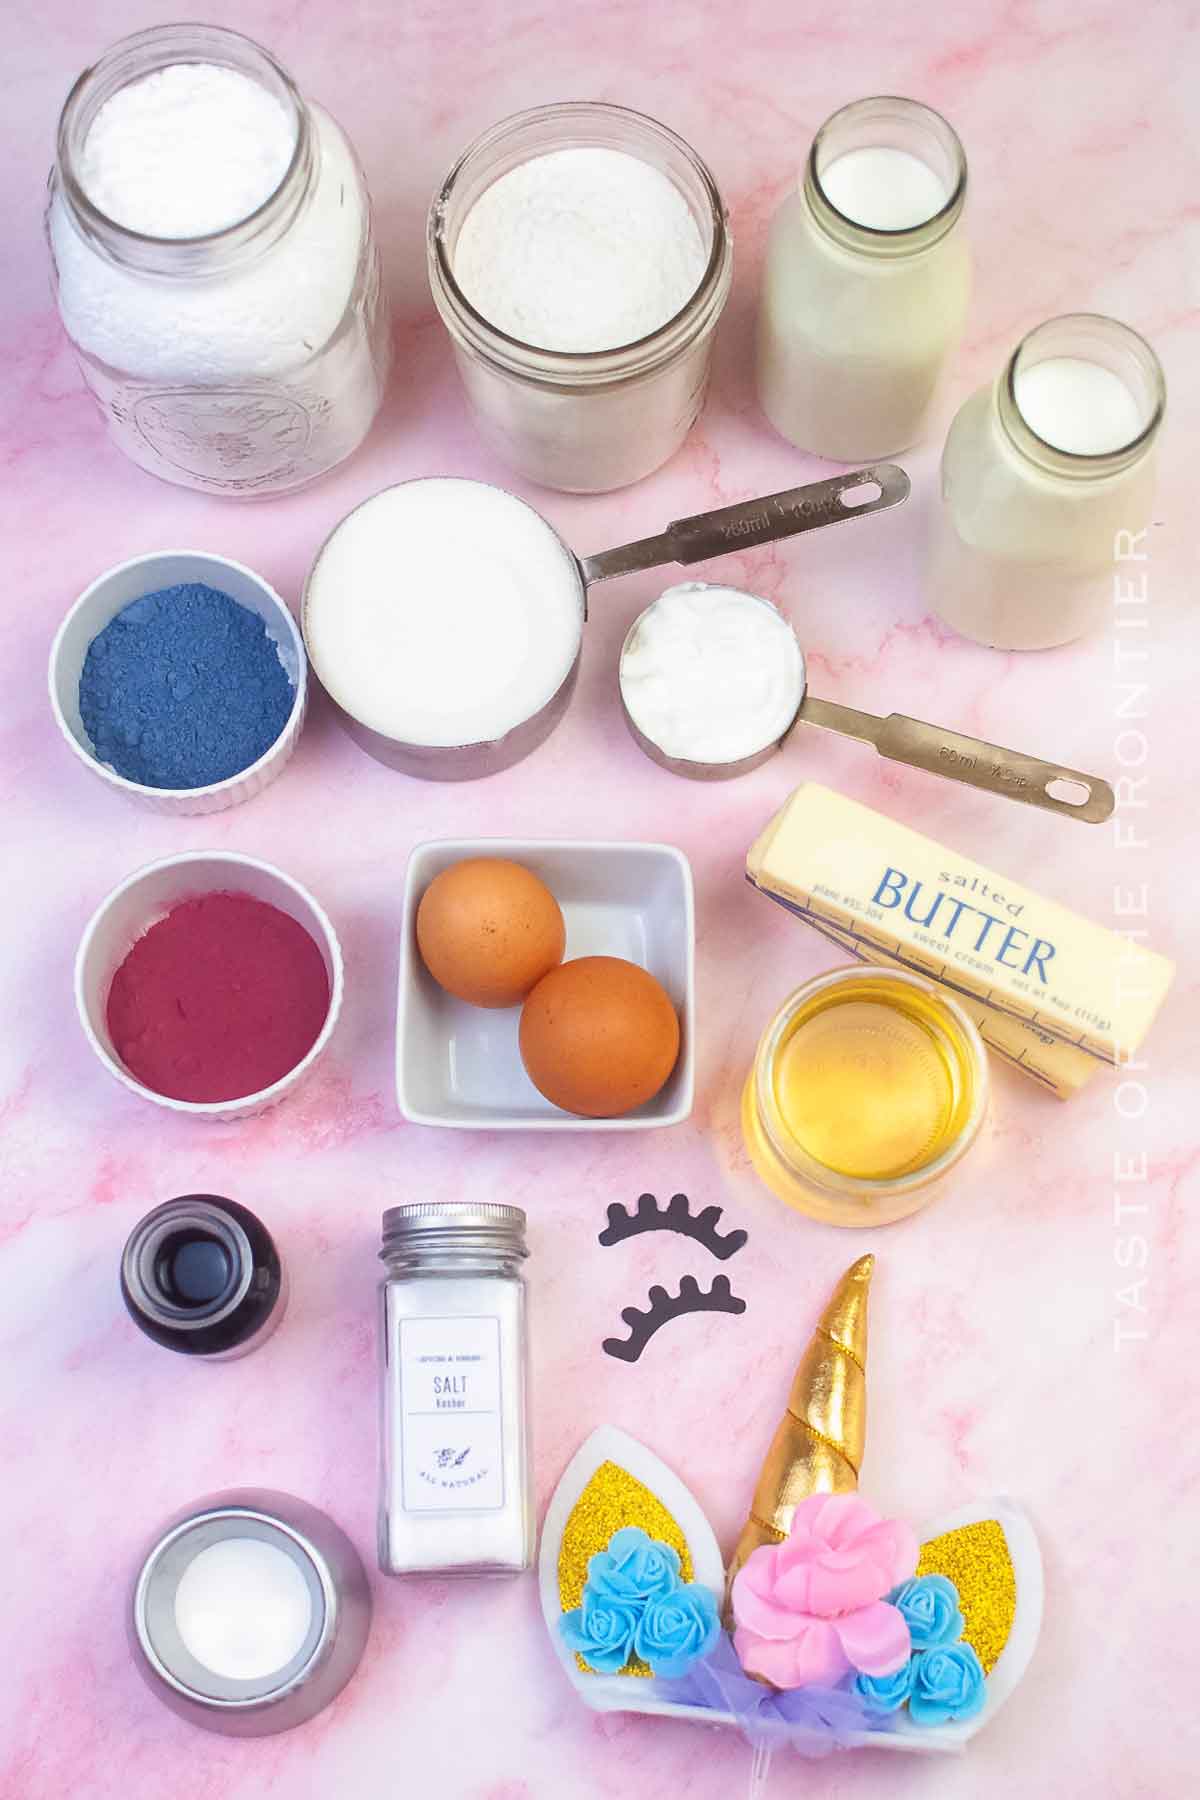
The ingredient list for this cake is simple yet delivers a delectable result:
Cake:
- Granulated sugar
- Large eggs
- Vegetable oil
- Vanilla extract
- Milk
- Sour cream
- All-purpose flour
- Baking powder
- Salt
Frosting:
- Salted butter
- Confectioner’s sugar
- Heavy whipping cream
- Vanilla extract
- Food coloring powders
Decoration:
- Unicorn horn cake topper and eyelashes
- Edible glitter for an extra magical touch
simple unicorn cake design
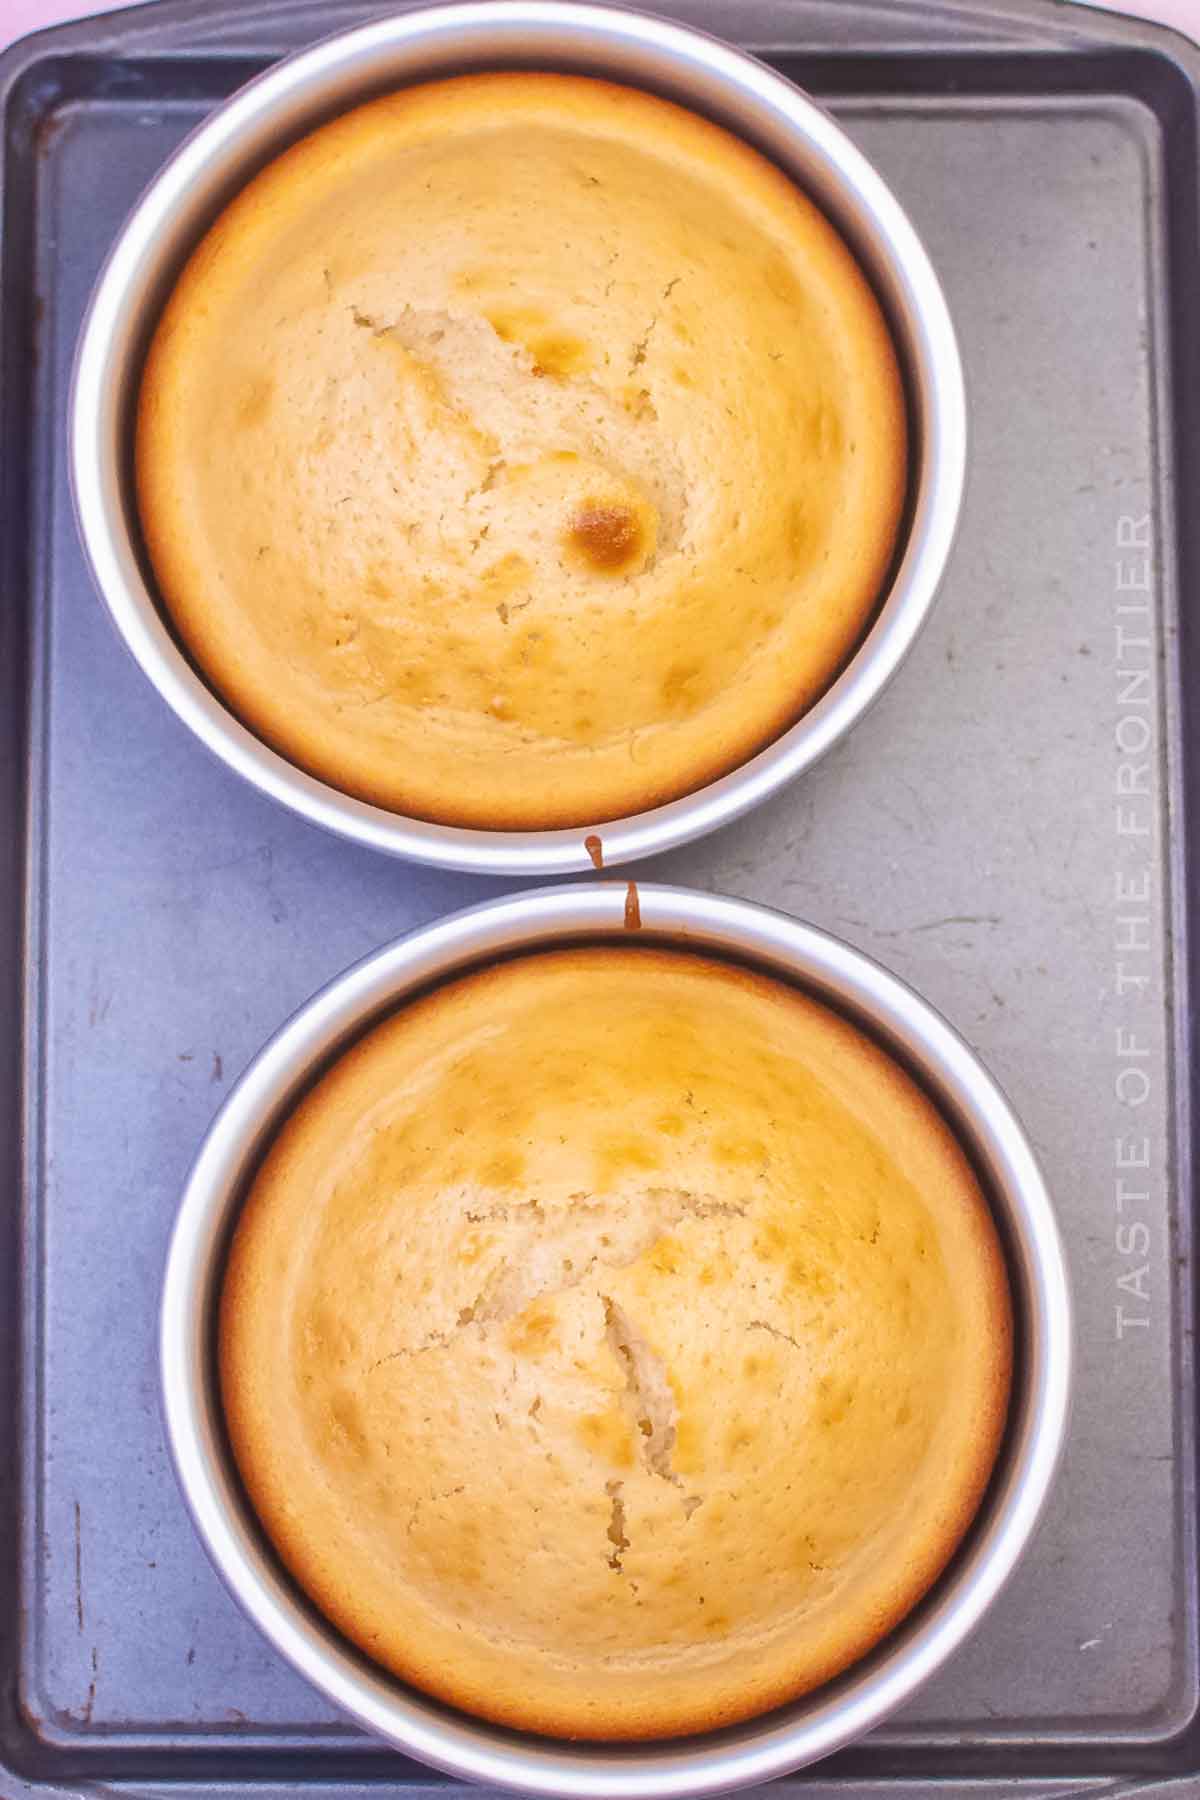
How to Make Unicorn Cake
The kids will have great fun helping or even just watching you make this one! It’s the perfect choice for birthday parties or any other special occasion.
Cake
- Preheat the oven to 350°f.
- In a mixing bowl, combine the sugar, eggs, oil, and vanilla. Whisk together until fully incorporated.
- Add the milk and sour cream and whisk to combine.
- In another mixing bowl, combine the flour, baking powder, and salt.
- Gradually mix the dry ingredients into the wet ingredients until it becomes smooth batter.
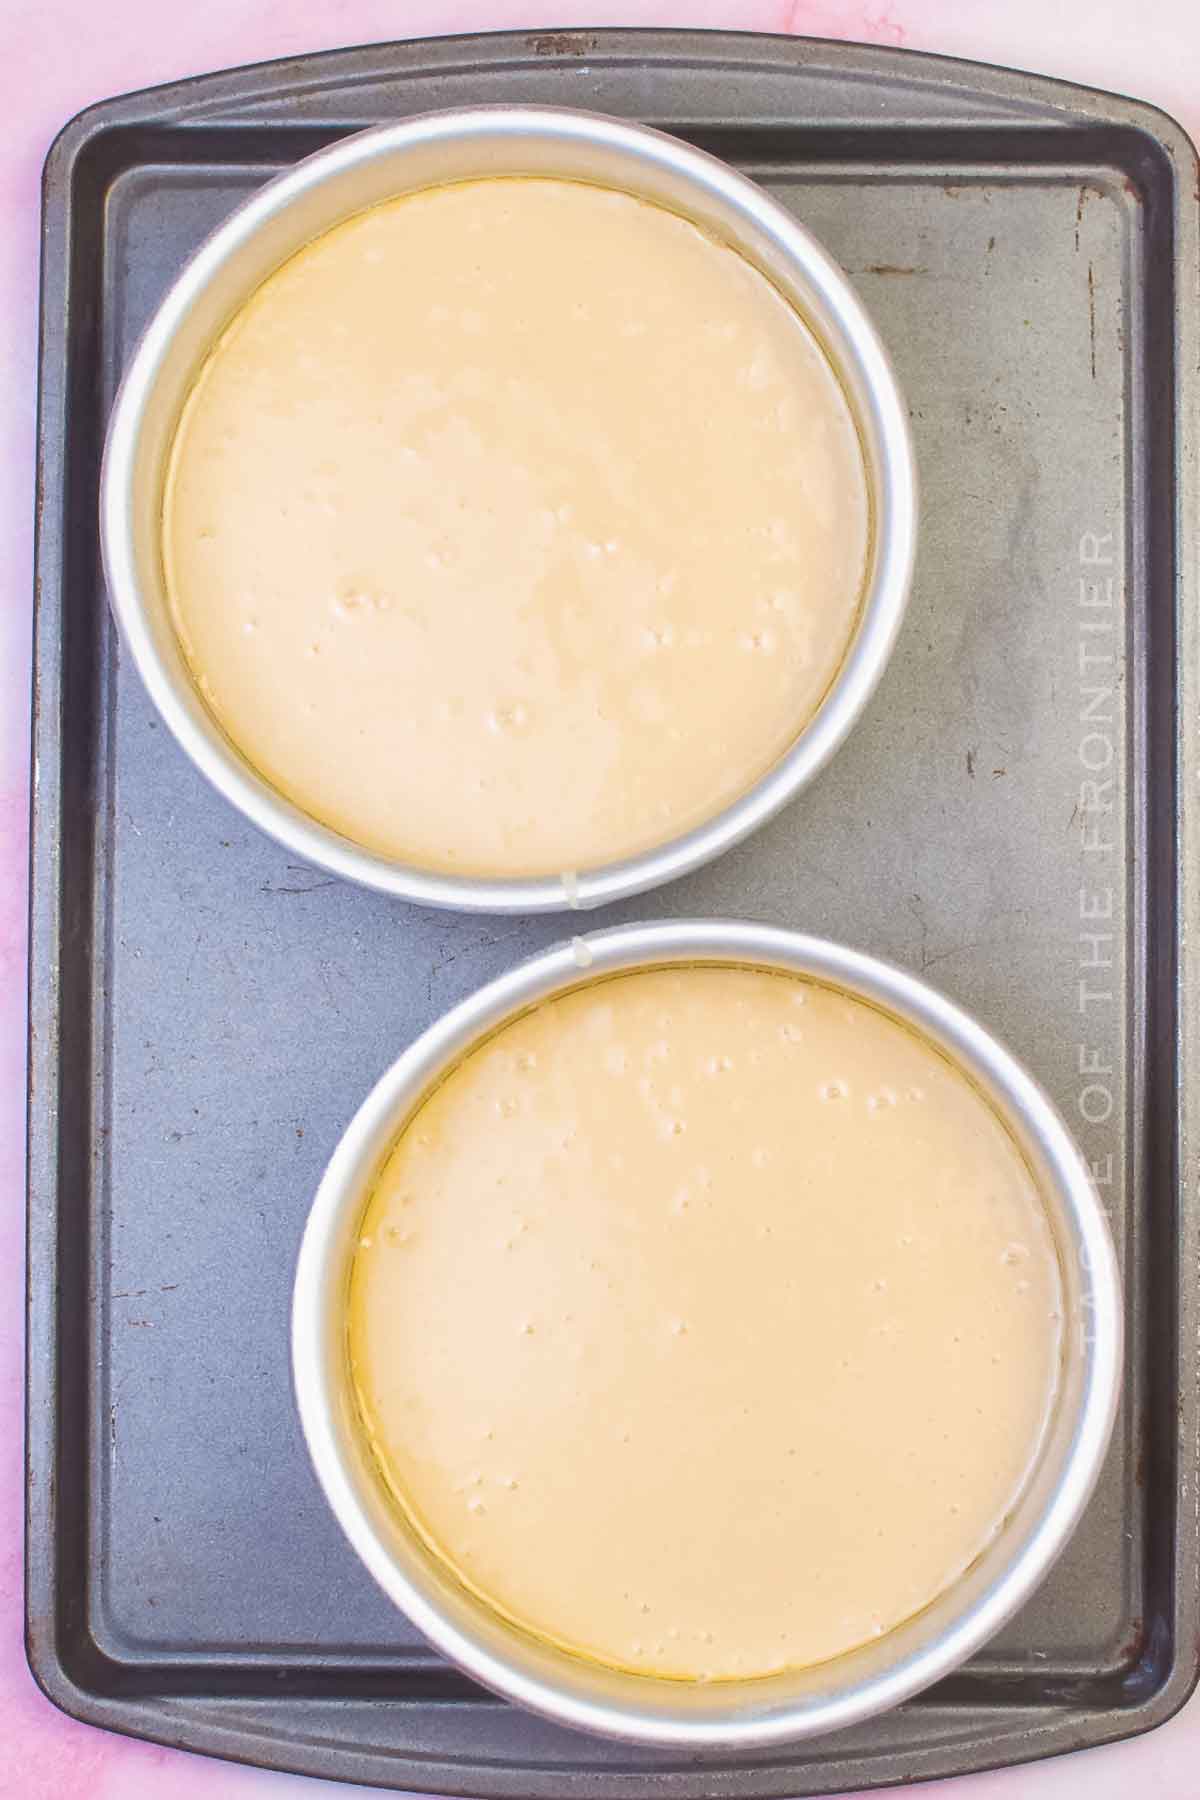
- Coat the two 6” cake pans with shortening or butter and then evenly divide the batter between the pans.
- Place the pans on a baking sheet for convenience and bake at 350°f for 20 minutes. Test the center of the cakes with a toothpick to be sure they’re fully cooked. Or they should spring back when gently pressed in the center with your finger.
- Once baked, remove and set aside to completely cool before removing the cakes from the pans.
Making the Frosting
- While the cakes are cooling, whip the butter in a mixing bowl until creamy.
- Gradually beat in 3 cups of the confectioner’s sugar, and half of the cream until whipped and creamy.
- Quickly beat in the vanilla and then increase the speed to high and whip the frosting for 5 minutes.
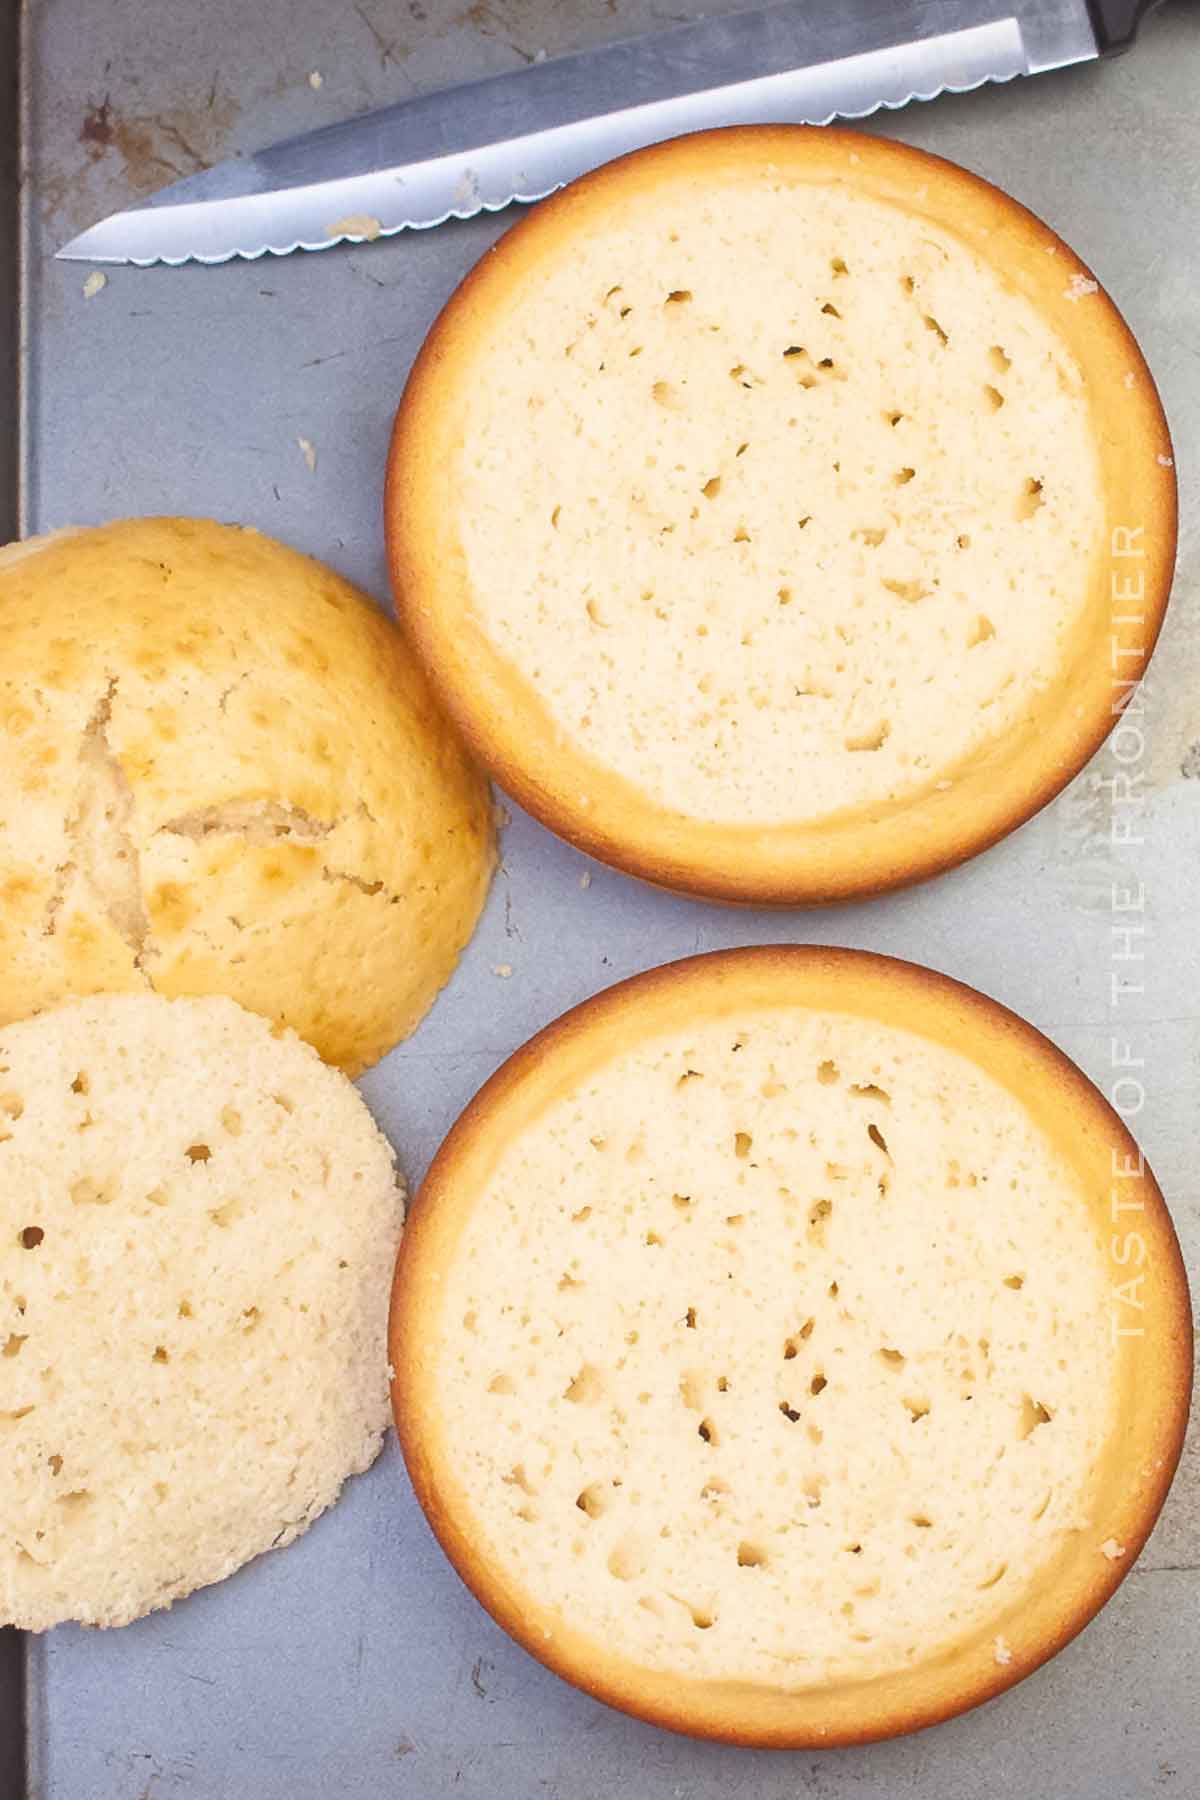
Adding the Frosting to the Cake
- Divide the frosting in half. Cover and set aside 1 half.
- Divide the other half into thirds. You will use each third to make the pink, blue, and purple frosting colors.
- To mix the pink color, add the beetroot powder 1 teaspoon at a time until the desired color has been reached.
- Blue color, add butterfly pea powder 1 teaspoon at a time until the desired color has been reached.
- Purple color, add 1 teaspoon beetroot and 1 teaspoon butterfly pea, and until the desired color has been reached.
- Divide the remaining white buttercream into thirds and set aside ⅓ of it for any touching up later on.
- Once the cakes are fully cooled, use a cake or bread knife and slice off the dome center of the cakes making them flat on top.
- Place the bottom layer on a flat surface such as a cake plate or cardboard round. Add a dollop of white frosting and evenly spread to a 1/2” thickness.
- Flip the other cake upside down and place it on top of the filling.
- Completely frost the two layers of cake with a thin layer of white buttercream frosting. You can freeze the cake for about 30 minutes at this stage. It will make the additional decorating a bit easier – but it isn’t necessary for the decorating process.
- Add more buttercream frosting to thicken the layer and form the base of your cake.
- Insert the cake topper in the center of the cake. Place the eyelashes on the front of the cake – center to the cake topper. I used tweezers for this.
Decorating
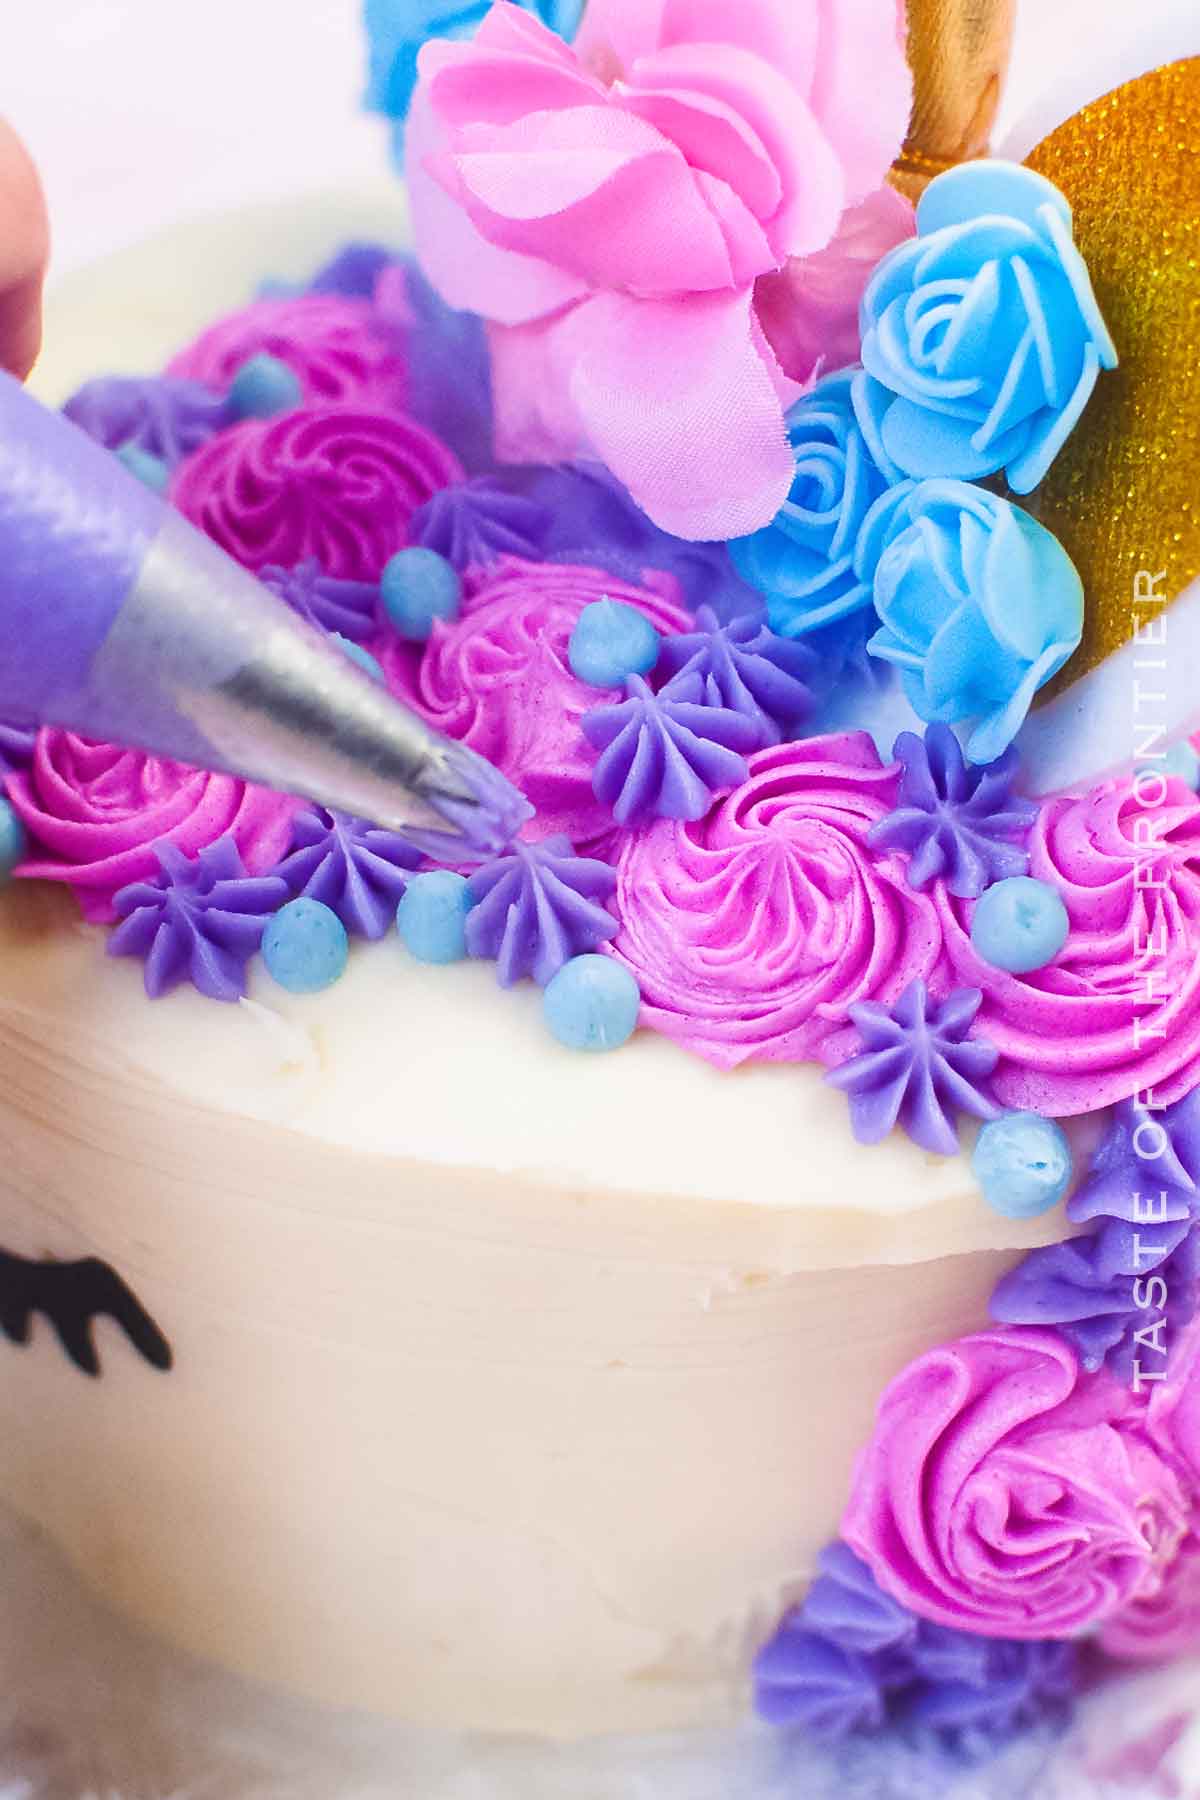
- To pipe the unicorn mane, add the three colored frostings to the piping bags and use decorative piping tips.
- For the pink, and purple, I used the drop flower piping tip. For the blue, I used the small round tip.
- Pipe in a large rounding motion, to create a large, round flower.
- Slowly continue to pipe the frosting colors in the open spaces until they have been filled to your liking.
- Continue to pipe floral dots flowing from the back of the topper down and swooping to one side as a mane would lay. Randomize the placement of the colors.
- Chill until ready to serve.
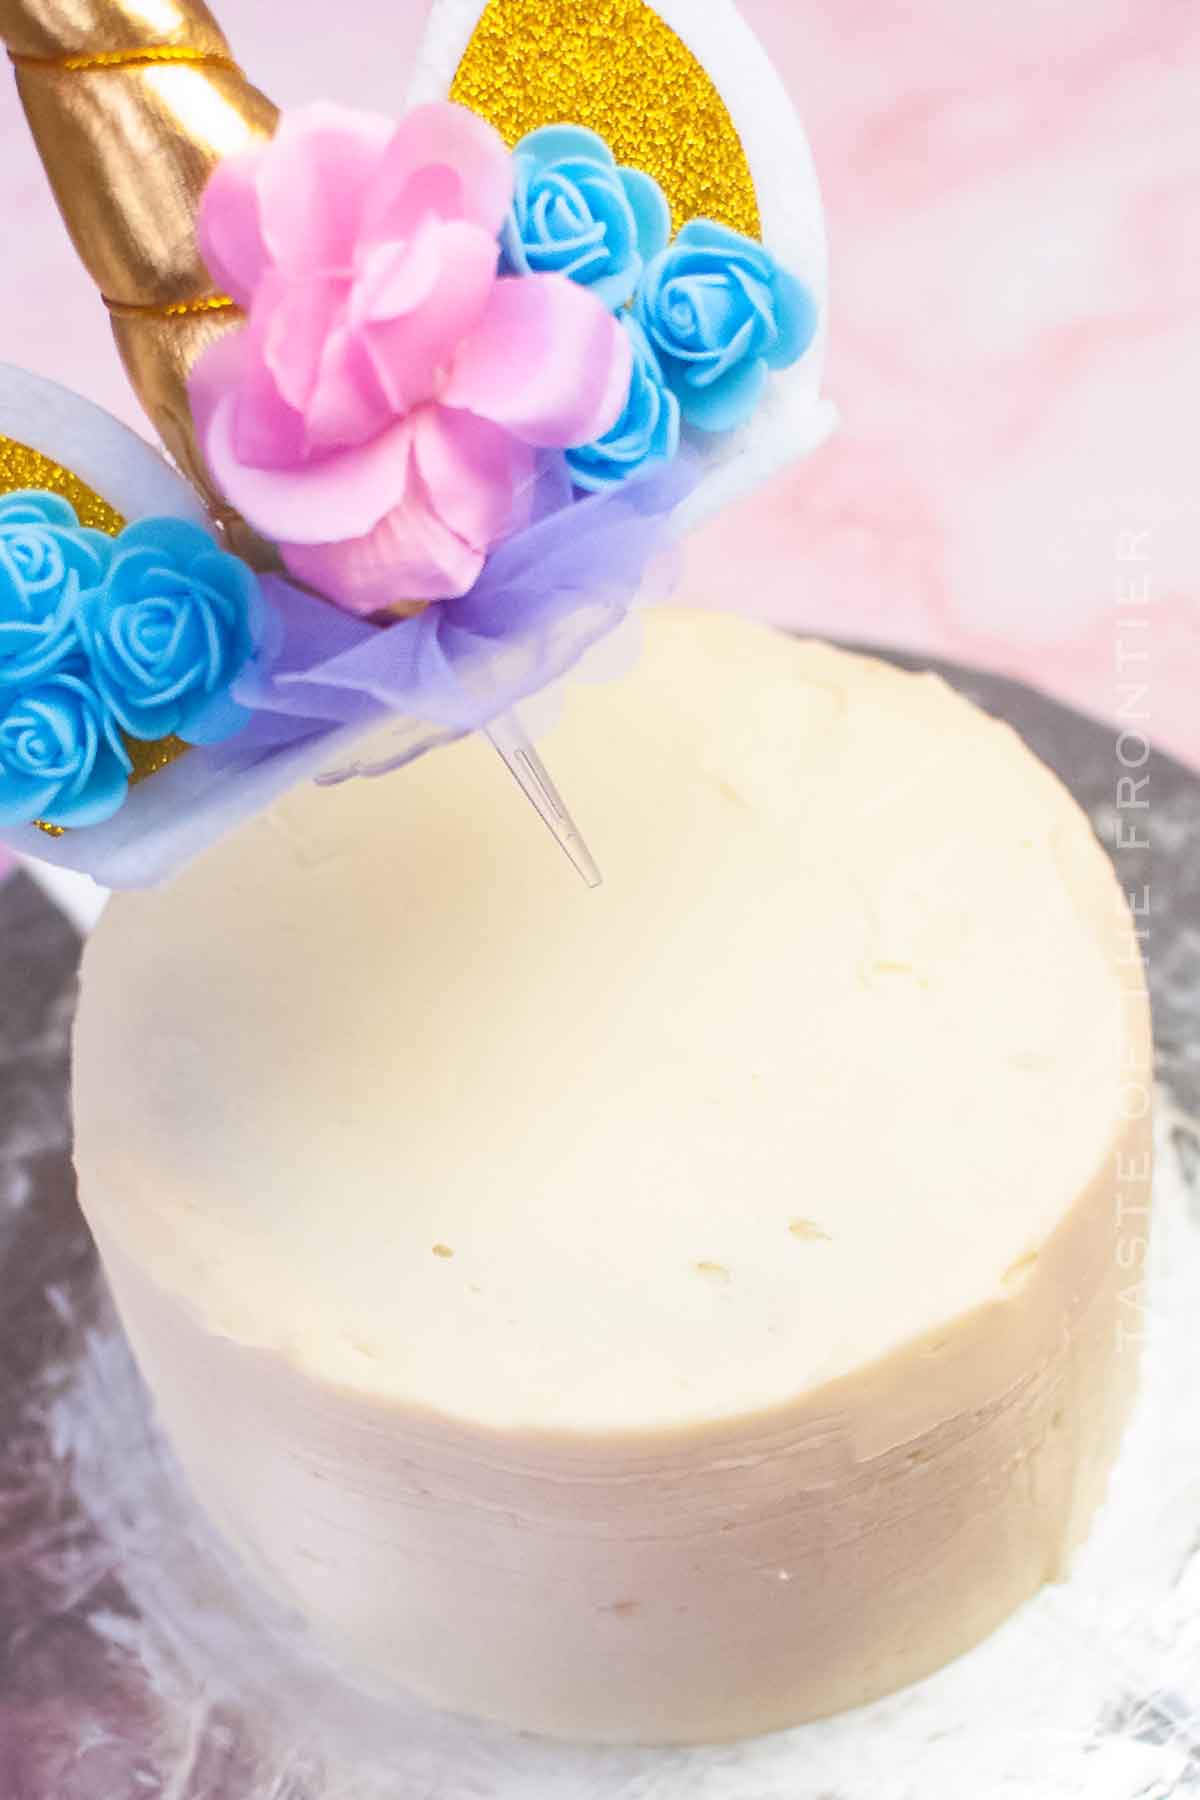
Kitchen Supplies You’ll Need for Unicorn Cake Design
Cake lovers and unicorn lovers alike will adore this cake. It’s delicious and magical!
- Mixing Bowls
- Whisk
- Cake Pans
- Offset Spatula
- Piping Bags and Tips
- Spatula
What to Serve With Unicorn Cake
Unicorn birthday cake is typically the star of any birthday party or special occasion. The best way to complement it is with light finger foods, rainbow fruit skewers, or a selection of sweet treats.
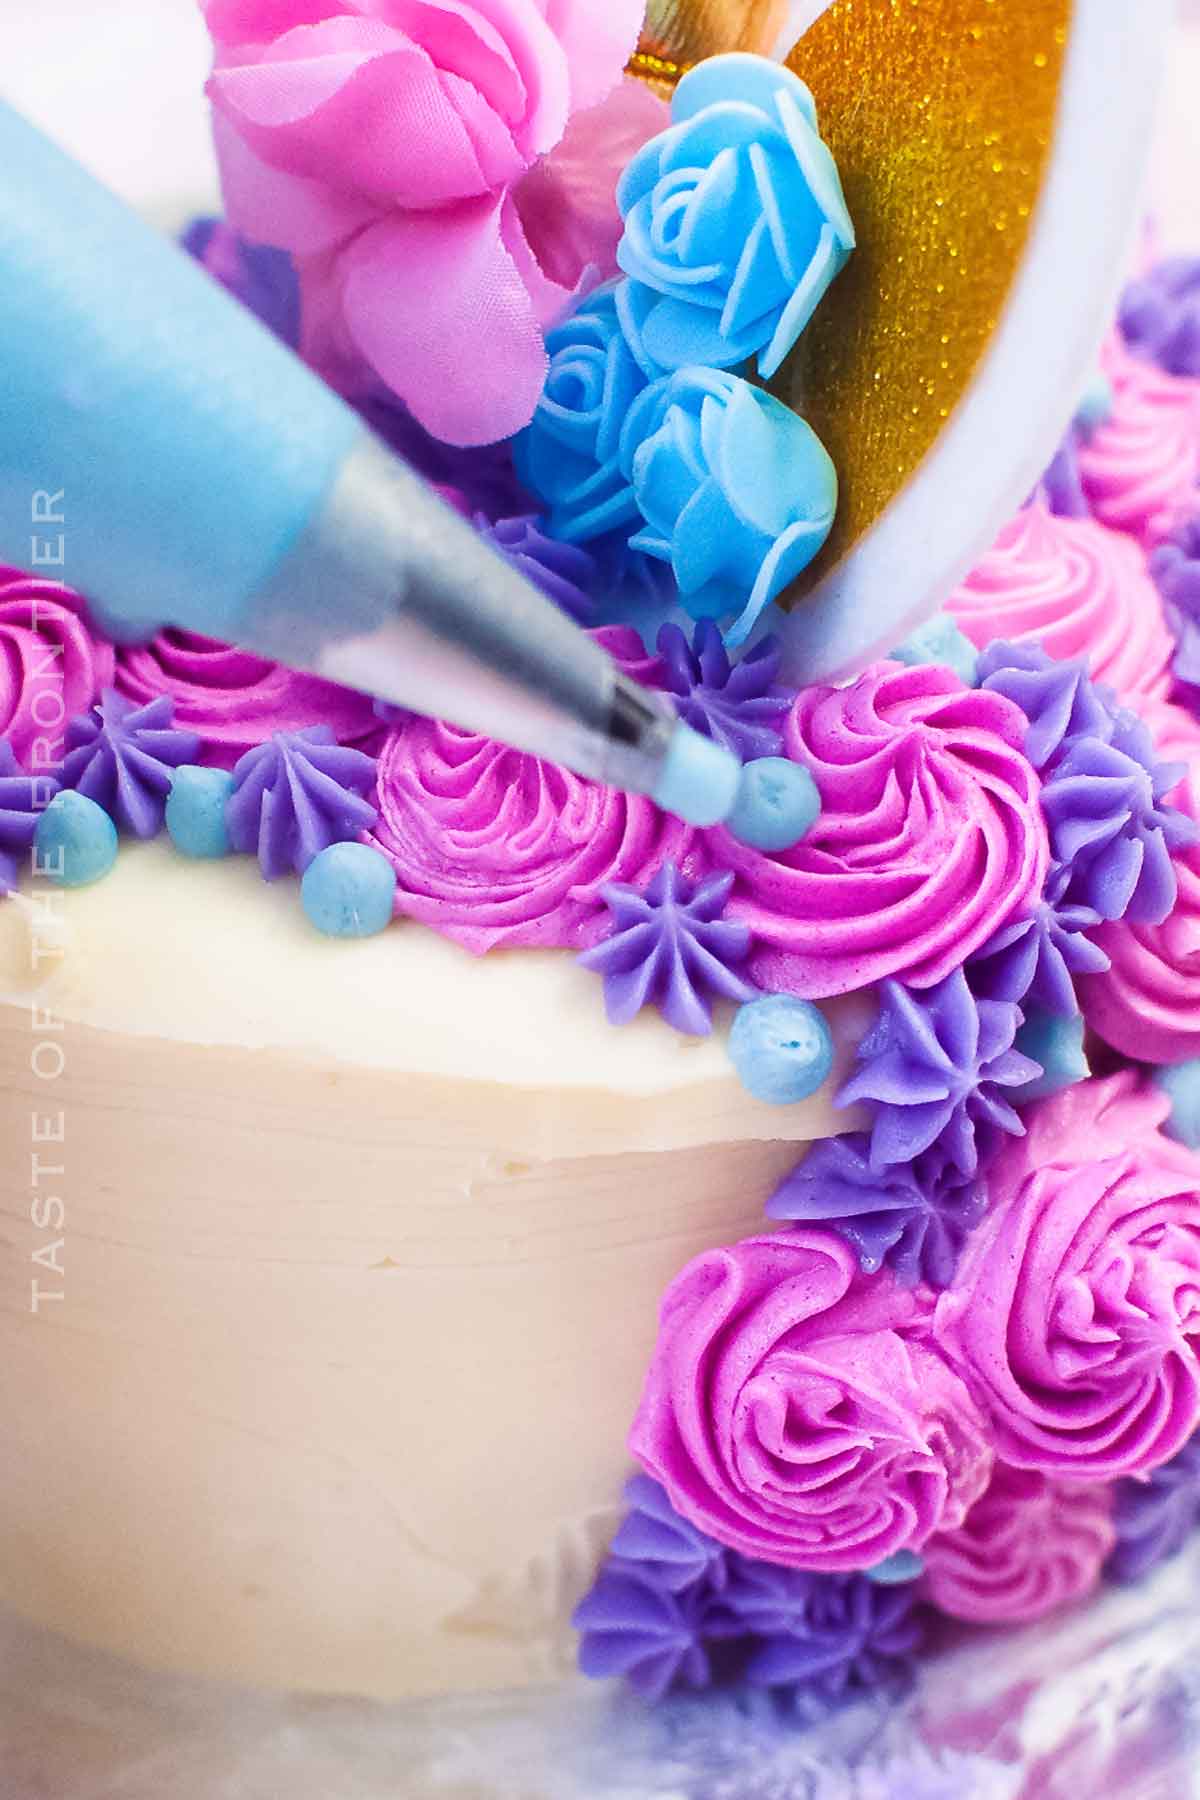
Why You Should Make Unicorn Cake
This design might just inspire you to try other mythical creatures in the cake!
- Perfect for Celebrations: This cake fits right in at any celebration, especially children’s birthdays and unicorn-themed parties.
- Delightful to Look At and Eat: With its colorful mane, fondant horn, and edible glitter, this cake is a visual feast. And its delicious vanilla cake base makes it a hit on the taste front too.
- Fun to Make: Creating this cake is a great experience, almost as much fun as eating it! It’s an opportunity to let your creativity shine.
Variations and Add-Ins for Unicorn Cake
This gorgeous unicorn cake is the best design to bring in some magic to your home or gathering.
- Rainbow Cake: For an extra touch of magic, make the inside of the cake as colorful as the outside by baking different colored layers of cake.
- Different Flavors: Change the flavor of the cake by substituting the vanilla extract with almond, lemon, or your choice of extract.
- Cupcakes: Turn this design into adorable unicorn cupcakes for individual treats.
- Edible Glitter: Sprinkle some edible glitter on the cake for an extra magical touch.
- Additional Decorations: Consider adding fondant flowers or stars around the base of the cake for extra decoration.
If you love this unicorn cake design, you’re going to love these other cake ideas too. Please click each link below to find the easy, printable recipe!
Try it with these great frosting recipes
Chocolate Buttercream Frosting
Best Bakery Buttercream Frosting
Fresh Strawberry Buttercream Frosting
If you love this recipe for unicorn cake as much as I do, please write a five-star review, and be sure to help me share on Facebook and Pinterest!
CONNECT WITH YUMMI HAUS!
Be sure to follow me on my social media, so you never miss a post!
Unicorn Cake Design
Ingredients
Cake:
- 1 cup granulated sugar
- 2 large eggs
- ¼ cup vegetable oil
- 2 teaspoons vanilla extract
- ⅔ cup milk
- ¼ cup sour cream
- 1¼ cups all-purpose flour
- 1½ teaspoon baking powder
- ½ teaspoon salt
Frosting:
- 1 cup salted butter softened to room temperature
- 4 cups confectioner’s sugar
- 2 tablespoons heavy whipping cream
- 2 teaspoons vanilla extract
Pink frosting color: 2 teaspoons beetroot powder or more if desired
Blue frosting color: 2 teaspoons butterfly pea powder or more if desired
Purple frosting color: 1 teaspoon each butterfly pea powder and beetroot powder or more if desired
Instructions
- Preheat the oven to 350°f.
- In a mixing bowl, combine the sugar, eggs, oil, and vanilla. Whisk together until fully incorporated.
- Add the milk and sour cream and whisk to combine.
- In another mixing bowl, combine the flour, baking powder, and salt.
- Gradually mix the dry ingredients into the wet ingredients until it becomes smooth batter.
- Coat the two 6” cake pans with shortening or butter and then evenly divide the batter between the pans.
- Place the pans on a baking sheet for convenience and bake at 350°f for 20 minutes. Test the center of the cakes with a toothpick to be sure they’re fully cooked. Or they should spring back when gently pressed in the center with your finger.
- Once baked, remove and set aside to completely cool before removing the cakes from the pans.
Frosting
- While the cakes are cooling, whip the butter in a mixing bowl until creamy.
- Gradually beat in 3 cups of the confectioner’s sugar, and half of the cream until whipped and creamy.
- Quickly beat in the vanilla and then increase the speed to high and whip the frosting for 5 minutes.
Decorate
- Divide the frosting in half. Cover and set aside 1 half.
- Divide the other half into thirds. You will use each third to make the pink, blue, and purple frosting colors.
- To mix the pink color, add the beetroot powder 1 teaspoon at a time until the desired color has been reached.
- Blue color, add butterfly pea powder 1 teaspoon at a time until the desired color has been reached.
- Purple color, add 1 teaspoon beetroot and 1 teaspoon butterfly pea, and until the desired color has been reached.
- Divide the remaining white buttercream into thirds and set aside ⅓ of it for any touching up later on.
- Once the cakes are fully cooled, use a cake or bread knife and slice off the dome center of the cakes making them flat on top.
- Place the bottom layer on a flat surface such as a cake plate or cardboard round. Add a dollop of white frosting and evenly spread to a 1/2” thickness.
- Flip the other cake upside down and place it on top of the filling.
- Completely frost the two layers of cake with a thin layer of white buttercream frosting. You can freeze the cake for about 30 minutes at this stage. It will make the additional decorating a bit easier – but it isn’t necessary for the decorating process.
- Add more buttercream frosting to thicken the layer and form the base of your cake.
- Insert the cake topper in the center of the cake. Place the eyelashes on the front of the cake – center to the cake topper. I used tweezers for this.
- To pipe the unicorn mane, add the three colored frostings to the piping bags and use decorative piping tips.
- For the pink, and purple, I used the drop flower piping tip. For the blue, I used the small round tip.
- Pipe in a large rounding motion, to create a large, round flower.
- Slowly continue to pipe the frosting colors in the open spaces until they have been filled to your liking.
- Continue to pipe floral dots flowing from the back of the topper down and swooping to one side as a mane would lay. Randomize the placement of the colors.
- Chill until ready to serve.
Equipment
- Offset spatula
- Piping bags and tips
- Cake pan set
- Blue powder
- Red powder
- Unicorn horn cake topper and eyelashes
Nutrition
Nutritional information for the recipe is provided as a courtesy and is approximate. Please double-check with your own dietary calculator for the best accuracy. We at Yummi Haus cannot guarantee the accuracy of the nutritional information given for any recipe on this site.



Share Your Thoughts