Thumbprint Cookies (Thumbprint Jam Cookies) are a classic holiday treat that everyone loves! They are simple to make and easily customizable too!
Thumbprint cookies make wonderful Christmas or holiday gifts. We love these cookies because they are also very easy to decorate for any holiday or occasion, making them suitable even for children to help with.
These cookies can be decorated with icing and sprinkles, candies, nuts, or almost anything that will fit inside the thumbprint indentation! We loved making them for neighbors in the past and love that they can even be made in many different flavors.

I can’t remember a time growing up when these cookies didn’t make an appearance during the holiday season. This is why they continue to be a holiday staple around our house each and every year!
Thumbprints come together quickly and will keep for up to a week if kept airtight. They really are the perfect edible gift and definitely a delicious treat for any holiday party.
raspberry thumbprint cookies

Here are some commonly asked questions
What are thumbprint cookies?
Thumbprint cookies are the classic holiday cookie. They are also known as Thumbprint Jam Cookies or Thimble Cookies for the manner in which they were prepared when they were first created.
These cookies are very simple to make and require minimal prep time. Thumbprint cookies are basically a simple shortbread cookie dough with added jam. They can be made in many flavors and can even be found filled with jelly or chocolate!
Thumbprint cookies were traditionally decorated with the thumb of the person who baked them (giving them their name), but today these classic cookies can be wonderfully decorated for any holiday or occasion.
Can these cookies be made ahead of time?
You bet. This cookie dough can be made ahead of time and kept in the refrigerator for up to 4 days prior to baking. Make sure to cover tightly with plastic wrap so it doesn’t dry out. Let it sit out at room temperature for about 20-30 minutes before rolling and baking.
thumbprint cookies recipe

How to store thumbprint cookies
These cookies are very easy to store. They will last about a week if stored in an airtight container at room temperature.
Can these cookies be frozen?
Yes, these cookies can be frozen for up to three months. They are also very good when made ahead of time and enjoyed later!
jam thumbprint cookies
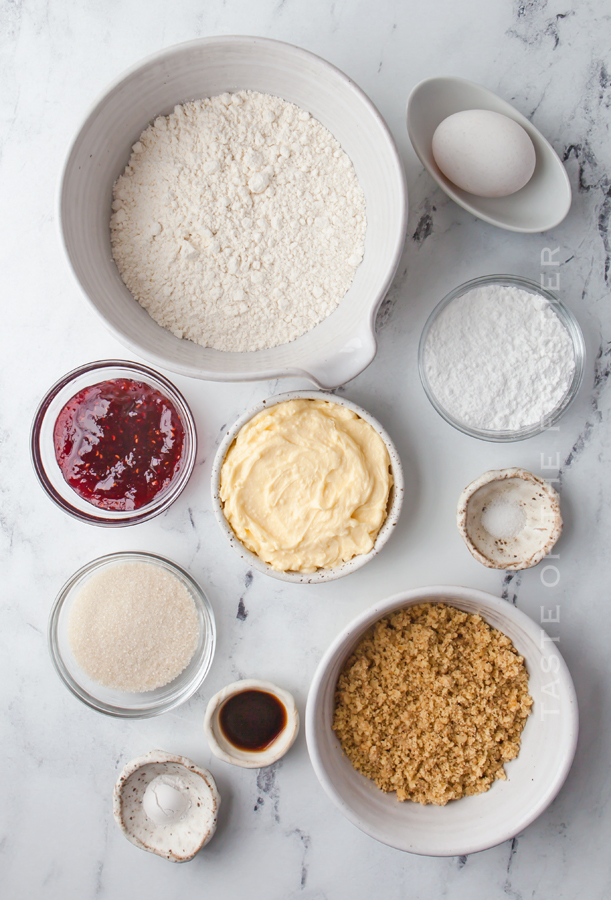
Ingredients for Thumbprint Cookies
- all-purpose flour
- confectioner’s sugar
- granulated sugar
- butter – softened
- egg
- ground walnut
- vanilla extract
- baking powder
- table salt
- jam
Can these be made without the ground walnuts?
I’m sure you can find a recipe out there that doesn’t call for finely chopped nuts – but in my experience, they are essential to making this classic cookie.
Not only does it work as a replacement for additional flour, which helps hold the dough together – but it also gives a wonderfully nutty flavor and texture to the cookies once they are baked.
jelly cookies
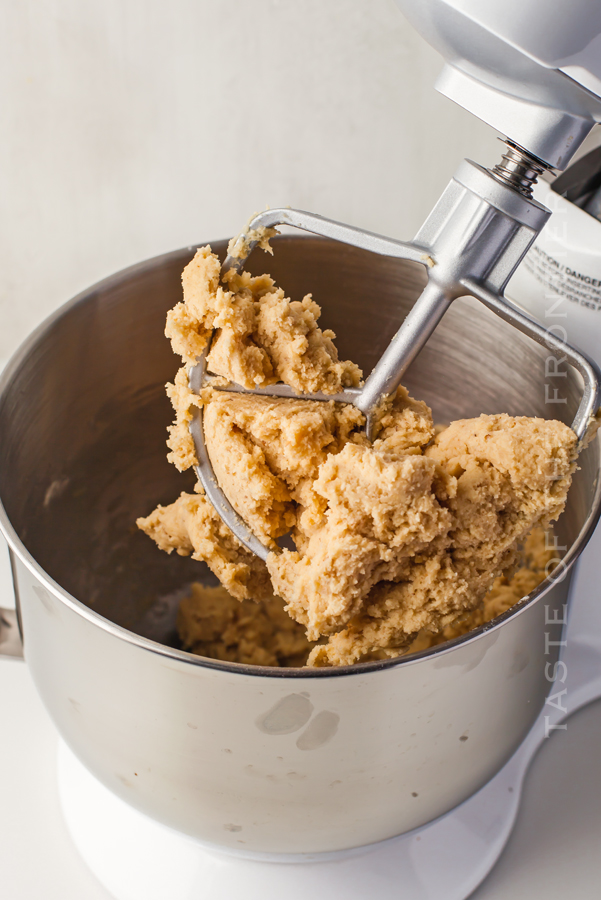
How to Make Thumbprint Cookies
- Preheat the oven to 350 degrees and line two baking trays with parchment paper. Set aside.
- In a stand mixer, using a paddle, mix the flour, confectioner’s sugar, granulated sugar, butter, egg, ground walnuts, vanilla extract, baking powder and salt together. Make sure you scrape down the sides periodically as it mixes. Pause to make sure you get all of the ingredients. Once the paddle has pulled in all of the dough, its ready.
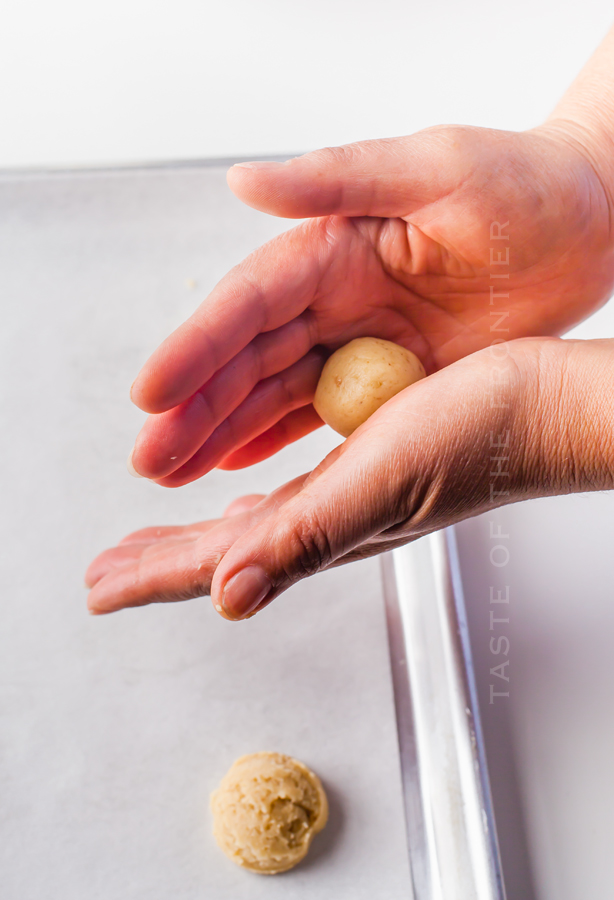
- With a cookie scooper, scoop one cookie at a time. With your hands, take the dough and roll that amount of dough into a ball.
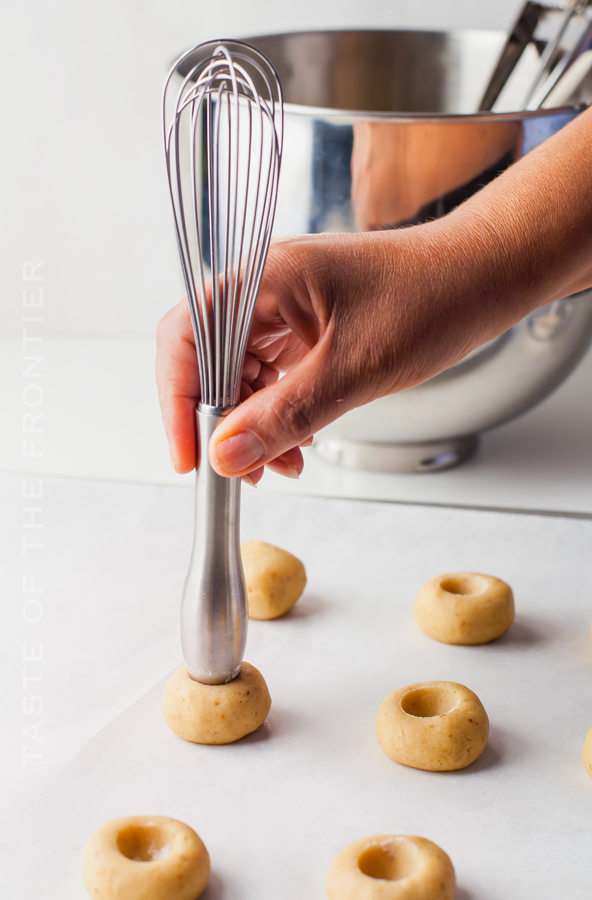
- Place the cookie on the baking sheet, and using the bottom of a balloon whisk, or something round like the back of a measuring spoon, press into the cookie to make an indentation. I don’t actually recommend using your thumb – despite these being called thumbprint cookies.
- Bake for 15 to 18 minutes, or until the bottom start to turn golden.
- Remove from the oven and let them cool.
- Spoon the jam into the indentations you created before baking.
- Serve and enjoy!
- Optional: If you would like more of a holiday look to your cookies, once you remove them from the oven, you can roll them in additional confectioner’s sugar before you add the jam to them.
How do I properly measure the flour?
The official way is to spoon the flour into the measuring cup & level off. This makes sure the flour isn’t packed tightly into your measuring cup, adding more than you need, as that will make your recipe too dry.
However – if you fluff your flour with a spoon, then gently scoop the flour into the measuring cup, taking care to not pack the flour – that should work for this recipe.
jam cookies

Why do the ingredients need to be at room temperature?
Room temperature ingredients help to ensure that everything blends together perfectly. You don’t want any pockets of unblended butter. You want everything evenly disbursed for the perfect texture.
When your dairy products are at room temperature, they can create an emulsion. It’s essential to have an emulsion because air gets trapped, so the baked goods expand and get fluffy as it bakes.
Isn’t the jam baked into the cookies?
For this recipe – no, we aren’t baking the jam into the cookies. However – there are recipes out there that do call for that. If you want to do that, make use to use a small amount of jam so that it doesn’t drip out of the indentation once it becomes liquified when it gets hot.
It will eventually solidify and become stickier once the cookies cool down again – but you want to make sure to keep it intact while they are baking. For this reason, we choose to add the jam after they are baked.
jam filled cookies
What jam do you recommend for these cookies?
This is the best part about these cookies – you can add just about any jam, jelly, or preserves to the center. You can even add melted chocolate or caramel to the center if you like. My favorite version is with our homemade mixed berry jam or with our 3-ingredient blackberry jam. However- the most popular version this time of year for most people uses raspberry jam.
Why do my cookies go flat?
Cookies typically go flat when the dough isn’t the right temperature at the time of baking OR when they are missing the right ingredients that help them to rise- such as eggs, baking soda, and baking powder. Please make sure you are measuring those ingredients correctly and that they are at room temperature when you start the mixing.
Also – something to keep in mind- make sure you are placing the dough on a cool baking sheet. The cookies will bake differently if you are placing the dough on the hot baking sheet you just removed from the oven. Make sure you have a rotation of baking sheets so you can always place the unbaked dough on a cool tray.
classic thumbprint cookies
How to soften the butter to room temperature?
First
There are a couple of ways to do this. The first being that you can take the butter (& any other ingredients that need to be at room temperature) out, leave it on the counter for about 30 minutes while you prep for baking.
I usually start with all my chilled ingredients and pull everything I need out onto the counter before getting started – so I know for sure I have everything before I’m mid-way through I realize I’m out of something.
But sometimes it’s winter and that isn’t enough time to get the ingredients warmed up – OR – I’m just not that organized to plan ahead. It happens. So I have another couple of tricks.
Second
I place the butter in the microwave – wrapped in the paper. (don’t do this if it is wrapped in foil) Then I microwave for 2 seconds – flip – go another 2 seconds – flip again – and continue for 2 seconds on each side.
This is usually enough to get it perfect – sometimes stopping before if it feels soft enough. Take care when doing this method – overly softened butter from the microwave WILL ALTER the end result of the recipe. Don’t over-do it.
Third
My third method is to place the wrapped butter sticks in a zip-top bag and place it in a bowl of warm water. I do this with the eggs too. If the water isn’t too hot it can be THE PERFECT way to get “room-temperature” ingredients.
Baking Tips
- Don’t overbake the cookies- bake them until they just start to turn golden on the bottom. You don’t want a dry, crumbly cookie.
- Don’t chill the dough – you want the dough pliable so you can roll it and create the indentation. If you need to chill it to make them later – be sure to bring it to room temperature before starting the rolling and baking process.
- I highly recommend adding the coating of confectioner’s sugar after baking. I think it just adds that extra something special to the cookies. You can also roll them in granulated sugar or sprinkles prior to baking if you like.
thumbprint jam cookies

Products I love when making thumbprint cookies…
This cookies recipe is SUPER EASY and delicious – and if you’re like me this time of year, then you maybe already have some of these items on hand OR maybe you have never made cookies with jam before, & you might be a bit nervous – but you’re going to love them. I have made a list below of the things I absolutely can’t live without when it comes to making this classic cookie recipe.
- all-purpose flour
- confectioner’s sugar
- granulated sugar
- ground walnut
- vanilla extract
- baking powder
- table salt
- jam
- 3/4 sheet pans
- measuring cups
- measuring spoons
- parchment paper
- mixer
- cookie scoop
cookies with jam in the middle

If you love this EasyThumbprint Cookies recipe, you’re going to love these other cookies too. Please click each link below to find the easy, printable recipe!










If you love this recipe for Thumbprint Cookies as much as I do, please write a five-star review, and be sure to help me share on Facebook and Pinterest!

CONNECT WITH YUMMI HAUS!
Be sure to follow me on my social media, so you never miss a post!

Thumbprint Cookies
Ingredients
- 2 ½ cups all-purpose flour
- ½ cup confectioner's sugar
- ¼ cup granulated sugar
- ¾ cup + 1 tbsp butter – softened
- 1 egg
- ¾ cup ground walnut
- 1 teaspoon vanilla extact
- ½ teaspoon baking powder
- ¼ teaspoon salt
- 2 ½ – 3 tablespoons jam – flavor of your choice- I used blackberry with raspberry jam
Instructions
- Preheat the oven to 350 degrees and line two baking trays with parchment paper. Set aside.
- In a stand mixer, using a paddle, mix the flour, confectioner’s sugar, granulated sugar, butter, egg, ground walnuts, vanilla extract, baking powder and salt together. Make sure you scrape down the sides periodically as it mixes. Pause to make sure you get all of the ingredients. Once the paddle has pulled in all of the dough, its ready.
- With a cookie scooper, scoop one cookie at a time. With your hands, take the dough and roll that amount of dough into a ball.
- Place the cookie on the baking sheet, and using the bottom of a balloon whisk, or something round like the back of a measuring spoon, press into the cookie to make an indentation. I don’t actually recommend using your thumb – despite these being called thumbprint cookies.
- Bake for 15 to 18 minutes, or until the bottom start to turn golden.
- Remove from the oven and let them cool.
- Spoon the jam into the indentations you created before baking.
- Serve and enjoy!
- Optional: If you would like more of a holiday look to your cookies, once you remove them from the oven, you can roll them in additional confectioner’s sugar before you add the jam to them.
Nutritional information for the recipe is provided as a courtesy and is approximate. Please double-check with your own dietary calculator for the best accuracy. We at Yummi Haus cannot guarantee the accuracy of the nutritional information given for any recipe on this site.





Share Your Thoughts