Posts
White Cornmeal Shortbread Bars
White Cornmeal Shortbread Bars are another yummy bar recipe that you are sure to love. Buttery shortbread topped with sparkling sugar is absolutely scrumptious.
White Cornmeal Recipes
I love making shortbread. All that rich butter flavor in a bar or cookie just makes my day. It’s a favorite of the family too. Which is why it’s a “go-to” recipe when I am preparing things like a nice brunch for us all. I like to make a wide variety of yummy bar recipes & create a nice spread for everyone to pick & choose their desserts along with maybe some tea sandwiches & a few beverage options. One thing about my shortbread recipe that you don’t often see – cornmeal. You won’t believe how wonderful the flavor is with that simple ingredient.
White Cornmeal Shortbread Bars
We like to have our brunch on a Saturday typically so that we can have the rest of the weekend to enjoy the leftovers. This keeps prep for meals later that day & on Sunday to a minimum & that sure makes me happy. When I spend less time in the kitchen on the weekends & it actually feels more like a weekend – instead of a working one.
What’s your favorite brunch recipe?
What could you make for brunch that you could incorporate cornmeal into?
White Cornmeal Shortbread Bars
Ingredients
- 1-1/2 sticks butter 3/4 cup room temperature
- 3/4 cup confectioners sugar
- 1/2 tsp vanilla extract
- 1 cup all-purpose flour
- 1/2 cup finely ground white cornmeal
- 1/4 tsp salt
- 2 tbsp sparkling sugar
Instructions
- Preheat oven to 325 degrees
- Line 8x8 baking pan with parchment - set aside
- In mixer bowl, combine butter, confectioners sugar & vanilla & beat until light & creamy
- Add flour, cornmeal & salt & mix on low until dough forms moist clumps
- Spread into prepared pan- flatten into a smooth, even layer
- Score the dough with a knife all the way through the bars before baking
- Sprinkle with sparkling sugar
- Bake 35-40 minutes or until dry & golden
- Immediately cut again along your score marks when removing from oven
- Allow to cool completely in the pan before removing & serving
For other Yummy Bar Recipes that I made for brunch….take a look at these.
Don’t miss these great ideas from these bloggers….
Make Ahead Deli Style Protein Box | No. 2 Pencil
Blueberry Oatmeal Greek Yogurt Muffins | Frugal Mom Eh
To see where I am linking today- visit HERE
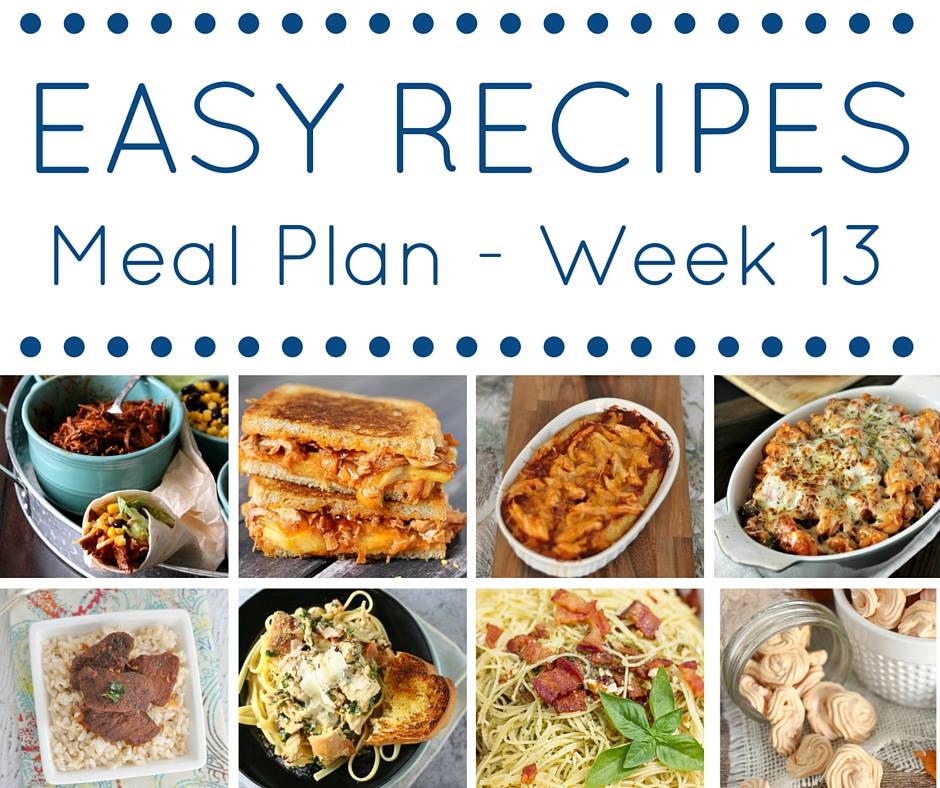
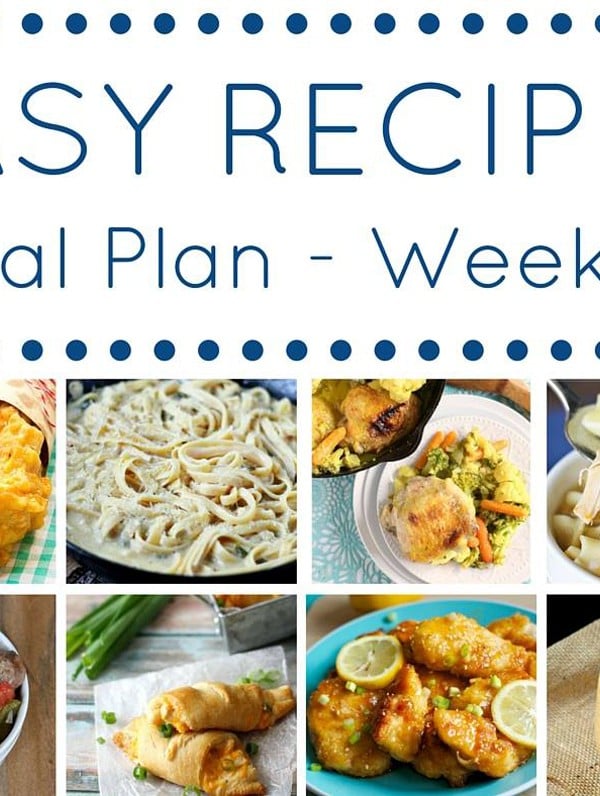
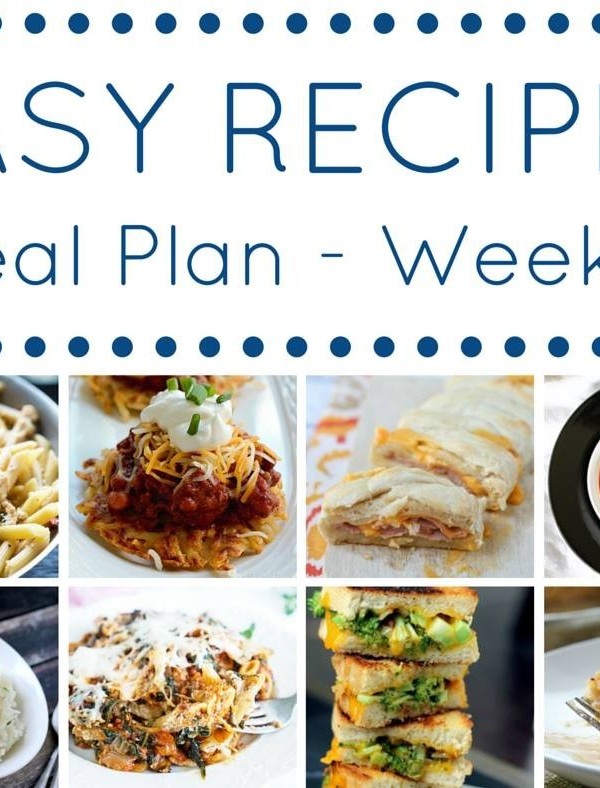
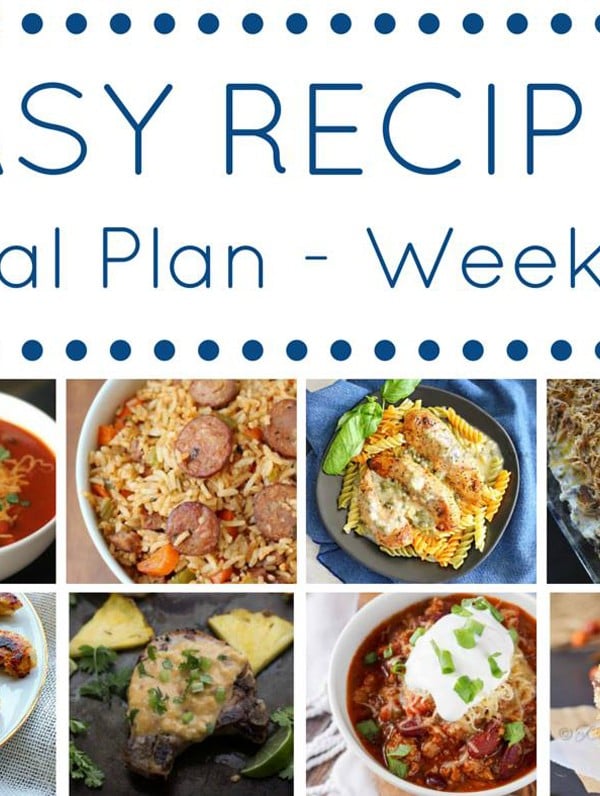
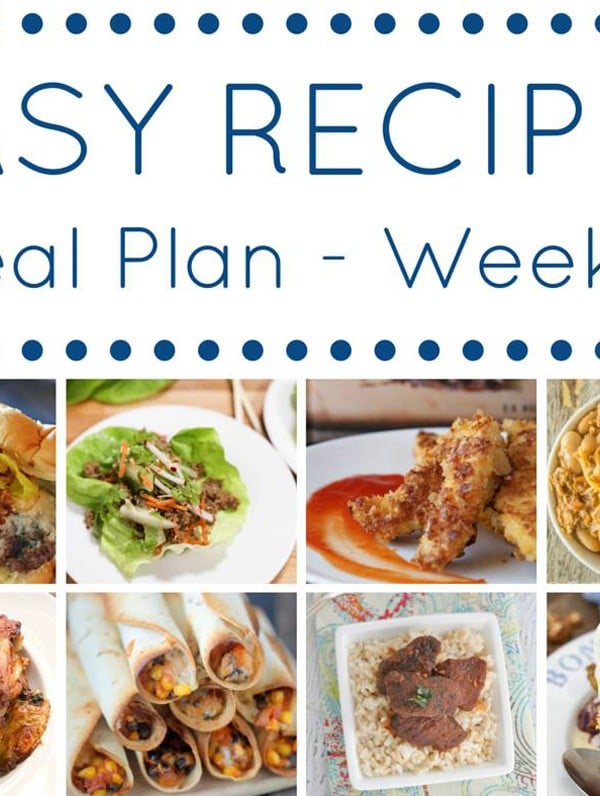
The Easy Dinner Recipes Meal Plan – Week 1
The Easy Dinner Recipes Meal Plan is here to take the guess work out of meal planning. With all the chaos that comes around dinner prep, these easy dinner recipes are tried, tested & perfected by all these phenomenal bloggers for you. Here’s to a delicious meal.
For a long time I have been wanting to provide you all with a weekly meal plan. But I wasn’t feeling like I had enough of my own recipes here to sustain that for too terribly long. So…. Guess what? I’m so excited to tell you that I am teaming up with SIX other awesome bloggers to bring it all together. This weekly meal plan will help you gather delicious recipes and major inspiration. The weekend is the best time to put together your meal plan for the following week. It’s so important! Meal planning is absolutely the key to saving money on groceries, and also eating healthier. I know that when we make a plan & stick to our list we always come out ahead- both with time & money. This Easy Dinner Recipes Meal Plan is something EVERYONE can use; from busy moms to newlyweds, there is something for everyone!
To kick it off – we are sharing with you SEVEN meals along with a dessert this week! Take a look!
Meatless Monday – ‘Taco Bell’ Mexican Pizzas by Domestic Superhero
Chili’s Monterey Jack Chicken by This Silly Girl’s Life
Baby Back Ribs by Kleinworth & Co.
Easy Crock Pot Pulled Pork Tacos by Play.Party.Pin
Creamy Avocado Fettuccine by Eazy Peazy Mealz
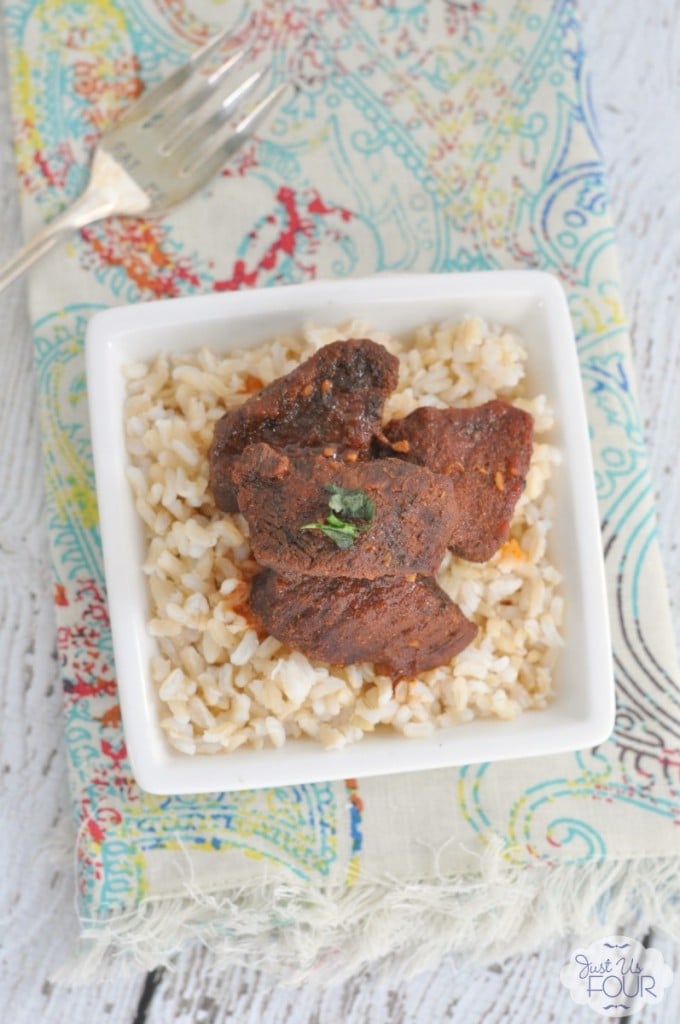
Grilled Sticky Chicken by Just Us Four
Southwestern Flatbreads (grilling these!) by Domestic Superhero
Easy Peanut Butter Cheesecake by Living Better Together
The Easy Dinner Recipes Meal Plan brought to you by: Domestic Superhero – Just Us Four – Living Better Together – Kleinworth & Co. – This Silly Girl’s Life – Eazy Peazy Mealz – Play.Party.Pin
There you go. I hope this gave you some great inspiration for this week ahead. I hope you stop by next week for some more meal plan ideas and inspiration!
Looking for more great dinner ideas?
To see where I am linking today- visit HERE
Easy Frozen Strawberry Lemonade
This Easy Frozen Strawberry Lemonade is just the cool down you need right now! With sweet strawberries & crisp lemonade, it’s the perfectly frosty treat for your summer.
What is it about a tall refreshing lemonade that just screams summer? Sometimes I like it by itself & other times it’s great to add some other yummy flavors to it. We are having record heat here in North Idaho (I think we brought a little Death Valley up here with us because we have not had a “normal” year since we moved here) so I wanted to take my usual beverages to a whole new level of cool & refreshing. So I came up with this frozen version of our favorite strawberry lemonade that is out of this world!
I love that it’s not only a refreshment, but in it’s frozen state – feels like a treat too. I’m always up for a treat! How about you?
Frozen Strawberry Lemonade
Ingredients
- 8 ounces lemonade
- 1 cup whole frozen strawberries
- 2 cups ice
Instructions
- Combine all ingredients in your blender & blend on high for several minutes
- Once slushy it's ready to serve.
- Garnish with lemon wheel if desired
That’s it! Easy right? You will love serving this all summer long. Enjoy!!
Looking for more great drink recipes?
To see where I am linking today- visit HERE
Monkey Pudding Pops
Cool & refreshing Monkey Pudding Pops are packed full of peanut butter, chocolate chips & frozen banana pudding. The perfect kid friendly dessert.
Do you like pairing the flavors of peanut butter & banana? How about adding a little chocolate to that mix? Yeah- it’s pretty good, I have to admit. So I was super excited when I found out that this month for our monthly Peanut Butter Bash the pairing would be banana with our favorite peanut butter flavor. YAY! I had about a zillion recipe ideas come to mind but with the heat settling in for the long haul, I had to go with these super tasty pops.
I mean- who wouldn’t love banana pudding pops swirled with peanut butter & chocolate chips. My kids devoured these in a few moments. Serve, smile, done! That quick! They are already begging me to make them again. I guess I better get working on it as they are the perfect treat for these hot summer days.
So how long would these last in your house?
Monkey Pudding Pops
Ingredients
- 1 box banana pudding
- 3 cups cold milk
- 1/2 of an 8oz tub frozen whipped topping
- 1 cup peanut butter
- 1/2 cup mini chocolate chips
Instructions
- Combine milk & pudding mix in a large bowl & whisk to combine
- Fold in whip topping until fully mixed & blended throughout
- Spoon in 1 tsp of peanut butter into each Popsicle mold
- Add a sprinkle of mini chocolate chips
- Fill in remainder with pudding mixture
- Add Popsicle stick & swirl around to mix before placing in the freezer
- Freeze 6-8 hours but preferably overnight before serving
Be sure to check out all the other AMAZING peanut butter & banana recipes by these INSPIRING bloggers!
If you want to know more or join in on the monthly peanut butter fun – visit our Facebook Group
How about more great peanut butter recipes?
Peanut Butter Seven Layer Bars
Peanut Butter Overload Pancakes
To see where I am linking today- visit HERE
Pomegranate Hard Iced Tea
Pasta Carbonara
Needing more Easy Family Dinner Ideas? Pasta Carbonara, a classic ‘bacon’ spaghetti dish is loaded with cheese which makes a creamy sauce that’s delicious.
I love easy family dinner ideas, which is why I post so many recipes on that topic. It seems that especially in the summer the last thing I want to do is be in the kitchen – but we all still have to eat (preferably together). So I am always working on new recipes to get me in & out of there quick so we can have as much family time as possible. Things like a hearty pasta dish like this pasta carbonara are great because it comes together fast & it fills all these hungry teens easily.
With the hectic schedules of everyday families it’s so important to still try to enjoy dinner together whenever possible. This is becoming less & less easy as my son’s work schedule has him missing so often at dinner time. So the quicker I can get dinner on the table, the easier it is for us all to find those openings in the schedules for that short amount of time & dine together as a family. I miss that time where we eat & laugh & enjoy. So these quick & easy family dinner ideas are what I seek all the time.
I like to pair this with some easy garlic toast to help sop up the remaining sauce on the plate.
The kids can’t get enough, which is great!
Pasta Carbonara : Easy Family Dinner Ideas
Ingredients
- 8 oz spaghetti - uncooked
- 1 pkg bacon - cooked
- 1-1/2 tbsp minced garlic
- 3 cups milk
- 3 tbsp cornstarch
- 3/4 cup Parmesan cheese
- salt pepper, granulated garlic & mined onions to taste
- Grape tomatoes & parsley for garnish
Instructions
- Start with preparing your bacon as you normally would- either bake or pan fry to crisp
- Allow to cool slightly & then rough chop or crumble into large skillet
- In a large pot bring water to boiling & cook spaghetti to package directions (usually around 11 minutes)
- Add garlic & seasonings to skillet with bacon & heat over low about 2 minutes - stirring frequently
- In a medium bowl combine milk & cornstarch - whisk
- Add milk mixture to skillet with bacon & cook on medium until thickened
- Add Parmesan & cook until melted
- Add cooked pasta to skillet & toss to coat
- Season with salt & pepper & garnish with tomatoes & parsley before serving
Looking for more of our favorite easy family dinner ideas?
General Tso’s Chicken Salad
To see where I am linking today- visit HERE
Burlap Coastal Art
This simple & easy Burlap Coastal Art is the perfect diy project for your coastal decor. Great if you are looking for a 30 minute or less project.
Honestly – you are not going to believe how easy this is!! Let me show you how I made these in less than 30 minutes!
I started with these 2 paintings. I had created these about a year ago when we were preparing for our move into our new house. I was certain at the time that I was going to do the powder room in “seashell colors”, you know- pink, gold, cream & blush tones. So I quickly whipped these up & I was happy with them until we finally moved in to our house & I was over the pink theme in about a week. Figures since the rest of the house is in cool blues & mint & cream – you know, other beach tones. Soooooo – it bugged me for a good long while before I popped these off the wall & decided to make a change.
I didn’t want to paint over them. With as often as I change my mind- I figured I would probably want to use them at some point in the future. So I used my staple gun & some white muslin fabric & covered them. Just wrap & staple- easy.
Then I stapled burlap around each end.
Again – wrap & staple. My burlap wasn’t wide enough to wrap the sides – but I’m okay with that.
I printed out some coastal clip art & used my x-acto knife to cut out the shapes.
Laid them over the burlap & grabbed my paint brush.
Just a little sample of paint & my stipple brush.
I used a pouncing (stipple) motion so as to keep the paint light on the burlap- I didn’t want it to soak through to the other layers.
Wait for it to dry – which wasn’t long & That’s it!
A simple & easy update in no time at all!
Want more fun beachy projects?
To see where I am linking today- visit HERE
Easy Patriotic Parfait
Quick & easy no-bake desserts are everyone’s summer favorite, Like this Easy Patriotic Parfait. It’s perfect for your 4th of July celebrations. It takes just a couple ingredients, minimal prep time & yet still brings BIG smiles! I haven’t met anyone who turned one down.
Looking for a quick & easy treat you can whip up for 4th of July? This super simple patriotic parfait is perfect. Sometimes it’s the easiest things that bring the biggest smiles. I know that my kids get just as much joy from being able to help me make fun little goodies like these as they do actually eating them. That’s the best part – the kids can help with these because there isn’t anything complicated about them at all. I don’t have to watch every step or measure out anything exact. It’s as easy as layer it in & enjoy.
I already know that it’s going to be sweltering come the 4th. So why not make our recipes simple, quick & easy, right?! So this year while we are finally able to enjoy the holiday altogether as a family (for the first time in 20 years) we will whip up a few of these after we grill some INCREDIBLE dinner dishes. I can’t wait! I know the kids are excited because while they usually get to be my recipe testers after I capture a few pics, this time the hubs was the one who ate these pretty little patriotic treats. I’m really looking forward to having some with the kids.
Easy Patriotic Parfait
Ingredients
- 1 box instant vanilla pudding
- 2 cups milk
- 1 sleeve graham crackers
- 1 cup Red White & Blue M&M's
Instructions
- Prepare pudding by whisking milk & contents of pudding box together in a medium size bowl
- Once fully mixed allow to sit for approx 2 minutes while you work on your graham crackers.
- Place a few M&M's in the bottom of you serving glasses
- Add in 1/2 crumbled graham cracker
- Top with a layer of 2-3 tbsp prepared pudding
- Add another layer of crumbled graham crackers & then pudding again
- Sprinkle with more M&M's
- Serve immediately. If you need to make ahead & chill in the refrigerator for a couple hours- add just the top M&M's at time of serving as the colors will bleed off in the refrigerator
So what are your plans for the 4th? Big or small- you have to include these parfaits!
Want more quick & easy recipes for your celebrations?
Simple Patriotic Ice Cream Sandwich
To see where I am linking today- visit HERE
Boozy Pomegranate Lemonade
This post was sponsored by Heaven Hill Distilleries Heaven Hill Family of Brands. Bardstown, KY © 2015
Boozy Pomegranate Lemonade is the perfect summertime refreshment. Ice cold lemonade, vodka & pomegranate liqueur make for a delicious way to cool down.
Do you like pomegranate? I sure do. I’m always looking for new ways to add a pomegranate twist to my favorite recipes, especially when it comes to my summer entertaining. It’s a great flavor twist when I’m mixing drinks for our friends during backyard bbq’s & parties with the neighbors. So I was playing with some new beverage recipes to serve at an upcoming summer evening party we are planning when I came up with this absolutely delicious Boozy Pomegranate Lemonade. Oh my goodness it was good. I can’t wait to share it with all our friends here soon.
It’s light & refreshing like lemonade usually is, but with that great hint of pomegranate & a little kick too. Perfect for sipping out on the back porch in the warm summer evenings.
Right now PAMA is running a summer contest.
Winners will receive the chance to make their summer party come to life, with some help from PAMA. There will be one grand prize winner and four runners up. The prizes include:
Grand Prize Winner: $500 gift card and PAMA party kit to throw a summer party
Runners Up: $250 gift card and PAMA party kit to throw a summer party
I know I could host a spectacular party with a prize package like that! How about you?
Visit PAMA Liqueur for details on how to enter!
Boozy Pomegranate Lemonade
Ingredients
- 4 oz lemon lime soda
- 1-1/2 oz lemonade
- 1 oz pomegranate liqueur
- 1 oz vodka
- lemon wheel
- ice
Instructions
- Fill rocks glass with ice
- Fill shaker with ice
- Add lemonade, pomegranate liquor & vodka to shaker & shake vigorously for about 30 seconds
- Strain into prepared glass
- Fill remaining with lemon lime soda
- Garnish with lemon wheel
- Enjoy
So what beverage recipe would you twist with PAMA Liqueur?
Stay tuned – I’ll be sharing more about our backyard BBQ soon.
PAMA Celebrate Summer Contest. NO PURCHASE OR PAYMENT NECESSARY TO ENTER OR WIN. A PURCHASE WILL NOT INCREASE YOUR CHANCES OF WINNING. Starts on 6/22/15 at 12:00:00 p.m. ET and ends on 7/20/15 at 11:59:59 a.m. ET. Open to legal residents of 50 United States and D.C., who are at least 21 years of age and older. Void where prohibited. For complete Official Rules, visit PAMALiqueur.com/CelebrateSummer. Sponsor: Heaven Hill Brands, 1064 Loretto Rd., Bardstown, KY 40004
Looking for more great summertime beverages for your party?
To see where I am linking today- visit HERE
Easy Everyday Cleaning Routine
This shop has been compensated by Collective Bias, Inc. and its advertiser. Sponsored posts are purely editorial content that we are pleased to have presented by a participating sponsor. Advertisers do not produce the content. I was compensated for this post but the content is all my own. All opinions are also mine alone. #RealLifeClean #CollectiveBias
My Easy Everyday Cleaning Routine is simple & quick. A clean house is easy with just a few minutes throughout the day to keep my house sparkling clean.
I think most people like a clean house. It’s mentally freeing when things are in in their place. When you can look around & things are polished & kept. I admit, it can be daunting at times when you have so much to do. So I thought I would share with you my routine for keeping on top of messes before they become overwhelming.
It can take all of us in this house to stay on top of things. We all pick up after ourselves & we all pitch in for the common areas to make it all go quickly.
We dust daily! It’s so important for keeping the pollen at bay, especially when we have the windows open through spring & summer. We each have a couple rooms we are assigned to which really cuts down on the time it takes. In the mornings while we get ready it takes less than 5 minutes for us all to grab our dust towel & wipe down everything in our assigned space.
Bathrooms are the same – they get wiped daily, scrubbed weekly. I have a designated rag in each bathroom & we all wipe the sink & counter after each use. This helps cut down on anything building up & keeps the water spots at bay too. My daughters & I each take a bathroom on the scrub days & we knock it out in no time. Because we are all wiping up on an every use basis, it doesn’t take long to give a wipe down with cleaner on those spots & focus our time on the showers & water closets.
The kitchen probably takes the majority of our time. With me in there several times a day making not only meals but creating recipes to share with you all here, it seems never ending. So I keep a good no-residue cleaner handy so I can clean as I work. Then after a large meal the girls will handle vacuuming & mopping the floors while I work on the dishes. We do this EVERY night. It’s routine, we have it down & it goes quite quickly now that we have worked it out.
Here are my favorite products that help me keep this place sparkling!
Clorox Scrub Singles Bathroom Pads | Clorox Pump ‘N Clean Kitchen & Dish Cleaner | Clorox Triple Action Dust Wipes
I love that the bathroom pads cut through the toughest of grime & the dust wipes grab that pesky dust with just one pass. The kitchen & dish cleaner helps me wipe up messes with in the flow cleaning. It’s food safe with no harsh chemical residues so you can quickly clean up messes and spills while you’re cooking, even around food! A clean that’s convenient yet effective and safe for your household. It’s the clean that doesn’t let mess get in the way but instead lets you live –your life.
I pick these items up on my weekly Target run.
From June 7-July 4, receive 10% selected Clorox products at Target using the Cartwheel app.
I’ve shared how we keep our house clean. What is your favorite cleaning trick?
Need more cleaning tips?
Easy Kitchen Clean Up
To see where I am linking today- visit HERE
Vintage Lighted Shop Sign
This post is part of a social shopper marketing insight campaign with Pollinate Media Group® and Glad, but all my opinions are my own. #pmedia #pressnsealhacks
This Vintage Lighted Shop Sign is simple to make. No cutting machine needed. It’s as easy as press, cut, paint & sand & you have this great personalized, vintage inspired shop sign.
Remember last week when I posted an image on Instagram saying I was working on a SUPER FUN PROJECT? Well, as I promised, I’m sharing the tutorial here with you today. You see, back when we first moved in to our house last summer I have been wanting to add a “shop” style sign to my studio space. But since I don’t have a cutting machine the project has been put on hold for a good long while. I have seen many tutorials floating around using Glad Press’n Seal & decided I would give it a go. I’m so stoked with how it turned out! Scroll on down & check out just how easy this project came together.
I picked a board from my scrap wood collection in the shed & measured & cut to the length I needed.
Sanded it down & gave it a coat of deck stain. Why deck stain?
Because this particular one shows the grain of the wood & the color gives the perfect weathered look with just one coat.
Once it was dry I brought it up to my studio to get to the fun part.
First I laid out the Glad Press’n Seal over the entire board & used a plastic card to scrape over the top to adhere it to the board.
I printed out my letters in the font of my choice & taped them down on top of the board making sure they were straight & evenly spaced.
Then I took my x-acto knife & carefully cut each letter out- making sure I was pressing hard enough to cut both layers.
You can see here I have the stencil left on the board & we are ready to paint.
I used a stippling brush with very little paint & stippled the brush (pouncing motion) over the exposed wood.
You can see here what it looks like when you stipple the paint. You have some areas that are lighter & darker than others. This is what you want as it makes the distressing so much easier when it already looks worn off in places.
But we want it even more worn, so I took some sandpaper & gave it a quick rub over the letters when they were dry.
Here’s what it looked like before I took it back to the garage for the lights.
I could have just left it like this as I love how it looks. However I really wanted to add a little more “wow factor”.
I wanted it to look like it was riveted to the wall. So we drilled some pilot holes & pounded in some bolts in the corners.
We picked up a strip of flat LED rope lights while at Walmart picking up the Glad Press’n Seal & attached it to the edge of the board.
Then we used some very large screws to attach it to the wall between the curtains.
We used a cord keeper to direct the cord down the wall where we wanted it & that’s it.
Here it is!!! Adorning my largest wall in my studio. It’s just what that space needed & I absolutely love it!
It sort of reminds me of the old signs we would see in those old rustic bars in tiny mining towns when we lived outside of Tahoe.
So what would you make with Glad Press’n Seal?
Visit them on their Website or on Pinterest for more project inspiration!
Want to see more projects for the home?
One Desk- Three Great Uses
To see where I am linking today- visit HERE
Patriotic Porch : 4th of July
Spruce up your entry for the 4th of July with Patriotic Porch decor. The Red, White & Blue in classic Americana tones help you celebrate in style!
It’s no secret that I love the 4th of July. It’s my favorite holiday to celebrate (minus the personal fireworks- since I am married to a fire chief) Once Memorial Day arrives I get so excited to start decorating with all my classic Americana colors. It absolutely makes my heart sing to see all this red, white & blue on my porch. As you can see I chose muted tones in my blues & reds to keep an understated, vintage feel.
This Patriotic Porch Art I made a couple years ago received some white washing & distressing to add to the vintage feel.
You remember, I shared my tutorial for how I made these No-Sew Patriotic Pillow Covers not too long ago.
I love how they change the whole look of the chairs.
I placed the green pot of flowers inside the larger red bucket I had picked up at the store to bring more red to the area.
Of course I added flags all around the pathway & planter to add even more red, white & blue.
There you have it…Patriotic Porch with just enough red, white & blue to celebrate in style!
Looking for more 4th of July Inspiration?
To see where I am linking today- visit HERE
White Corn Tortillas
Easy homemade White Corn Tortillas are so easy to make & taste better than anything you’ll find in the store. They are the perfect addition to your dinner.
I love making things from scratch whenever I can. Most of the time it not only tastes better but it’s much easier than it seems.
In a very short amount of time I’m able to make enough of these homemade white corn tortillas for our evening dinner.
I know what you’re thinking – why not just buy the package at the store? Well – because these are SO much better.
Cornmeal Recipes
You know how the store bought tortillas will break when you fold them & all the contents of your taco is either in your hand or on your plate? Not these -they are soft & pliable & are able to hold up to stuffing them full of taco goodness.
I love the taste too – not quite like flour or a traditional corn tortilla. It’s a flavor all it’s own& better than anything I have ever paired with my tacos.
The hubs is a huge lover of tacos & burritos & absolutely swoons over these tortillas. I really didn’t expect him to rave like he does – but he loves them so much.
Here are some commonly asked questions
How many can this serve?
I make about 20-24 tortillas with this recipe. Depends on how large or small you make them.
Recipe Homemade Tortillas
Can this recipe be doubled?
Yes, absolutely this can be doubled. You can make as many tortillas as you need, doubling is easy.
Now they are just part of our prep for taco night. It takes less time than frying traditional corn tortillas & do much better for us too. You have to give them a try.
Corn Tortillas Recipe
HOW TO MAKE White Corn Tortillas?
- Combine all ingredients in a large bowl & whisk well – add more water as needed 1/8 cup at a time. (batter should be thin- more like cake batter than muffin batter.)
- Heat a large non-stick skillet over med-low heat.
- Ladle in one scoop of batter like you would pancakes.
- Take the backside of a spoon & smooth out the batter to the outer sides to get the tortilla as thin as you can & also even out the shape. (this should make it more uniform in size & shape & help increase the size)
- Allow to cook until browned – flip & brown the other side – be patient & watch closely.
- The first couple might take a little practice but once you have it down it’s really quite simple.
- This should make about 20-24 tortillas depending on their final size.
These don’t need yeast?
Nope, no yeast for tortillas, so they are easy. No yeast, no need to wait for them to rise. Just mix & cook like pancakes.
To make this recipe you will need…
- all-purpose flour
- cornmeal
- salt
- water
- eggs
Products I love when making these incredible tortillas…
This tortilla recipe is SUPER EASY and delicious – and if you’re like me, then you maybe already have some of these items on hand OR maybe you have never made homemade tortillas before, & you might be a bit nervous – but you’re going to love these turn out. I have made a list below of the things I absolutely can’t live without when it comes to making this tortilla recipe.
- mixing bowl
- all-purpose flour
- table salt
- white corn meal
So what would you make with Cornmeal??
I just can’t tell you how much everyone loves these tortillas!
If you love this tortilla recipe as much as I do, please write a five star review, and be sure to help me share on facebook and interest!
CONNECT WITH KLEINWORTH & CO!
Be sure to follow me on my social media, so you never miss a post!
FB, Pinterest, IG, Email Subscription
Here’s what I like to make along with these tortillas.
Or how about more Easy Family Dinner Ideas?
Restaurant Style Refried Beans
Then later I’ll make these with the leftovers….
Don’t Miss These Tortilla Recipes Too
White Corn Tortillas
Ingredients
- 3-1/2 cups water
- 2 eggs
- 1 cup white cornmeal
- 2 cups all-purpose flour
- 3 tsp table salt
Instructions
- Combine all ingredients in large bowl & whisk well. * add more water as needed, 1/8 cup at a time. (batter should be thin- more like cake batter than muffin batter.)
- Heat a large non-stick skillet over med-low heat.
- Ladle in one scoop of batter like you would pancakes.
- Take the backside of a spoon & smooth out the batter to the outer sides to get the tortilla as thin as you can & also even out the shape. (this should make it more uniform in size & shape & help increase the size)
- Allow to cook until browned - flip & brown the other side - be patient & watch closely.
- The first couple might take a little practice but once you have it down it's really quite simple.
- This should make about 20-24 tortillas depending on their final size.
Pepperoncini Chicken Bites
Simple &light appetizers like these Pepperoncini Chicken Bites are perfect for summer gatherings. Just 3 ingredients & a couple minutes to make, delicious.
I love light summer snacks, especially when we can have a couple bites of something delectable with maybe a bowl of fruit & call it a meal. If it’s no-bake, no- cook even, all the better. I find myself focused on paring down the number of ingredients we add to dishes. I also find that we are more focused on what is added to the items we choose to include as we prepare. The ingredients list on our food is something we check more & more.
Which is why we choose Triscuit crackers for snacks like this. The ingredient list is simple – whole grain wheat, oil and salt. That’s all! Only 3 ingredients! You know how I feel about things added to my food -which is why these are a no-brainer for me.
Did you know that Truscuit is a champion of the “Maker” community? The “Makers of More” program helps promote & support local makers like The Jam Stand. Located in Brooklyn, it was started by two friends who wanted to learn the art of making jam. Girls after my own heart, you all know how much I love making jams & jellies myself. In fact, one of our favorite snacks is Triscuit crackers topped with cream cheese & my Pepper Jelly. I love the Jam Stand because like me, they like to get creative with their recipes & mix things that might not be the norm. They also believe that packaged food doesn’t have to mean processed food. I love that!
Like Triscuit, I do believe in a “less is more” approach through the summer months. It’s a great way to eat.
Pepperoncini Chicken Bites
Ingredients
- *Per 2 Crackers
- 3-4 small pieces of chunk chicken
- 3-4 pepperoncinis
- 2 pieces of diced tomato
- salt & pepper if desired
- *Note- if making for a party you can use 1 large can of chunk chicken add in homemade mayo if desired & have enough pepperoncinis & tomato for the amount of crackers you are serving for your guests.
Instructions
- Place 1-2 pieces of chicken on each cracker
- Top with pepperoncini & tomato
- Add seasonings if desired
Looking for more great snack ideas?
For more appetizers- visit my Easy Family Dinner Ideas page.
Prosciutto & French Onion Tea Sandwiches
Triscuit believes in simple things coming together to create something more. Whether it’s just three ingredients on a Triscuit or about life, we believe that you (and Triscuit) are “Makers of More”.
Triscuit sponsored this blog post. The opinions and text are all mine.
Twisted Frozen Cosmo
This Twisted Frozen Cosmo is a great variation of the classic cosmopolitan cocktail. Using Everclear® in place of high proof vodka & adding some homemade cranberry liquor makes for a Cosmopolitan like you have never had before!
I absolutely LOVE taking classics & really changing them up with twists that are outside the box. It’s really what I do best. Because when you have something that’s already a favorite – it makes it so easy to change a couple things & really take it to a whole new level. I was wanting something refreshing, classy & pretty too & I was also wanting to use my martini glasses because they are just so much fun. I started thinking about what I could make & decided on a cosmo. So when I took a look at the classic cosmopolitan cocktail (which I have never shared here before) I knew I could make it even better with just a few small changes. One thing was for sure – aside from some key ingredient changes, I knew I wanted to make this one frozen for a refreshing way to relax in the heat of the summer.
I looked through my bar & thought that using Everclear® in place of high proof vodka would really give this cocktail the twist I was looking for. I also thought that adding some homemade cranberry liquor made with Everclear® would make a great addition & really kick up the cranberry flavor.
It turned out just as I imagined. Fresh & pretty with the perfect blend of flavors. Perfect for a sunny, late afternoon cool down.
So tell me, what would you make with Everclear®?
Be sure to check out Make It Your Own by Everclear® for more info, recipes & inspiration!
Twisted Frozen Cosmo
Ingredients
- 2 oz cranberry juice
- 1/2 oz fresh lime juice
- 1- 1.5 oz Everclear® depending on the proof in your area
- 0.5 homemade cranberry liquor- using Everclear®
- 3/4 oz triple sec
- 1 cup ice
- lime twist for garnish
Instructions
- Combine all ingredients except the lime twist in a high powered blender & blend on high until it forms a slush
- Serve in a martini glass garnished with twist of lime
- Enjoy!
Here are more great recipes to use with Everclear®!
To see where I am linking today- visit HERE
Everclear® is the perfect ingredient for craft cocktails and home mixology, allowing you to put your own spin on new and old favorites. With its neutral grain composition, Everclear® extracts the optimal flavor to infuse your cocktails — whether you’re making bitters, liqueurs, tinctures or extracts. Visit makeityourown.com for recipe ideas, tips and more!
“This post was brought to you by Everclear®, the “original” grain alcohol, and Luxco. I received compensation to write this post. The opinions and text are all mine.
Blue Cheese Breakfast Burger
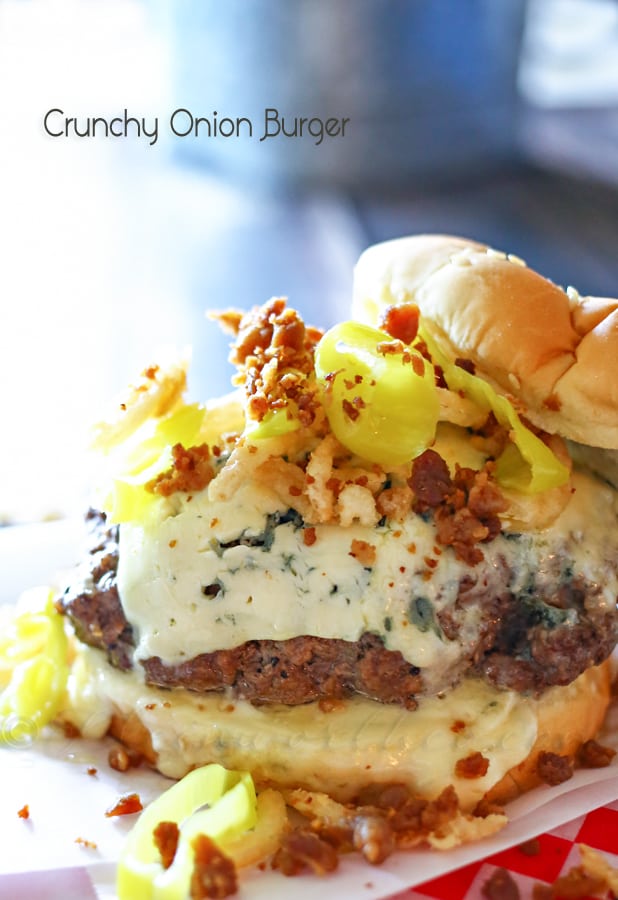
Partnering with Castello for a Summer of Blue, this Blue Cheese Breakfast Burger is loaded with delicious blue cheese, layered with hash browns, a ground chuck patty, bacon & an egg – sunny side up!
It’s everything you love about breakfast, packed on your burger & complimented by the great taste of blue cheese. Heaven on a bun!
Have I mentioned before that I like my food hearty? I’m not a salad feign like my kids. Maybe you gathered that already by how few salads you find here on Kleinworth & Co. I will rarely turn down a good burger.
One of my ALL TIME favorite ways to eat a burger is with blue cheese. I swoon over it!! In fact – it’s also my favorite topping for steak. Can’t get enough of that great taste!
View postBlueberry Cheesecake Pops
These Blueberry Cheesecake Pops are the perfect easy frozen dessert. Delicious cheesecake flavored frozen yogurt swirled with homemade blueberry jam & graham crackers is positively SCRUMPTIOUS.
Are you needing something a cold & refreshing? I thought so. I know that when we lived in the Nevada desert, cool treats were a MUST every single day. I started making them homemade after we realized we were having them all the time (read: multiple times a day) & it was getting expensive. Then after having to continuously buy bigger clothes from all that eating, I started making them a little lighter too. Which is where all the frozen yogurt recipes come in to play. Frozen yogurt is slightly better for you than ice cream, right? At least that’s what I tell myself & the family so I feel less guilt. These blueberry cheesecake pops taste every bit as indulgent as something you would buy in the store.
You will definitely want to enjoy these out by the pool or while putting your feet up after a long day of gardening. If you love blueberries & cheesecake these will be your new favorite dessert. Everyone here is begging for me to make some more.
Blueberry Cheesecake Pops
Ingredients
- 1 16 ounce container vanilla yogurt
- 2 tsp vanilla extract
- 1 pkt cheesecake pudding mix just the powder- do not prepare the pudding
- 1 can 14 oz sweetened condensed milk
- 1/2 cup milk
- 1-2 graham crackers
- 1/2 cup blueberry jam
Instructions
- Combine yogurt, vanilla, pudding mix powder, sweetened condensed milk & milk in mixer bowl
- Beat on medium until fully combined - should be fairly thick once mixed
- Crumble graham crackers into the bottom of your popsicle molds
- Spoon in your cheesecake frozen yogurt mixture to about half full
- Add in a small spoonful of jam
- Swirl the jam into the yogurt slightly with a skewer or thin object
- Fill remaining molds with more cheesecake yogurt mix
- Add your sticks & freeze overnight
Looking for more great recipes to cool down?
Banana Cream Pie Frozen Yogurt
Toasted Coconut Banana Ice Cream
To see where I am linking today- visit HERE
Easy DIY Picnic Table
This Easy DIY Picnic Table is so incredibly simple to make. Just 30 minutes or less to assemble, add weatherproof stain & you’re ready to dine al fresco & turn your backyard into a little oasis.
Last year when we moved into our house we made a whole lot of trips to both home improvement stores in town….a lot. We still do. Most weekends include a trip to at least one of them for some project or another. But last summer we noticed that both Lowes & Home Depot had a Build-it-Yourself picnic table kit for less than $100. We meant to pick one up & then before we could get to it, they had replaced them with snow blowers for the season. We talked about it all winter long & we were really eager to get going on one for our yard.
So when my friend Taryn posted about picking one up – I knew they were back in stores & it was time to go get one.
It literally came together so quickly that I was through to this stage of staining it before I remembered to take a picture. It was dumping rain, the hubs came home with it – dropped it in the garage & we immediately got to work on it. Before I knew it we were nearly done. So my apologies for the lack of “how-to” pictures. If you want to see that process – you can visit Taryn in the link above & check out her post on it.
The hubs couldn’t find the stain I was originally hoping for. So he took a chance on something new & I’m in LOVE! It’s Olympic Maximum Stain + Sealant in One (semi-transparent) Color – Coffee. It goes on sort of dark, then as it dries it gives the wood this GORGEOUS aged look that we all love right now. Plus it’s a sealant – so no need for varnish to protect it from the weather.
I love this stain so much I’m using it on everything – like inside & out.
The plan from the get go was to make this space in the yard feel like we had happened upon a nice little bench at a campground. With the weathered look of the bench & the placement next to our aspen & pine trees it certainly does give that feel. It makes me smile every time I look out my kitchen window. It’s been a great place to host our neighbors for gatherings & to just dine al fresco on these glorious summer evenings.
Want to see more projects for the home?
EASY BACKYARD FIRE PIT {IN LESS THAN 30 MINUTES}
To see where I am linking today- visit HERE
Coconut Mocha Pops
These Coconut Mocha Pops are made with delicious iced coffee, mini chocolate chips, coconut & slivered almonds. They make for a quick dessert idea & a great way to cool down.
I have mentioned before that after so many years of living in the desert, I have become a master at coming up with quick & easy ways to cool down on the hottest days. Because I like treats my ideas usually involve something yummy too. If it’s cold, refreshing & tastes absolutely delicious – then it’s something that we end up making all the time. Huge bonus if it happens to involve just a couple ingredients & very little time to make.
Last month I shared with you my favorite way to kick start my day with my Iced Coffee Protein Shake. Now my new favorite way to end my day is with one of these Coconut Mocha Pops. In the mornings while I’m preparing my protein shake I can take a couple minutes to prep the pops in the molds. Pop them in the freezer & I have a tasty cool treat to share with the hubs after dinner.
You see -each evening after the dinner clean up we head out to the front porch to sit & talk about our day. It’s a way to set aside a few moments for just us, away from the noise of the kids wrapping up the evening cleaning. It’s really hard to relax & have a conversation when there are multiple vacuums going along with trash, dishes & all the other activity. So a few moments outside with a treat is a great way to relax. Do you have little times to connect at the end of your day?
What would you add to your iced coffee pops??
So, if you are looking for a a delicious treat that you can prep in just a couple minutes, you will want to give these a try!!
Find out more about International Delight & sign up for their newsletter.
Connect with them on Facebook, Twitter, Instagram & Pinterest.
Coconut Mocha Pops
Ingredients
- 2 cups International Delight Iced Coffee - Mocha Flavor
- 1/4 cup sweetened coconut
- 1/4 cup mini-chocolate chips
- 1/4 cup slivered almonds
Instructions
- Sprinkle almonds, chocolate chips & coconut in the bottom of each popsicle mold
- Add in iced coffee & place your sticks
- Freeze for several hours to firm
- Enjoy!
Looking for more great treat recipes?
Caramel Macchiato Pudding Pops
To see where I am linking today- visit HERE
This conversation is sponsored by International Delight. The opinions and text are all mine.
Candied Disney Popcorn
This Candied Disney Popcorn is just like the tasty treat you get at the park. Added Mickey shaped sprinkles make this Disney recipe even more fun for all.
Growing up in the town right next door to Disneyland made it was sort of like my second home. We would go there for dinner, random “hey let’s go to Disneyland right now” & for just about every school event & so on.
All my life it was part of my everyday. I could watch the fireworks from my house. It was sort of magical existence as a kid knowing that it was just right there & I could visit just about any time I wanted.
So now that we live so very far away from there, I’m finding myself trying to make all the fun recipes that I remember growing up. One of which is this Candied Disney Popcorn.
Do you remember the candied popcorn there? Have you ever tried it? It’s a favorite – something I would get every time I went, even if I was just there the day before.
So, of course, I had to make some when I was asked to join in on this Month of Disney event hosted by the awesome Rachel from R & R Workshop. What a fabulous theme!
Here are all the AMAZING bloggers you will find contributing in this event all month long!
YAY! I’m so thrilled to be working with them on this.
Looking for more great Disney Inspired food?
More Delicious Popcorn Recipes
Candied Disney Popcorn
Ingredients
- 1/4 cup Disney sprinkles
- 1 bag microwave popcorn - popped
- 1 14 oz can sweetened condensed milk
- 1 box any flavor you wish 3 oz Jello mix
- 5-10 drops food color depending on what flavor you choose
Instructions
- Preheat oven to 200 degrees
- Line a large baking sheet with parchment & set aside
- Pop popcorn & transfer to a large bowl - set aside
- In a small saucepan, combine sweetened condensed milk & jello packet
- Heat over medium until it starts to boil
- Allow to lightly boil about 1 minute - stirring constantly
- Remove & immediately pour over prepared popcorn
- Stir & fold to mix & coat the popcorn
- Transfer to prepared baking sheet spreading out as best as you can
- Sprinkle with your Disney sprinkles
- Bake 20-30 minutes - stir about half way through
- Remove & let cool
- Break apart & enjoy
- Store in a paper bag - not an airtight container to keep from getting soggy
No Sew Patriotic Pillow Cover
This post is brought to you by Plaid Crafts and Blueprint Social. The opinions are my own.
This No Sew Patriotic Pillow Cover is an easy holiday decor project you can complete in just 20 minutes. It sure makes holiday decorating simple & quick using Fabric Creations™!
No sooner did a finish my Summer Porch Makeover did I realize it was nearly Memorial Day & I had yet to decorate the porch for the holiday. You see – this is my FAVORITE time of year because I love all things Americana & Patriotic. So I like to decorate for Memorial Day & leave the red, white & blue up through 4th of July. Then I go back to my usual summer decor for the remainder of July through August. So it was literally Friday morning before the holiday weekend when I realized I had to get everything decorated – STAT. (It was a huge push because the hubs was giving me push back on changing the decor so soon after wrapping up the whole makeover- I had to get it done before he came home that day) 🙂
Fortunately I had just received this box of GOODIES full of Plaid Fabric Creations™. I knew exactly what I wanted to do.
Here we have Soft Fabric Ink in multiple colors, Block Printing Stamps, foam printing mat, sponges & the cleaning brush.
I love this ink because it’s machine washable, waterbased for easy clean up & non-toxic. My project went through a heavy thunderstorm & was soaked – the ink still looks perfect.
I had already had it in my mind that I would take these old throw pillows we have had for YEARS (like I can’t really believe we have held on to them for this long) and recover them. I originally wanted to use bandannas but my lack of time to get to the store & pick some up before this revamp needed to be completed hindered that. So I came up with a new plan that I liked even more. I grabbed some extra chambray I had laying around & the paisley stamp & white fabric ink & some red bias tape. Simple!
I measured the pillow & then cut my fabric (with a fold – so I have 3 open sides) for about 2 inches larger to make sure it had enough room to accommodate the volume of the stuffing.
I placed the foam printing mat in-between the 2 sides of the pillow fabric.
Squeezed a little soft fabric ink onto my sponge & dabbed it onto my block printing stamp & started stamping – adding more ink after 2 applications.
(I’m swooning through this because – I’m not sure if I told you- but I SUPER LOVE paisleys)
I did them in a random pattern making sure no two that were next to each other were facing the same direction. Not quite like a bandanna but for me – less is more when it comes to decor. So I am super happy with the simplicity of this.
Then – here’s the easy part – I said these were no-sew. So I then placed the pillow I was covering between the two sides of the fabric I worked on. Then pulled each corner together & tied them with the red bias tape. EASY!!! So cute & makes it simple to quickly (& if you want- temporarily) change the pillow cover.
Fabric Creations Soft Fabric Ink is super soft fabric ink that is the perfect formulation for stamping, stenciling and brushing on fabric.
Use printing blocks for creating unique fashions, quilts, textiles, stitching embroidery, scrapbooking, printing, and more!
Fabric Creations Block Printing Stamps and Fabric Ink are both available at Hobby Lobby and www.plaidonline.com.
So I can do this same process for every single holiday & freshen my porch! Oh the possibilities are endless!!!! I’m SO EXCITED!!!
Learn more about Fabric Creations™ & visit on Pinterest | Facebook | Instagram
Looking for more fun Patriotic Ideas?
To see where I am linking today- visit HERE
Rocking Chair Makeover
This simple diy Rocking Chair Makeover using chalk paint was so easy. From rustic to beachy in a few short hours. What a great furniture transformation.
*Disclosure: I partnered with Deco Art as part of their Blogger Outreach program to facilitate this post. All opinions are truthful & my own.
Remember when I showed you THIS before picture of our porch. This sad rustic rocking chair had seen better days. It’s finish was wearing off & I was getting splinters when I would sit in it. Fortunately we did a full front porch makeover & so now I sit in comfort. But I still love the rocking chair & wanted to use it elsewhere. I just didn’t want to have to sand it all down & re-stain it. Knowing what I do about chalk paint, I knew it would be the perfect product to help fix this poor chair.
After convincing the hubs that his rocking chair would be better off with some paint, we picked a color & I contacted my friends at Deco Art & told them my plans. They sent me what I needed & I got to work.
I used 3 (8 oz) containers of Americana Decor chalky finish paint in Everlasting & 1 (16 oz) container of Americana Decor light satin varnish.
I taped off the the woven portion of the chair & started painting- starting with all areas I could reach with my brush while it was up on the sawhorses.
Then once it was dry on that side, I worked on the remaining portions. Then flipped it back to add the varnish.
We added Never Wet to the seat area to protect it as it will be on the back porch & no longer protected from the weather.
I so love how it turned out!!! It went from old & rustic to fresh & beachy!!
Perfect for our home!
For more info on all Deco Art products – check out their website! It’s packed with inspiration.
Looking for more chalk paint transformations?
Craft Table Make-Over
To see where I am linking today- visit HERE
Summer Camp Packing Tips
I participated in an Influencer Activation on behalf of Influence Central for Mabel’s Labels. I received a voucher to facilitate my review as well as a promotional item to thank me for my participation.
It’s summer camp time. If you are sending your kids off to camp I have some Summer Camp Packing Tips here to help you out. Don’t miss the Mabel’s Labels coupon & contest at the bottom too!
I went to camp every summer when I was in high school. It was mainly geared for my extra-curricular activities I was involved in during the school year but it was a great time to get away for a couple weeks. I remember packing was always the hardest part & there was always something I realized I had forgotten once I got there. At that point it was too late & I had to do without. I thought you might experience the same woes with your kids too. So if your child is planning to attend camp this summer there are some tips for making sure you remember it all & they leave & come home with everything!
Plan out a packing list ahead of time
I usually have them write down everything as they use it as they go through their daily routines about a week before. This way we remember to get things on the list that are so routine that they may actually forget they use them – and then forget that it needs to be packed.
Choose a large enough bag or trunk.
They will be living out of this for the duration of their stay. Make sure it’s large enough to not only hold everything but that there is room to find it all once they are there.
Lay out everything ahead of time & take a good look at what they are taking.
Label EVERYTHING
As you fold & pack each item – stick a label on it. That way there is no mistaking who these things belong to.
Ones like these super cute Limited Edition Camp Labels from Mabel’s Labels are great because they are laundry, dishwasher & microwave-safe – 100% guaranteed. So you can put them on everything from clothes, swim gear, backpacks, shoes, toiletries & more. I love them because they are available in so many great designs (easy to order & affordable) – you will definitely find ones perfect for every member of your family – all able to be customized to your needs.
Pack a water bottle – preferably a reusable one with a filter.
This way they can always have fresh water – even if the only source is a drinking fountain.
Fun stamped metal tags like these are great for not just water bottles, but work well on their luggage too.
Plus – they are ADORABLE!
Don’t forget – medications, sunscreen & some super fun post cards like these so they can write home.
Be sure to leave valuables at home too!!
Pack a copy of the list
This is so they can check off everything as they pack to come home. This will help them make sure they have gathered everything they arrived with & raise a red flag if they forgot something! (providing they actually go through the list) 🙂
……and finally …..
Don’t stress! It’s going to be a great experience!
Join the Mabelhood community on Facebook, Twitter, Google+ & Instagram!
Sign up for free newsletters too – a fun & reliable source for all things mom-related!
Mabel’s Labels is offering a chance to receive 15 – 50% or free item coupons!
Opportunity opens on May 22, 2015 and closes June 22, 2015
By signing up for the Mabel’s Labels Newsletter and completing one additional social share, you will be given a one-time use coupon code. Go to Mabelslabels.com to find out which discount you got!
Hurry up! Grab your code & pick up your own custom labels!
Not going to camp this summer? How about some fun activities they can do at home!
To see where I am linking today- visit HERE

Orange Quick Bread
Cooking with extracts makes it easy to add great flavors to your food. Like this simple & easy Orange Quick Bread. Orange extract replaces orange zest in this recipe & gives a fabulous orange flavor.
Orange Quick Bread
This bread is so wonderfully sweet with that great citrus orange flavor. My family loved having this on the side of their yogurt for breakfast. However it makes a great dessert with a scoop of vanilla frozen yogurt on top too.
Orange Quick Bread
Orange Quick Bread
Ingredients
- 1-1/2 cups all-purpose flour
- 1 tsp baking powder
- 1/2 tsp salt
- 2 eggs
- 1 cup milk
- 1/2 cup vegetable oil
- 1 cup granulated sugar
- 1/2 cup white chocolate chips
- 1 tsp vanilla
- 1/2 tsp orange extract
Glaze
- 1 cup confectioners sugar
- 1 tbsp milk
- 1/8 tsp orange extract
Instructions
- Preheat oven to 350
- Spray loaf pan with cooking spray & set aside
- Combine flour, salt, sugar, baking powder in mixer bowl
- Add in eggs, milk, oil, vanilla & extract & mix to combine
- Fold in white chocolate chips
- Transfer to prepared pan
- Bake 35-40 minutes - watching closely in the last 5 minutes or so as ovens vary.
- Remove when toothpick test in the center is clean
- Cool on wire rack completely before adding glaze
Prepare Glaze
- Whisk all ingredients together & pour over bread
- Enjoy!
Be sure to check out all these other great Orange recipes being shared today!
Orange Quick Bread | White Chocolate Orange Truffles | Chocolate Orange Flourless Torte
Star Wars Orange Chocolate Cremes | Orange Creamsicle Muffins
DIY Orange Creamsicles | Orange Pineapple Fluff Cake
Want More great recipes?
Lavender & Honey Ice Cream
Lemon Infused Sugar
To see where I am linking today- visit HERE
Peanut Butter Seven Layer Bars : Yummy Bar Recipes
Yummy Bar Recipes are the name of the game! Are you ready for more? These super yummy Peanut Butter Seven Layer Bars are the perfect blend of peanut butter & coconut in a bar – made just for the peanut butter bash.
I am always looking for a recipe challenge. So when the AWESOME Rebecca asked me to join in on the Peanut Butter Bash monthly challenge – I was all in. I love working with peanut butter & even better to try new ingredients along with it. So when the word was out that the secret ingredient for June would be coconut – I was stoked. I love coconut & will find an excuse to add it to many many things. You name it, drinks, main dishes, sides & desserts – coconut is my thing all the time. This go around I made these Peanut Butter Seven Layer Bars to add to my Yummy Bar Recipes list & they are SOOOOOOO GOOD. Can you pass up a seven layer bar? I know I can’t.
These are typically made with butterscotch or white chocolate in this house. So making the swap to peanut butter chips was a great change. Then adding the Rolos on there for not only added chocolate but the caramel too. DIVINE!!! These may be our new favorite way to enjoy seven layer bars. The hub looked at me worried as he tried one on his way out the door for work (yes for breakfast) & he says “I’m going to be 700 lbs if you don’t change what you blog about!” Sorry babe – it’s what I love to do best!
Peanut Butter Seven Layer Bars : Yummy Bar Recipes
Ingredients
- 3/4 cup of graham cracker crumbs
- 1/4 C melted butter
- 2/3 of a 14 ounce can sweetened condensed milk
- 1/2 C semi sweet chocolate chips
- 1/2 C peanut butter chips
- 2- Rolo candies
- 1 C sweetened shredded coconut
Instructions
- Preheat your oven to 350 degrees.
- Place graham crackers into food processor -Grind them up into crumbs
- Add melted butter -Stir it in with a fork
- Line an 8x8 pan with parchment
- Pour the crumbs & press flat into the bottom of it.
- Sprinkle on semi sweet chocolate chips, peanut butter chips, Rolo candies & coconut.
- Add can of sweetened condensed milk as evenly as possible over the top
- Bake 25-30 minutes or until it is bubbly and the edges are golden brown.
- Remove from oven & cool the bars completely then cut and serve.
- Enjoy!
Check out all the other FABULOUS peanut butter & coconut combos happening today!!
If you want to know more or join in on the monthly peanut butter fun – visit our Facebook Group
Looking for more Yummy Bar Recipes?
White Chocolate Macadamia Nut Blondies
To see where I am linking today- visit HERE
5 Easy Ways to Stay Hydrated
This post is part of a social shopper marketing insight campaign with Pollinate Media Group® and Brita, but all my opinions are my own. #pmedia #BritaOnTheGo
One thing I learned after 12 years living in the desert, Hydration is vitally important! So today I’m sharing these 5 Easy Ways to Stay Hydrated. Following these tips makes it simple to get your recommended daily water intake.
Before moving here to North Idaho we spent 12 long years living in the Nevada desert. It was HOT – like 100+ days over 100 degrees kind of hot. So learning to stay hydrated had to become a way of life for us. I changed how I do things & it’s now a habit that is still with me even though we have been here in this cooler climate for nearly 3 years. It doesn’t matter the season, dehydration is bad news & so easily avoidable.
Some Effects of Dehydration
muscle cramps
low blood pressure
kidney failure
nausea & vomiting
cold sores
dizziness
headaches
weight gain
hunger (people mistakenly think they are hungry – when it’s actually thirst)
& even tired eyes
Have any of those symptoms lately?? Get hydrated & see how great you can feel!!
1. Drink infused water
Adding a little flavor to your water can really get your intake up. Some like to add some cut fruit to their glass or water bottle. I like to add a couple drops of my lemon & grapefruit essential oils to my bottle.
2. Make hydration a habit!
As soon as I get up in the morning I like to have my first 8 ounces of water. Before I even have my morning coffee or breakfast, I start with water. I make sure I end my day with water too. A full 8 ounces right before I brush my teeth as part of my nightly routine really helps. Every two hours I make sure I’m taking in at least another 8 ounces. One way to make it go faster – use a straw. For me – I can suck down 8 ounces of water with a straw in less than 30 seconds. Drink it out of a glass & it can take far longer. It’s a good way to slam it down & be done with it until your next round.
3. Make hydration Convenient
Get a larger water bottle & carry it around with you all the time. I started with a 16 oz bottle but as soon as the larger, 20+ ounces became available I picked up several. This means less trips to refill & more likely that I will drink more. If it takes me longer to get through a bottle, I can just drink & drink. Instead of having a nearly empty bottle on my desk & ignoring it. That being said- I top it off every time I pass by the sink so I always have enough.
4. Download an App
There are apps out there that will help! My favorite, Carbodroid helps you keep track of your intake to help you reach your daily goals. It has an alarm to remind you every time you need to drink more! Remember that whatever you weigh – you should be drinking half that number in ounces DAILY!
& finally…..
5. Count your ounces
I like to use water bottles with the ounces clearly marked on the side, like this Brita Hard Sided Water Filter Bottle (I picked mine up at Walmart- in the hardware section). It makes it really easy to see just how much I’m taking in. But like I mentioned before- I top off when I pass the sink. So I’m sort of fooling myself into drinking more. Say I drink half the bottle – but then I top off. I usually forget that I had already consumed that half bottle or exactly how many ounces it was before I topped off. So then when I watch the clock & see that another 2 hours has passed & I need to drink – I’m starting off with more from that point. So I’m usually taking in far more than I’m actually counting. That’s what you want – not the other way around.
I particularly like using the Brita Hard Sided Water Filter Bottle because it’s so nice to have clean, filtered water at all times. I don’t have to worry about contaminants in what I’m drinking & it’s reusable too- no matter where I am.
So there you have it -drink, drink, drink!!!!!
It’s easier than you think!
For more info on the Brita Hard Sided Water Filter Bottle visit them on Pinterest | Facebook | Instagram | Twitter
Looking for some recipes to help with hydration?
To see where I am linking today- visit HERE
Coastal Pallet Art
This simple Coastal Pallet Art is the prefect way to spruce up your space with little beachy feel. Comes together in less than 30 minutes. Easy DIY craft.
So this is what I started out with – a small piece of the portion of the pallet we used to make the Industrial Cart Coffee Table. I finished dismantling it, which left me with just the 3 boards to work with.
I used rope & tied them together by just wrapping & knotting.
Then I drilled a couple shims on the back for stability. I then added a string on the back to hang it. I then flipped it over & attached the seashell.
It adds the perfect little bit of beach to the room.
Sooooo easy!
Looking for more easy DIY projects?
Kids Beach Bath
To see where I am linking today- visit HERE
Peppermint Cake Mix Brownies : Yummy Bar Recipes
It’s potluck season, which means Yummy Bar Recipes are the name of the game. These Peppermint Cake Mix Brownies are another one of my Yummy Bar Recipes that are also an easy dessert. Just 4 ingredients & you have a delicious treat that you can bring to any party. But you better make a double batch because with just 16 brownies in this recipe, they will be gone in a flash.
Have you ever been craving a brownie so bad that you actually head to the kitchen to make some? Then when you get there you find that you not only don’t have a mix on hand, but that you are also out of cocoa so you can’t even make them from scratch. Yeah – sadly, this happens to me often. I seem to go through certain ingredients & they do make their way on to the grocery list. But somehow don’t make their way into my cart.
One thing I always have on hand though is cake mix. Since it’s great for adding to other recipes beyond making a cake, I have a lot of them. So in doing a little research I found that by changing the measurements of the ingredients you add to a mix, you can actually make brownies with it. WhoooHoooo! Did you know that? I was pretty excited to learn this & had to give it a try myself. These wonderfully delicious brownies were the result.
Peppermint Cake Mix Brownies : Yummy Bar Recipes
Ingredients
- 1 box chocolate fudge cake mix
- 1/3 cup vegetable oil
- 2 eggs
- 1 cup mini Peppermint Patties
Instructions
- Preheat oven to 350 degrees
- Line 9" square pan with parchment & set aside
- Combine cake mix, oil & eggs in mixer bowl & stir at a low speed until fully combined & smooth
- Transfer batter into prepared pan & press into an even flat layer
- Top with peppermint patties & press in slightly
- Bake 25-30 minutes or until toothpick test comes out clean
- Cool completely on wire rack before cutting & serving
Yummy Bar Recipes?
To see where I am linking today- visit HERE
Planning a White Wine Party
This post brought to you by Sonoma-Cutrer Vineyards. The content and opinions expressed below are that of Kleinworth & Co..
It’s that time of year when it’s great to host some friends for a relaxing backyard gathering. Have you ever hosted a wine party? This summer we plan on gathering in our backyard, serving some great food & enjoying some delicious dessert & Sauvignon Blanc in the warmth of the evening. If you are Planning a White Wine Party, here’s some tips to help you make your party a success. From how much you need to what to pair, it’s all here.
So to start – who should you invite?
Invite friends and even new acquaintances. You can use the party to engage in great conversations surrounding wine, including history, cuisine and travel.
How many to invite & how much to serve?
How many people you invite is entirely up to you. However I like to keep it more intimate & invite just a few couples over. That way it keeps the cost down for both wine & food and it allows for more engaging conversation. Plan on serving 2-3 ounces of each wine per guest, one bottle will serve 8-10 guests.
Wines
Be sure to bring your wine to proper temperature before the party so it’s ready to go. (for whites it’s 55 degrees) Also, be sure to have a few extra bottles on hand so your guest can leave with a bottle of their favorite flavor of the evening.
Since white wine pairs so well with citrus &fruit, here are some of my favorite recipes I plan on sharing.
[metaslider id=28138]
So what wines do I suggest you serve?
Sonoma-Cutrer – known for their world-class Chardonnay and Pinot Noir Wines – are introducing an exclusive Winemaker’s Release: Sauvignon Blanc. Sauvignon Blanc is a uniquely special release. This small production offering represents the first-time Sonoma-Cutrer has created a wine outside of the two varietals for which we are known – Chardonnay and Pinot Noir!
This Sauvignon Blanc is classic Russian River Valley. It is crafted in a bright and vibrant style that showcases aromas of passion fruit, lychee, lime and white peach. The palate is sleek and crisp with tropical flavors of guava and passion fruit that mingle with citrus notes of grapefruit and lime! For a bright and clean, citrus laced finish!
Sonoma-Cutrer has been producing the finest quality wines since it opened as a vineyard company in 1973. Its foundation is built in the hillsides and rocky foothills in the region recognized as the Sonoma Coast Appellation – this region experiences long, even growing seasons thanks to the cool, foggy coastal climate. In the 70’s, the company planted several different grape varieties and virtually overnight Sonoma-Cutrer’s Chardonnay grapes had gained a reputation for exceptional quality and were in high demand by many premium wineries.
Did you know that Sonoma-Cutrer has a wine club that offers exclusive wines and 3 shipments/year to members.
Join today and find some of your own new favorite wines.
They also have a Winery Tour and tasting in Sonoma. How exciting is that??
Find out more about Sonoma -Cutrer on Sonoma-Cutrer Facebook , @SonomaCutrer & Sonoma-Cutrer Instagram
So there you go. I hope this helps you plan an amazing white wine party!
Be sure to check back in with me in a couple weeks to see how the party went! I’m so excited!
Cheers!
To see where I am linking today- visit HERE
Classic Vanilla Frozen Yogurt
This Classic Vanilla Frozen Yogurt is so incredibly simple to make. With just 5 ingredients & a few minutes prep you have yourself a light & cool dessert. It’s my absolute favorite summertime recipe that I make multiple times a week.
There’s something about a classic vanilla. Whether it be cake or ice cream or in this frozen yogurt. I love a good vanilla every now & again. It goes great with everything – I like to keep it on hand almost all summer long.
When I realized that we were enjoying cool treats nearly every night through the hot months I started tweaking our favorite homemade recipes to make them lighter & better for us. Don’t get me wrong. I can really go over the top when it comes to a dessert. Did you see my Ultimate Ice Cream Float? Yeah – I can really do it up- unfortunately my waistline can’t handle all that so frequently. So for everyday I like to keep it simple. Which is why this Classic Vanilla Frozen Yogurt is a favorite.
It’s so easy – no churn… with just 5 minutes of prep – it’s ready to enjoy in about 4 hours.
Classic Vanilla Frozen Yogurt
Ingredients
- 1 container 16 oz low fat vanilla yogurt
- 2 tsp vanilla extract
- 1 pkt low fat french vanilla pudding mix
- 1 can 14 oz sweetened condensed milk
- 1/2 cup low fat milk
Instructions
- Combine all ingredients in mixing bowl & beat until well combined.
- Transfer to air tight container & freeze at least 4 hours to firm up.
How about some more of our favorite cool treats?
White Chocolate Custard Frozen Pops
To see where I am linking today- visit HERE
20 DIY Console Tables
If you are looking for some inexpensive ways to fill a challenging space, these 20 DIY Console Tables are sure to inspire you. Easy & creative DIY Projects are the name of the game here. I’m always looking for ways to think outside the box when it comes to my decorating challenges. I love taking something that others would consider scrap & putting it to good use. Like my Pallet Console Table, which has been my most popular DIY post to date. I can see why, they are so handy. Check out all these AMAZING DIY Console Tables made by some incredibly resourceful & talented people.
Back from the days when we had very little & had to make due with what we had, I never lost that sense that everything can still serve a purpose. My great grandmother was like that. When she passed we found so many brand new items (gifts given to her with the tags still on) because she didn’t feel she had worn out her other things enough to warrant breaking out something new. She was resourceful & clever in her ways – I always admired that about her & try to continue passing that mindset on to my kids. I guess that’s why I was inspired to build my table in the first place.
You can see all 20 Budget & Beautiful DIY Console Tables on my Console Tables Board over at HomeTalk
I bet you didn’t know that you can find me on HomeTalk! It’s such a fun place for diy inspiration.
Looking for more great DIY projects for the home?
To see where I am linking today- visit HERE