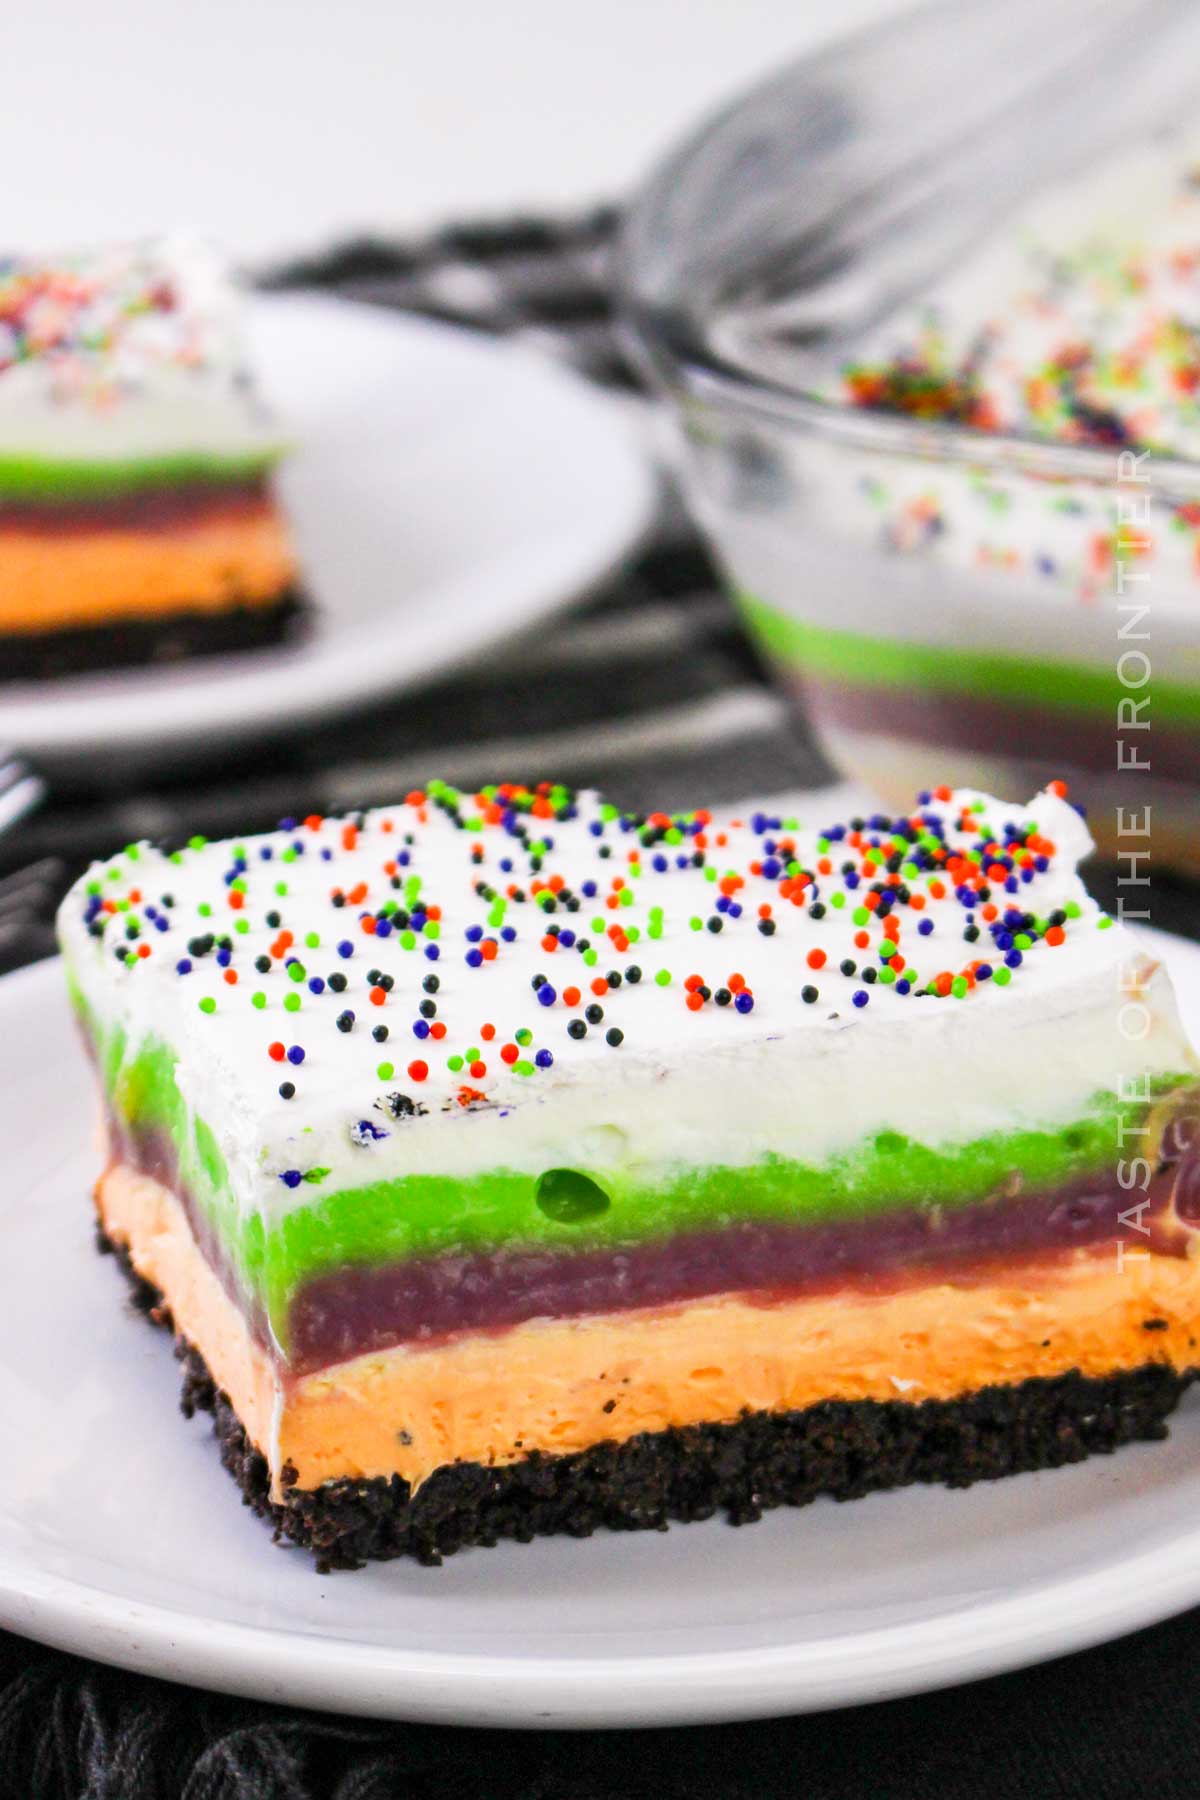
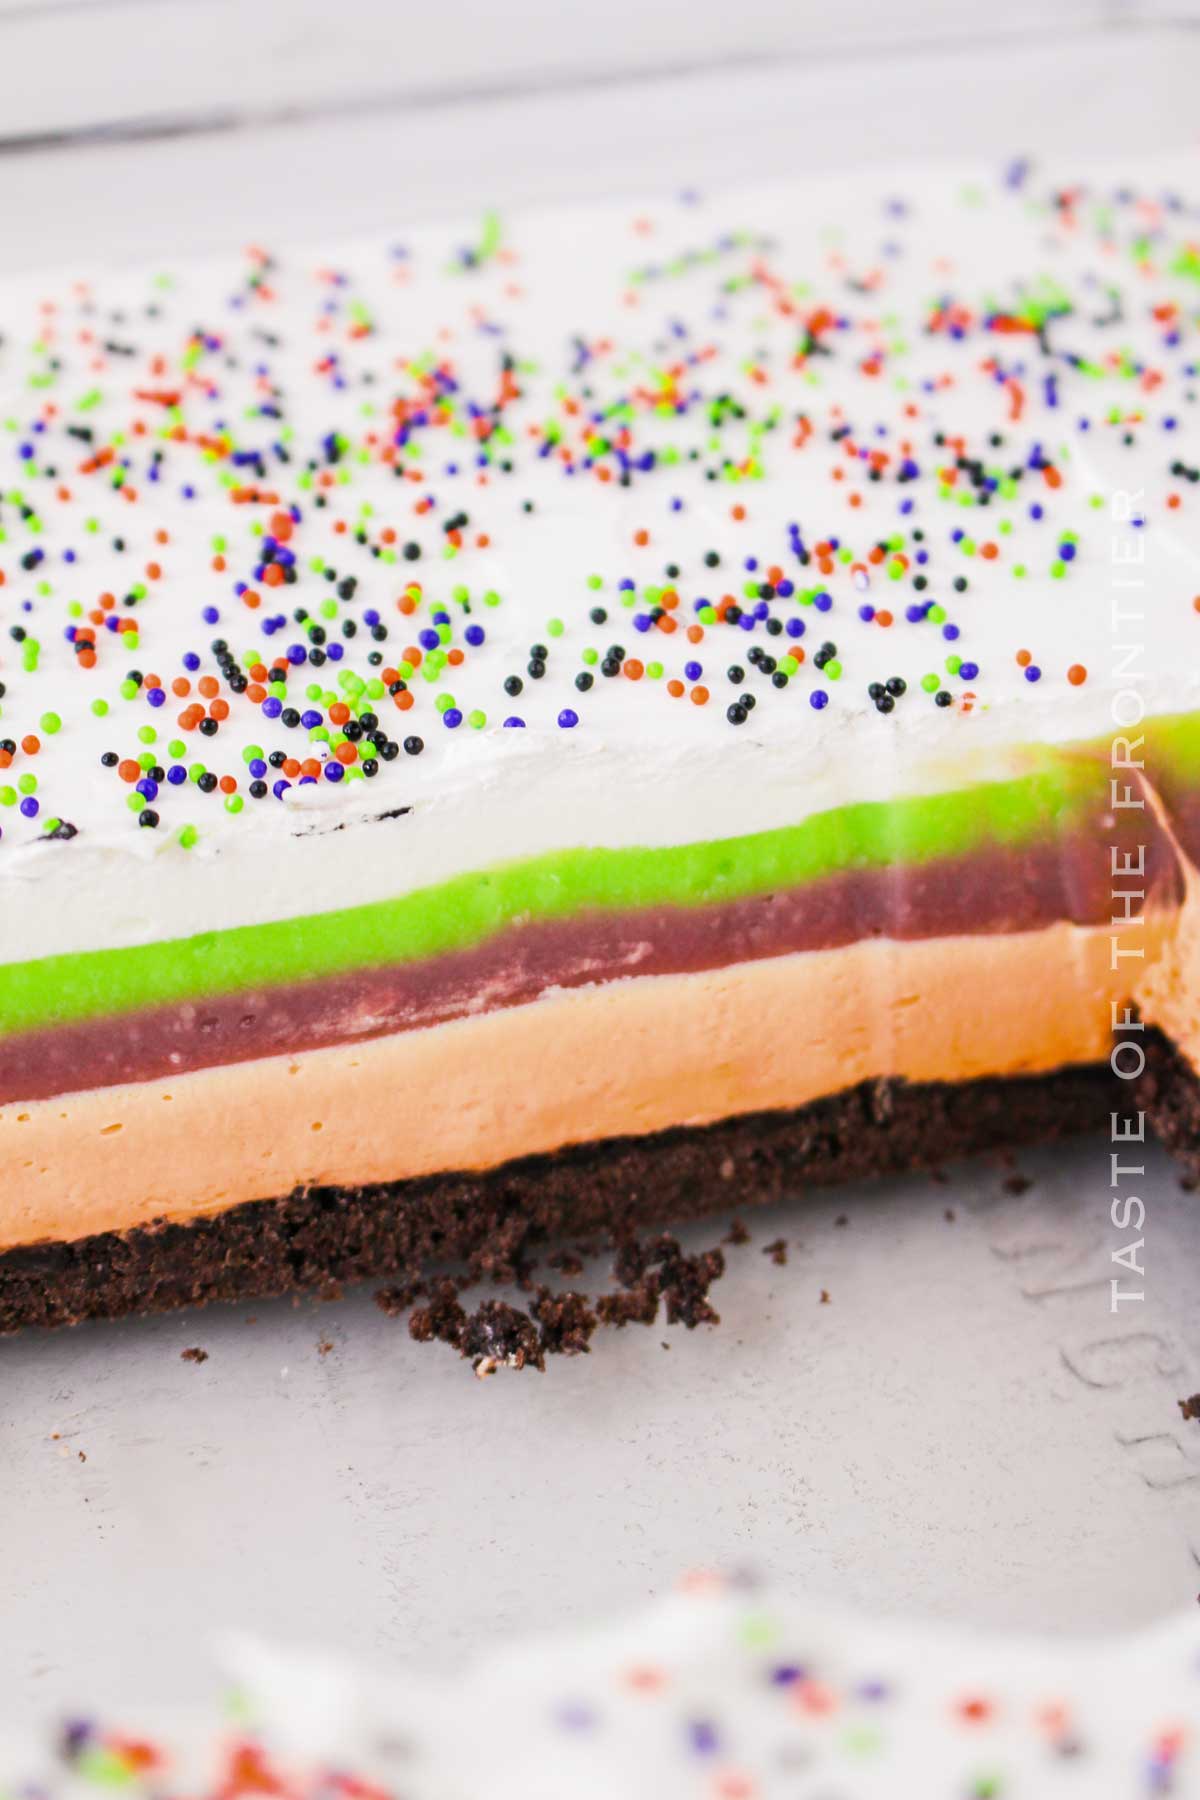
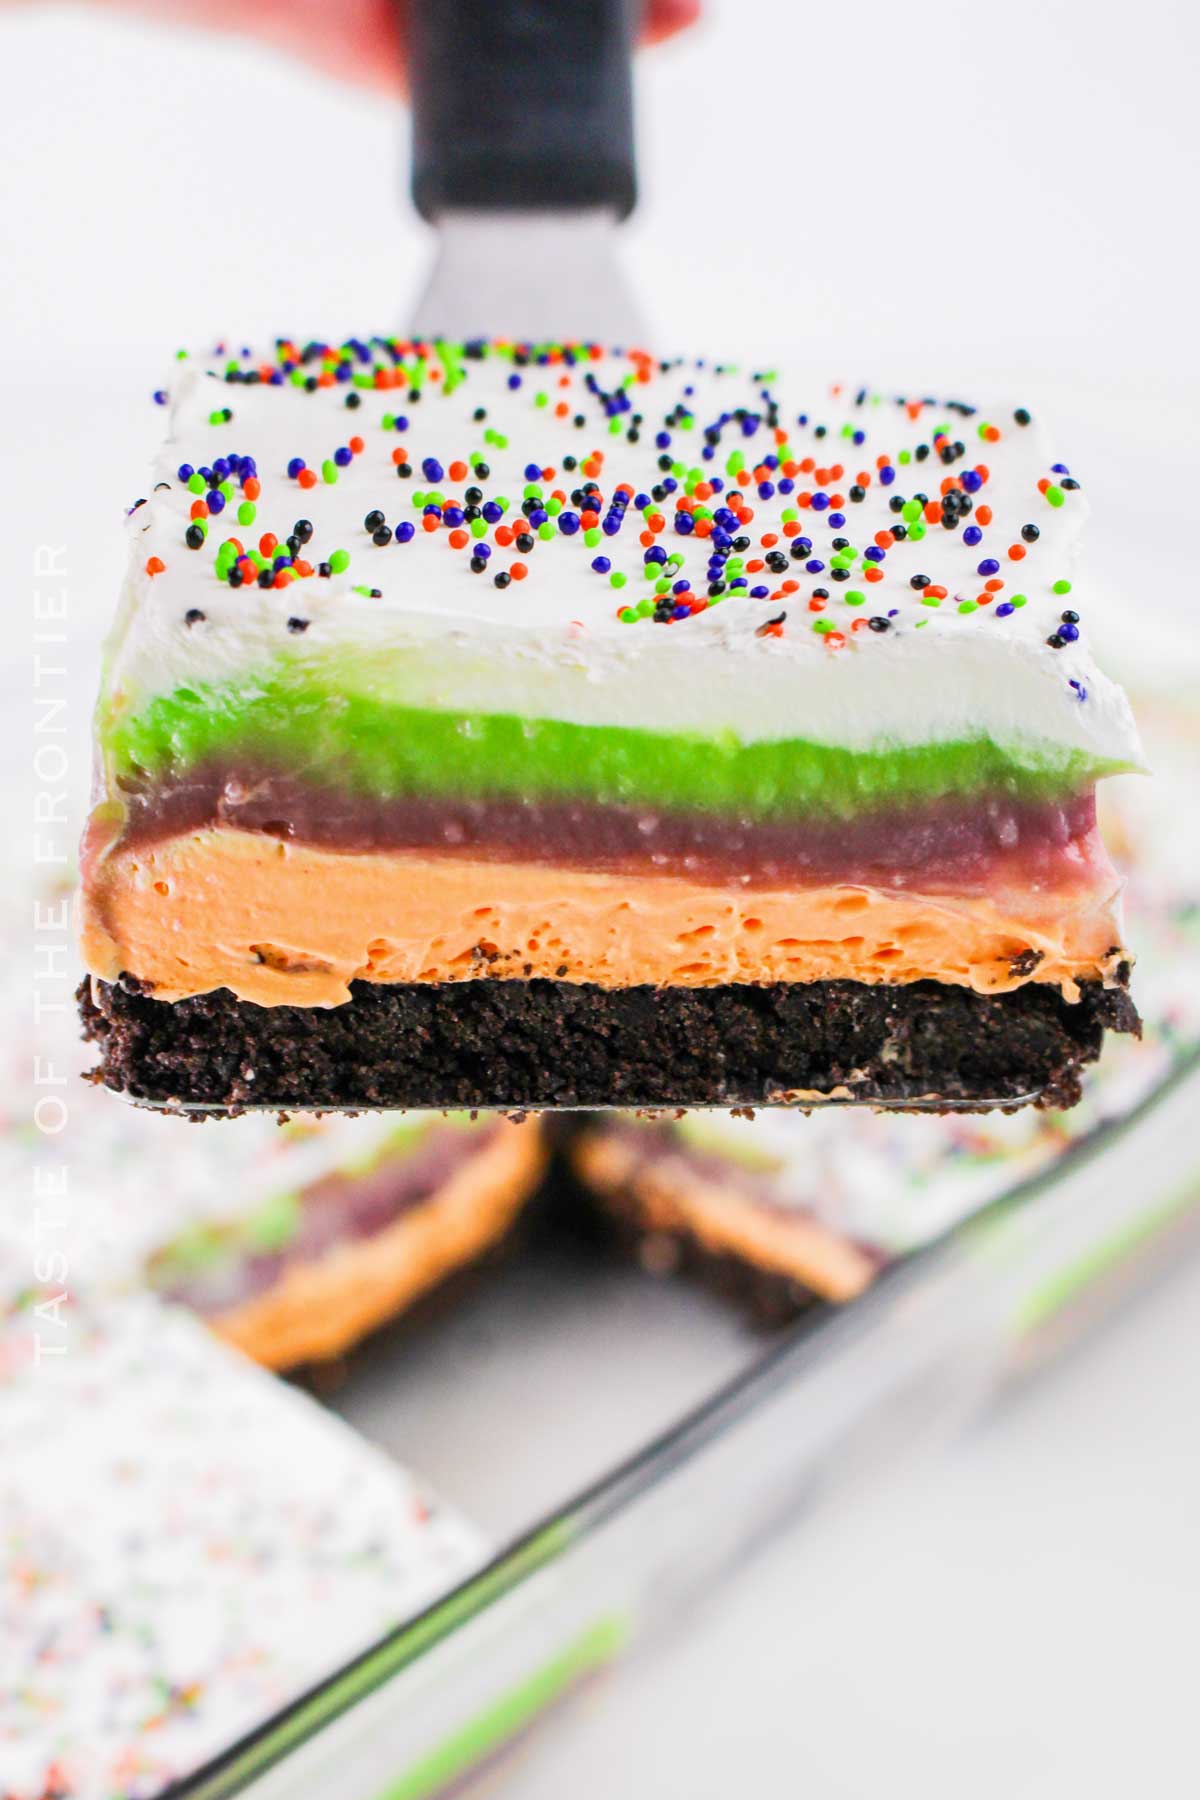
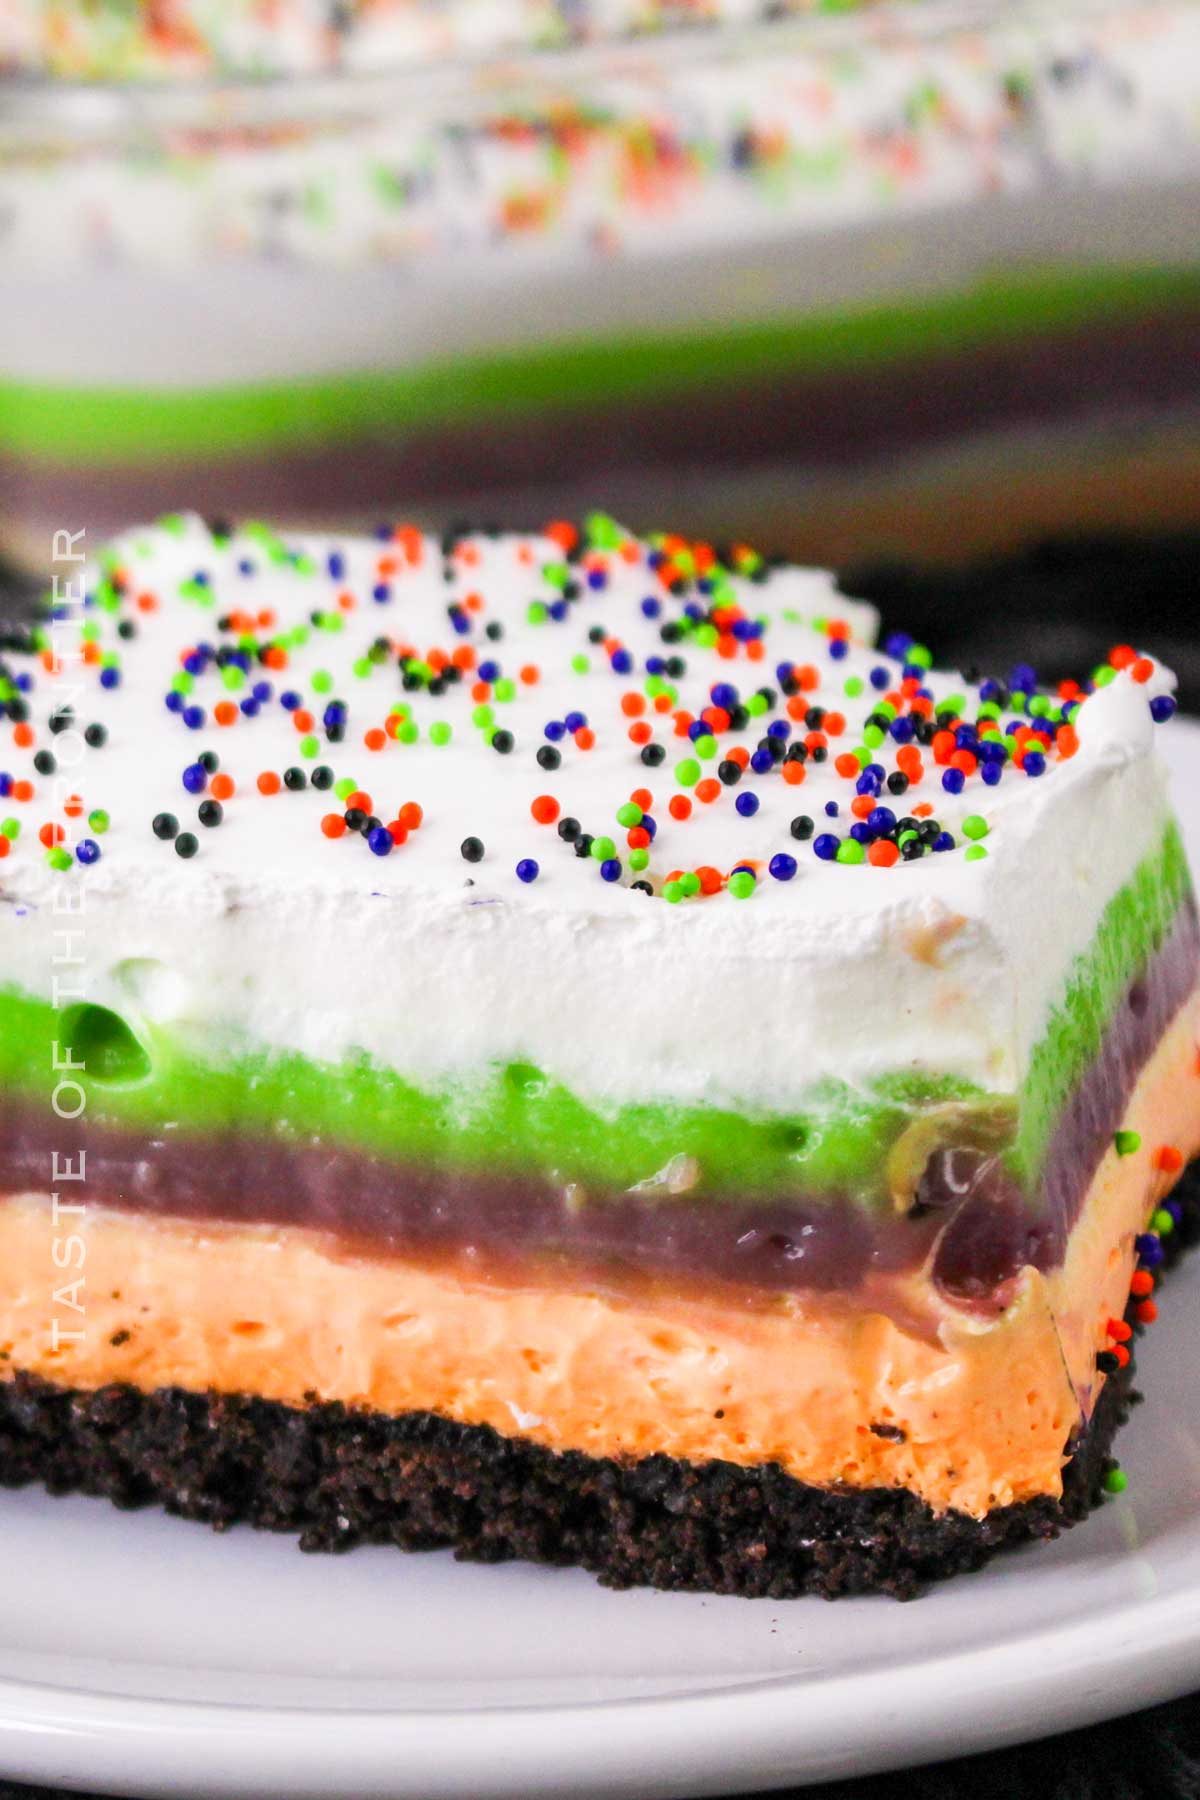
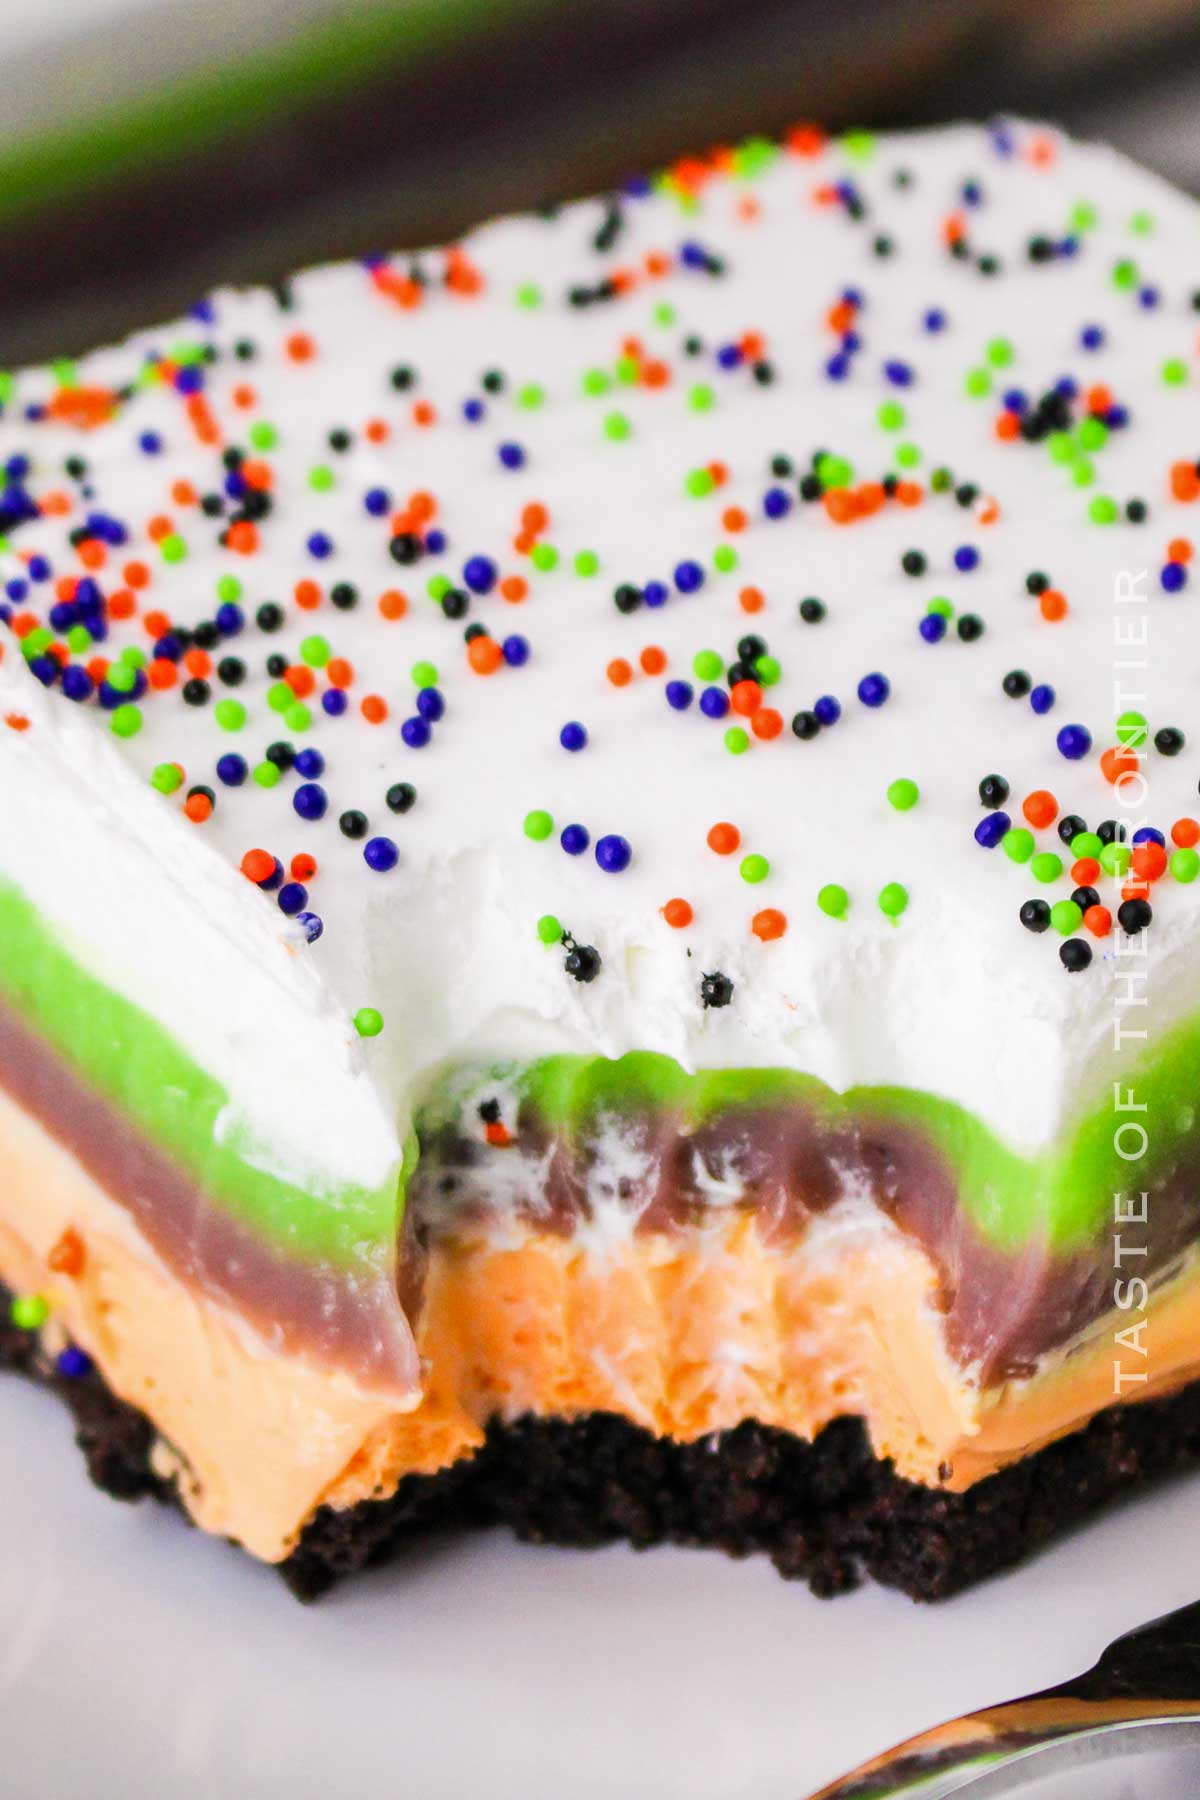
This colorful Halloween Lush is a visually striking dessert with layers of orange, purple, and green, perfect for adding a festive touch to your spooky celebrations.
It’s a fun and easy no-bake dessert that combines creamy cheesecake layer and fruity layers over a homemade cookie crust for a tasty treat everyone will enjoy.
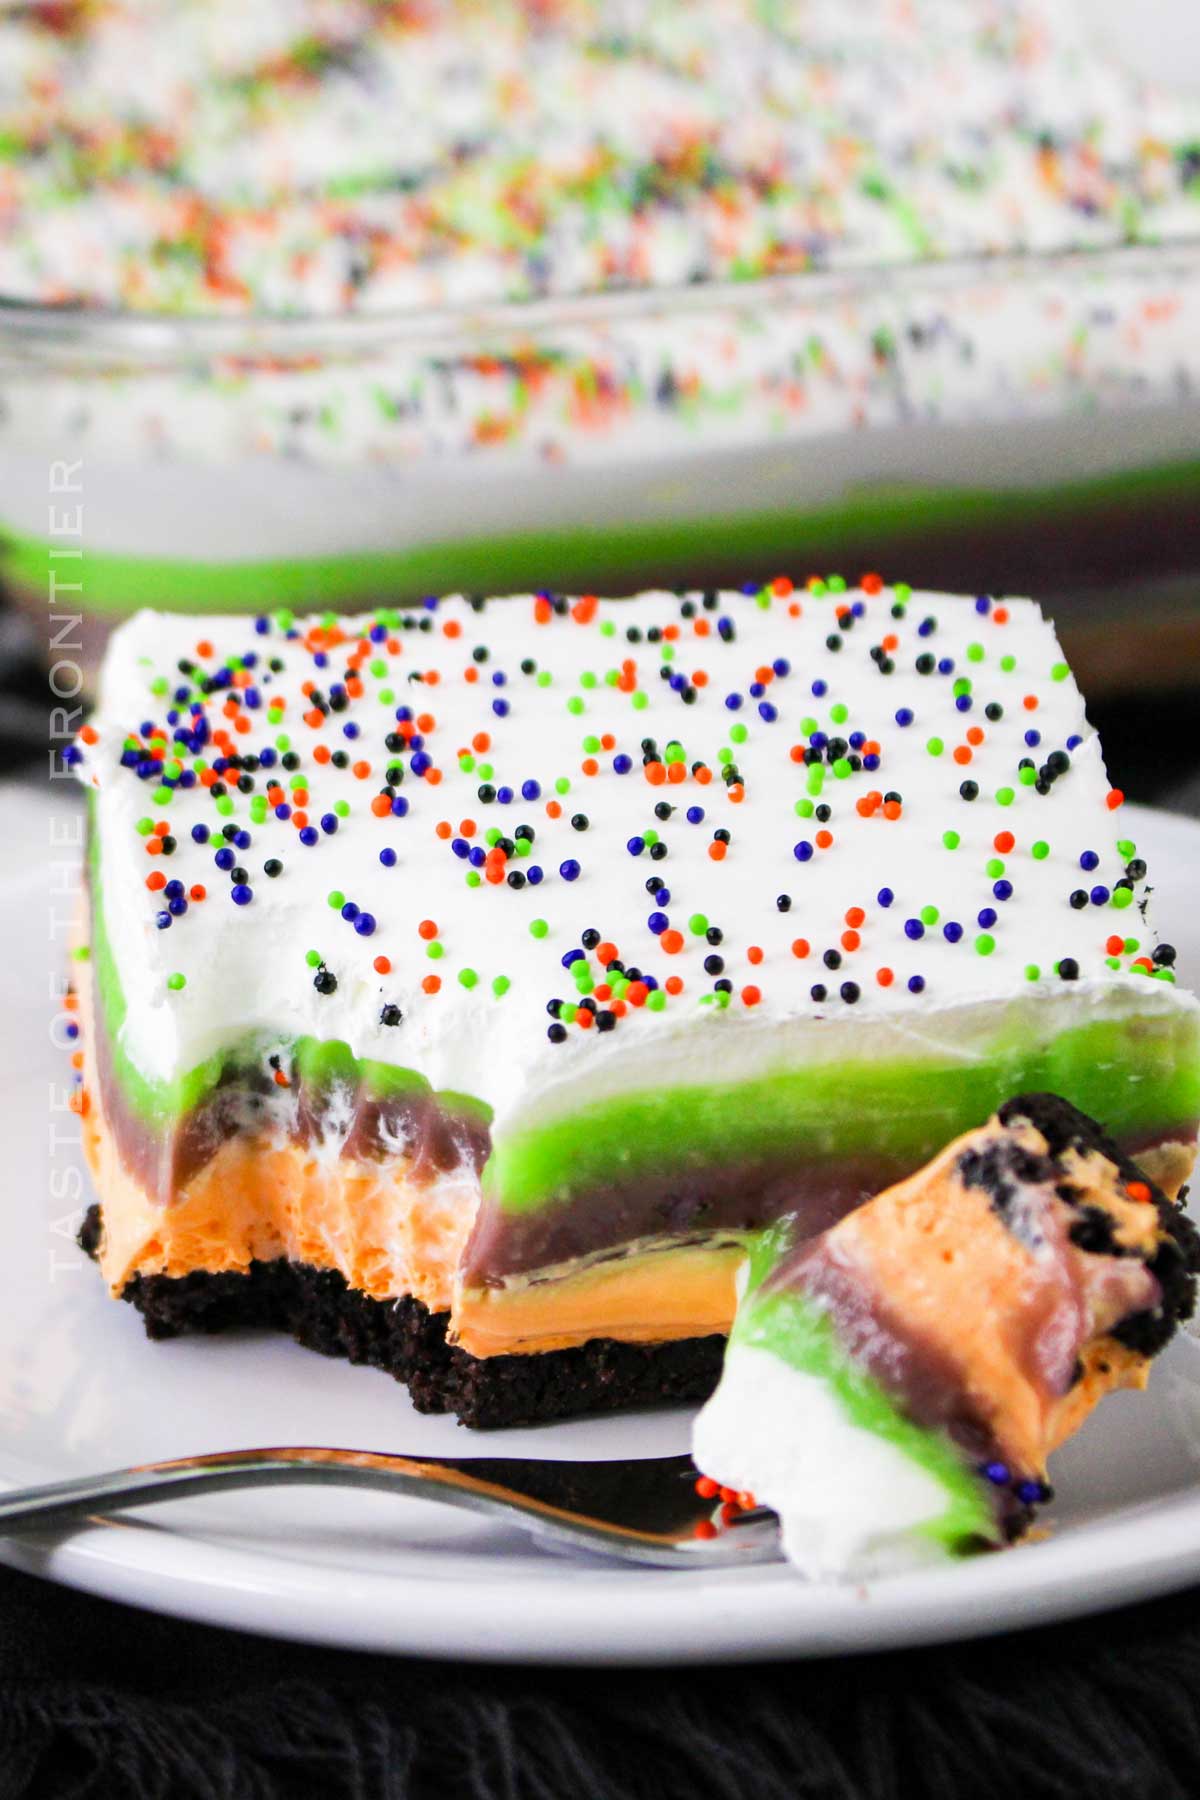
Halloween parties are all about sharing, fun, and dressing up. This delicious dessert is no exception – dressed up in colorful layers hiding vanilla, pistachio, and chocolate flavors.
Why You Should Make This For Halloween
- Delicious no-bake dessert for a Halloween party or potluck. It needs 30 minutes of prep time and can be made ahead. A perfect setup for busy home chefs and a dessert that can feed 12 people.
- Fun and colorful! If you love colors, sprinkles, and layers – this is a perfect dessert for you.
- No gelatin. I rarely use gelatin and for this recipe, I use boxed dry pudding mixes for each pudding layer.
- More layers than in most recipes and extra whipped topping! I like to make my recipes a little different.
What Is Lush Dessert?
Lush is an American no-bake dessert that usually is built of pudding layers over the crumb crust, and topped with whipped cream. Think of a sweet lasagna and you get the idea.
It is a very old-fashioned dessert and yet is it super easy and still delicious!
Lush in cooking and baking has nothing to do with bath time.
Although Lush Halloween collection is spooky, aromatic, and amazing for the skin, I am not talking here about bubble baths, essential oils, shower gel, or their new lip scrubs.
As much as I love their bath products, the OG Lush is about food and, this time of the year – it is all about yummy Halloween treats.
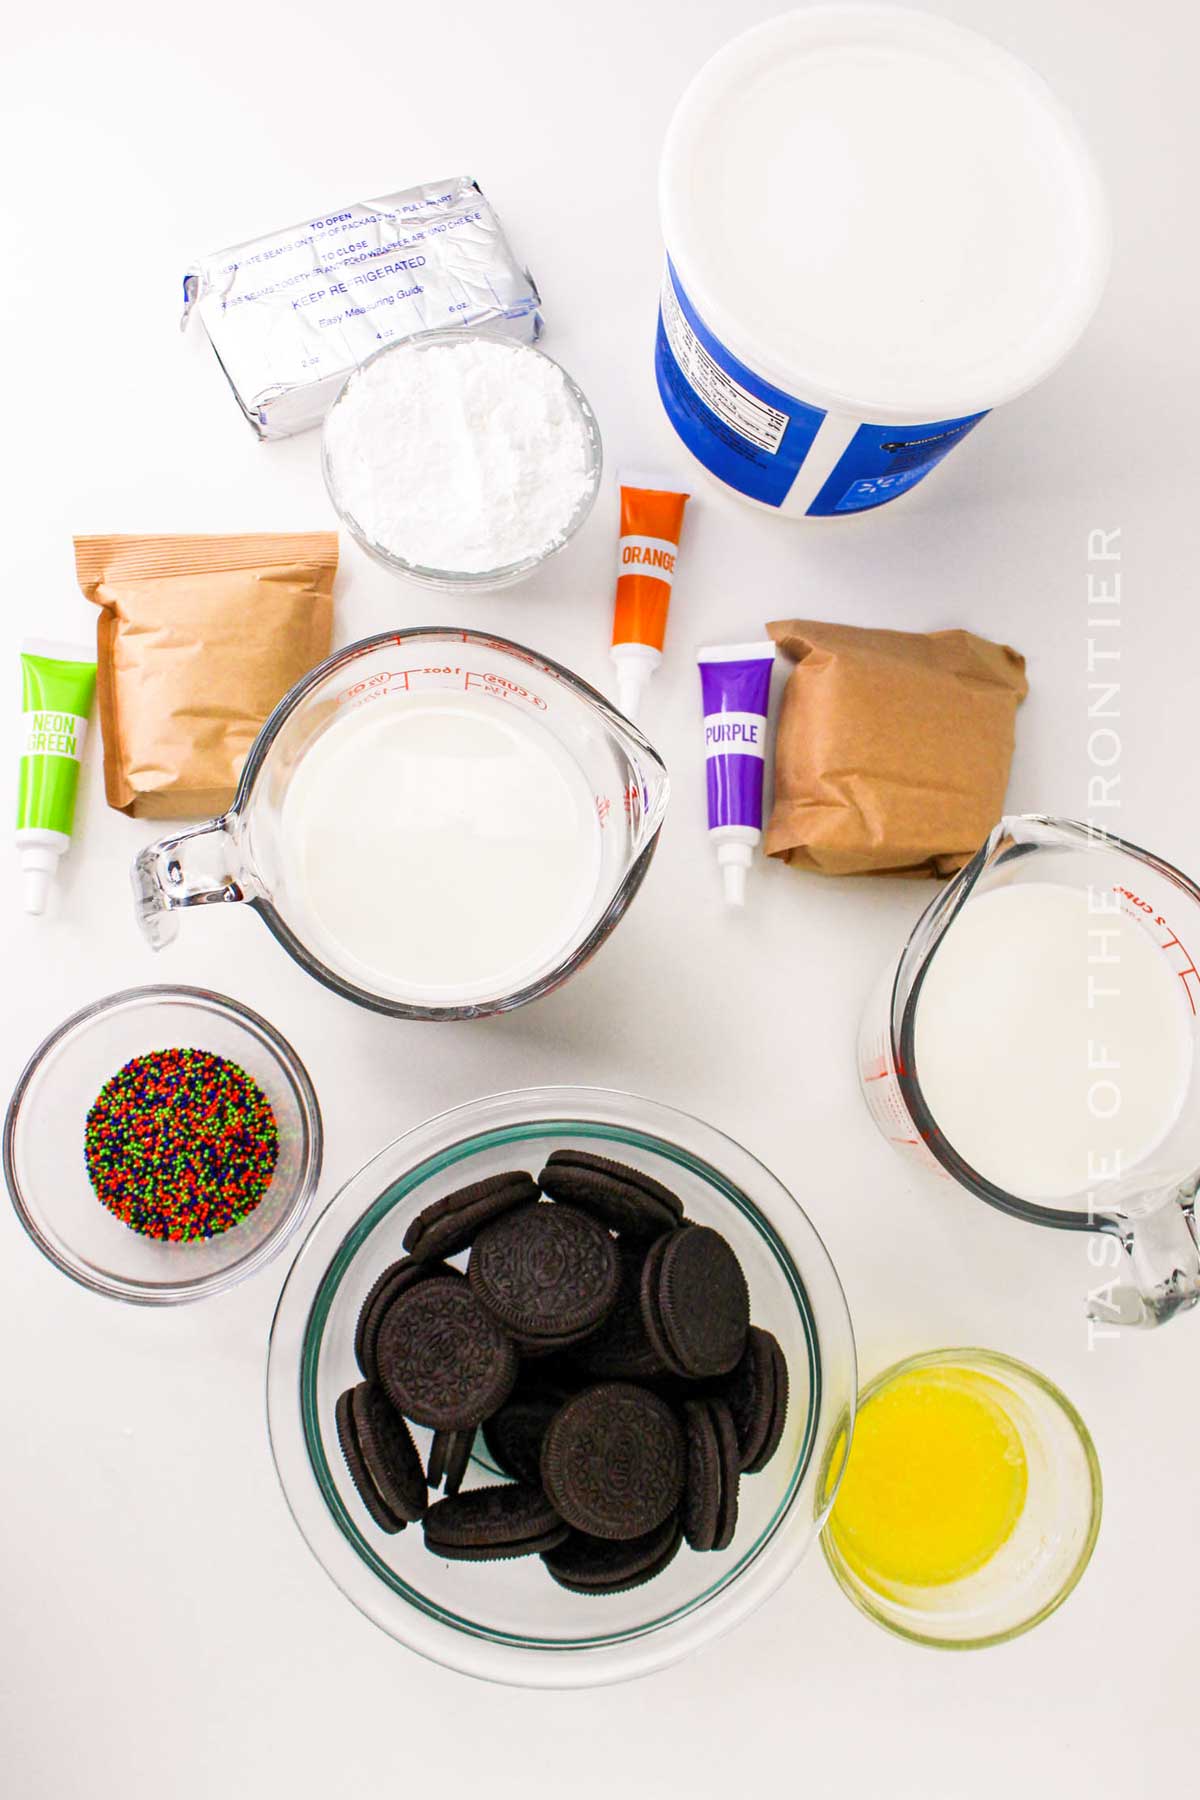
Halloween Lush Ingredients
Cookie Crust
- Chocolate cookies, crushed into crumbs. Any chocolate sandwich cookies will work, Oreo cookies, Graham crackers, or similar.
- Melted butter is best for binding cookies for a crust.
Halloween Colors Layers
- Softened cream cheese is the main ingredient for the orange cheesecake layer.
- Confectioner’s sugar or powdered sugar.
- Whipped topping (we will use it for the layers and for the topping, prepare at least 2 cups)
- Vanilla instant pudding mix for the orange cream cheese layer. Using premade pudding saves us precious time and doesn’t affect the flavors.
- Pistachio instant pudding mix for the green layer to mix the color with the flavor (pistachios are green, I hope you follow my logic…)
- Cold milk. Always use whole milk for baking to make a moist, creamy, and soft texture.
- Food coloring: orange, green color, and purple food coloring.
Topping
- Whipped topping (Cool Whip or homemade)
- Halloween-themed festive sprinkles to decorate. Spooky sprinkles have the same colors: black, green, purple, orange.
Kitchen Equipment
- Food processor or Ziploc bag and + rolling pin
- 9×13-inch baking dish. Pick a dish that has a lid (can even be a casserole dish) to make storage easier.
- Electric mixer, to combine ingredients for each layer and beat the cream cheese.
How to Make Halloween Lush Dessert
1 – Make The Oreo Crust
- In a food processor crush the cookies until crumbs. Crushing cookies in a food processor is the most effective way, but if you don’t own this appliance, don’t worry – use the old-school method. Place cookies in a Ziploc bag and crush them with a rolling pin.
- With an electric mixer combine crushed cookies and melted butter in a medium bowl. Stir to moisten the cookie crumbs.
- Press the mixture into the bottom of the baking dish using your hand, the back of the spoon, or the bottom of the glass.
- Chill in the refrigerator while preparing the other layers.
2 – Orange Cheesecake Layer
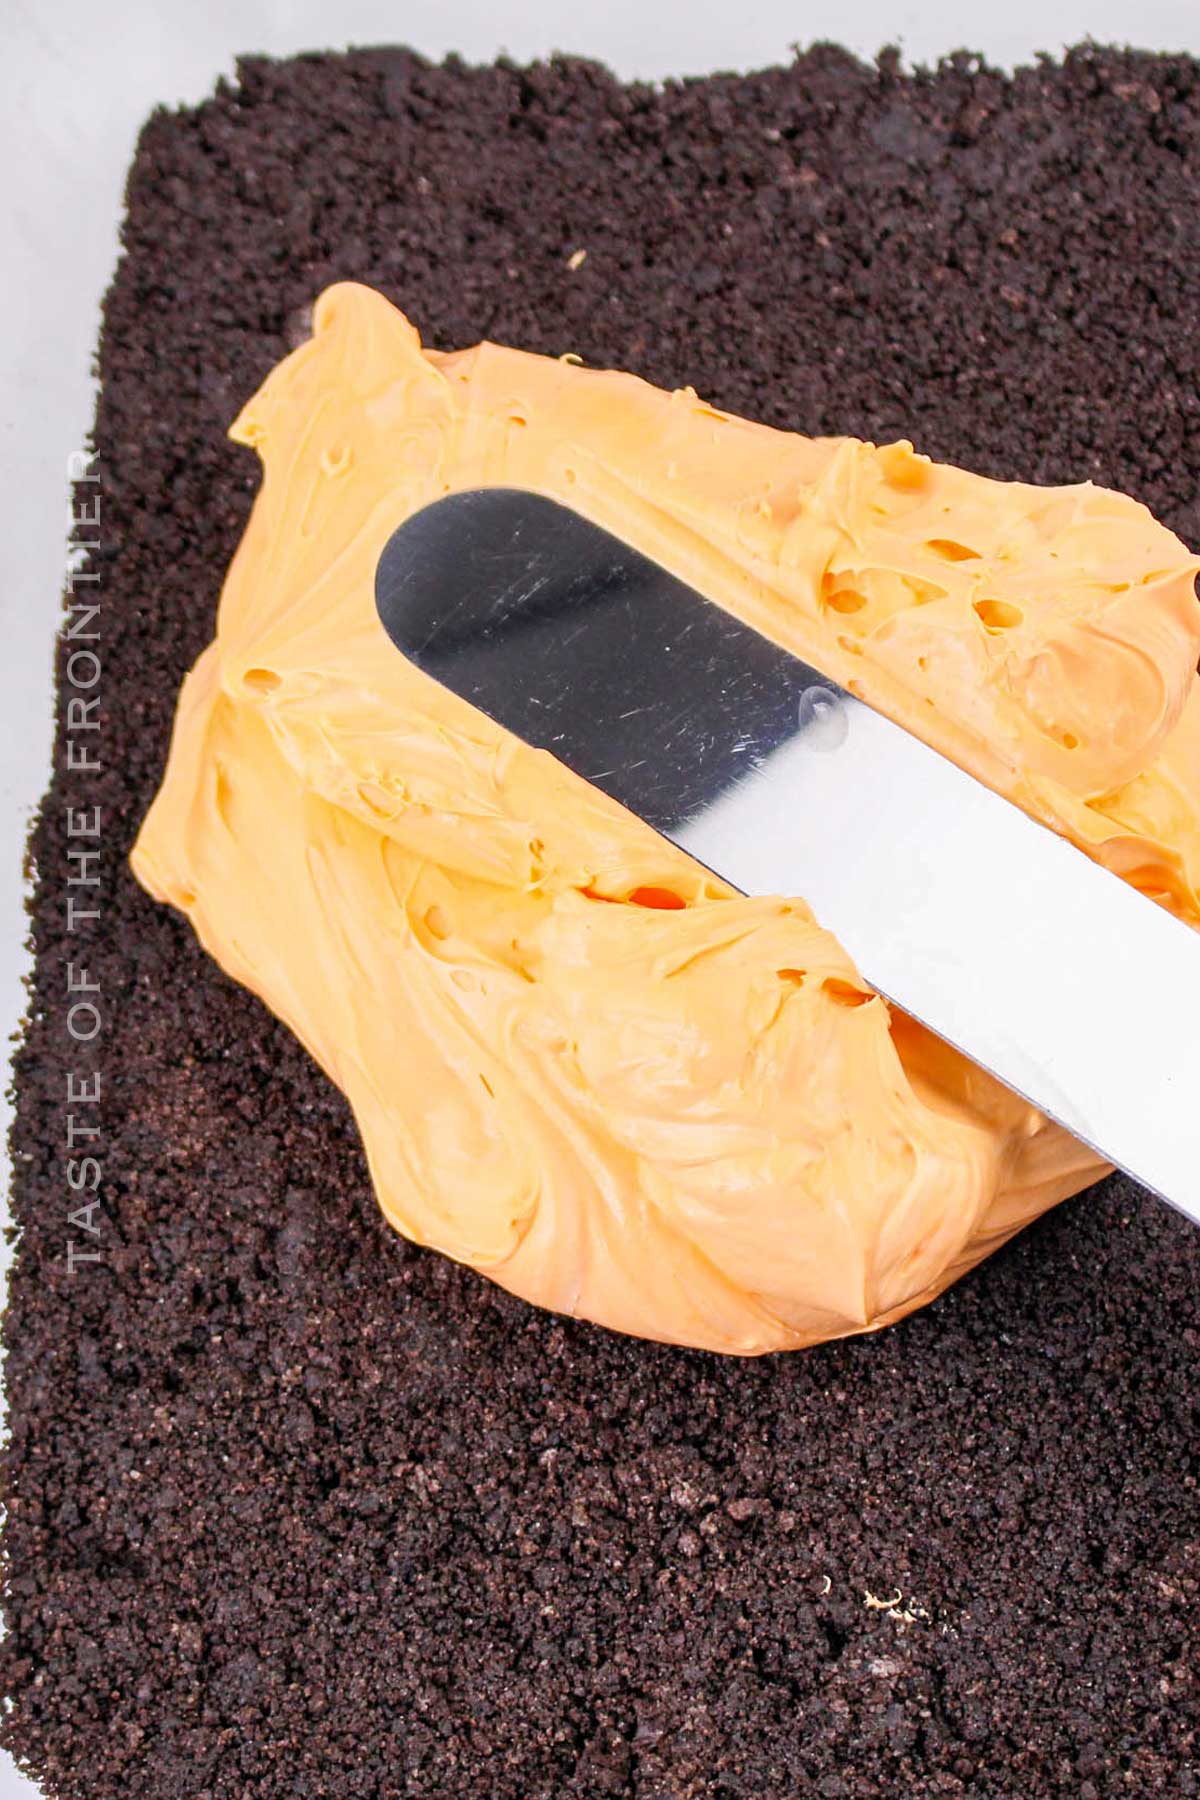
- Beat the softened cream cheese and confectioner’s sugar in a large bowl until smooth.
- Fold in the whipped topping.
- Add orange food coloring and mix until the color is evenly distributed.
- Spread the orange layer over the chilled crust.
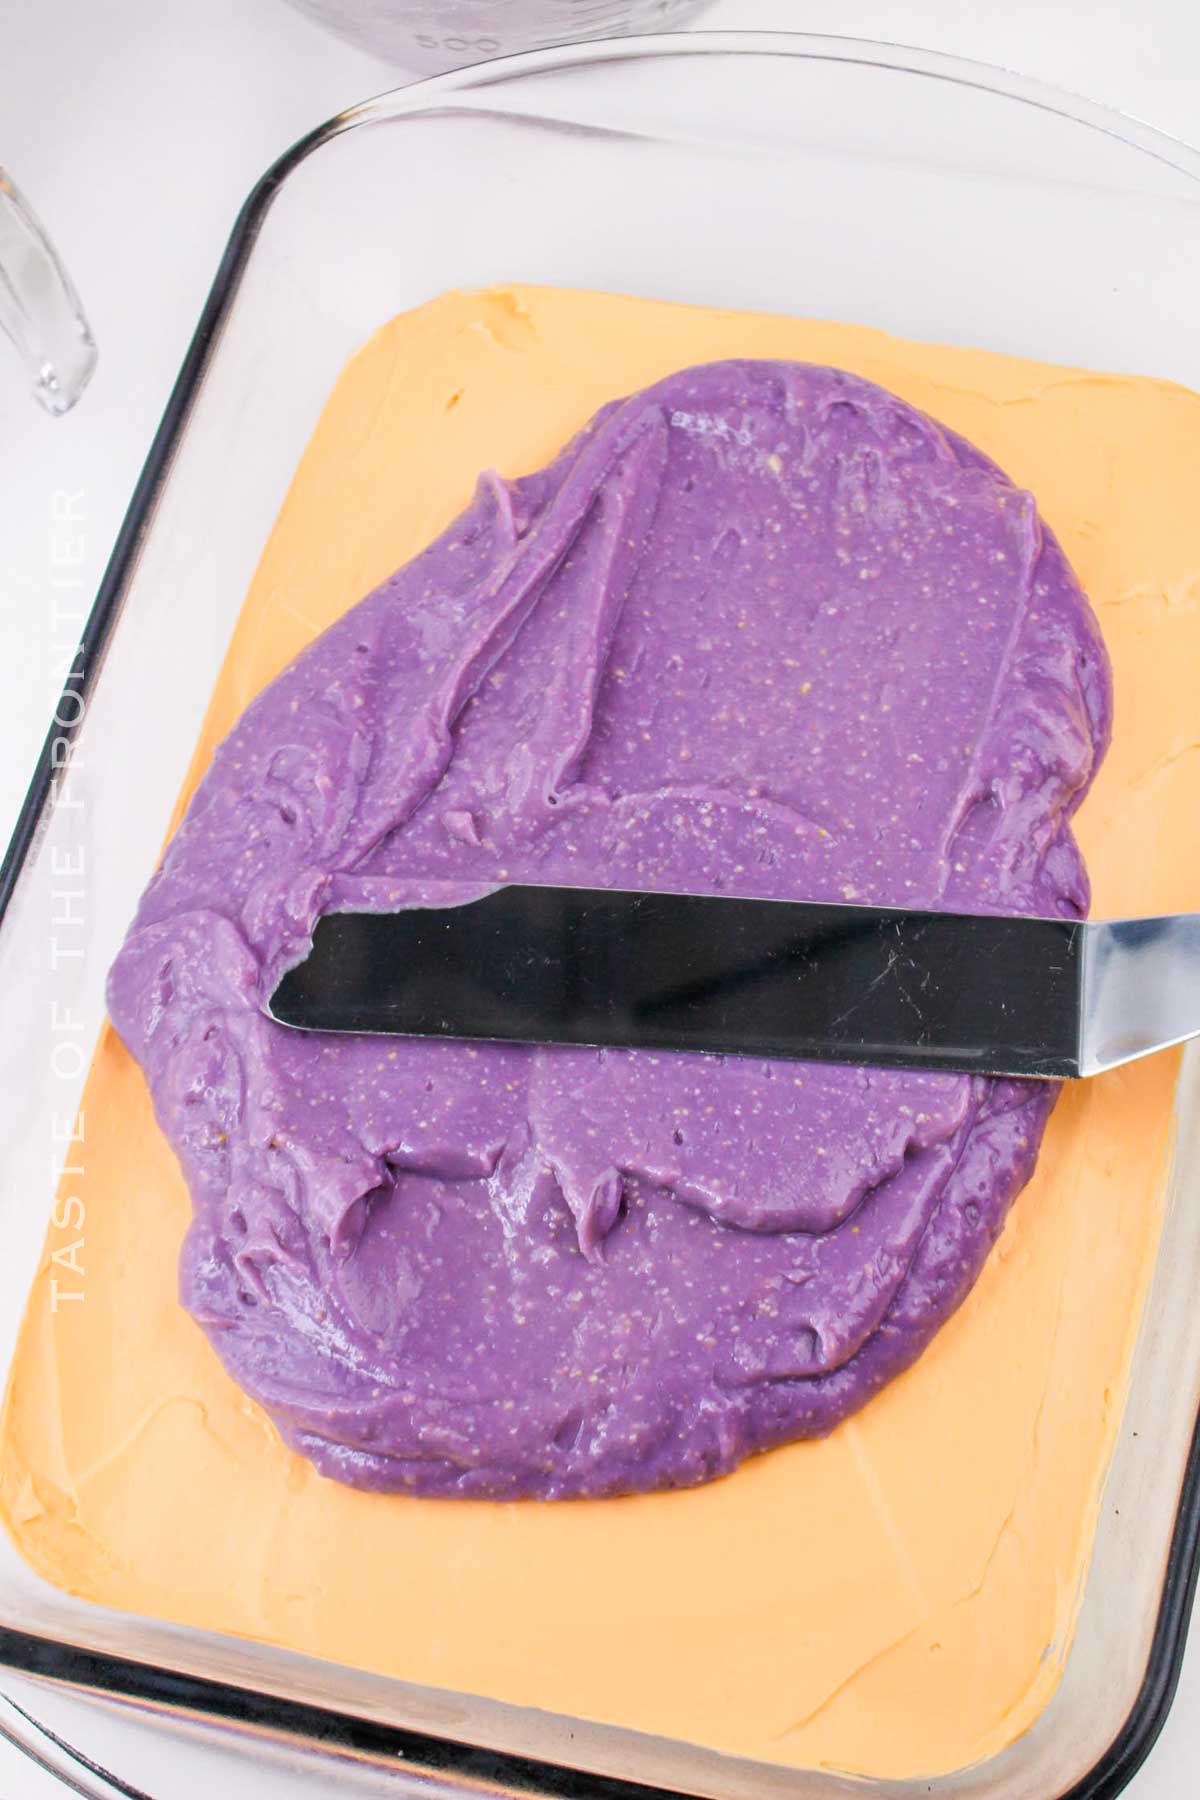
3 – Purple Pudding Layer
- Whisk the vanilla pudding mix and cold milk in a mixing bowl until it thickens.
- Add purple food coloring and mix until the color is evenly distributed and you get the desired purple shade. Let the pudding partially set.
- Spread the purple layer over the orange layer.
4 – Green Pudding Layer
- Whisk the pistachio pudding mix and cold milk in a mixing bowl until it thickens.
- Add a few drops of the green food coloring and mix until completely combined and the color is evenly distributed. Let the pudding partially set.
- Spread the green layer over the purple layer.
5 – Topping
- Spread the remaining whipped topping over the green layer.
- Refrigerate for at least 2-4 hours before serving to allow the layers to set properly.
- Just before serving, decorate the top with Halloween-themed sprinkles.
- Cut into squares and serve chilled.
Storage
You can make the Halloween lush ahead and store it in the fridge overnight or freeze it.
Once cut, any leftovers should be covered in plastic wrap or placed in an airtight container. If you used a glass baking dish with a lid, that’s good too.
The dessert can last up to 4 days in the refrigerator.
Lush desserts are perfect for making ahead and freezing. They last up to 3 months frozen.
Before serving, let the lush thaw for about 1 hour.
Defrosted Halloween lush may have a slightly softer texture.
Variations And Substitutes
- You can replace the pudding with Jello (which contains gelatin). If using regular gelatin and not a boxed mix, remember to use boiling water to mix it. Most recipes call for an orange gelatin layer but I do the Halloween lush my way 🙂
- To make the cream cheesecake layer smoother, add 1 more cup of heavy whipped cream. I love adding a generous amount of whipping cream!
- For the orange layer, you can make a pumpkin filling with pumpkin puree. It is a good way to incorporate more Halloween flavors.
- Any food coloring can technically be natural. Matcha gives a subtle green color, turmeric gives a dense orange-brown color, purple sweet potato – for a purple layer, etc. I haven’t experimented with natural food colorants yet!
- The green layer can also have some minty scent and minty products instead of pistachio.
- Halloween sprinkles are not the only option, can add glitter, drizzle, or little edible googly eyes to this fun dessert. You can prep a mix of everything in a small bowl to sprinkle on top of the dessert. On each individual slice, you can add a jelly spider or a gummy worm too!
- Use any colors you’d like in any order for this Halloween dessert. I do, from the bottom, orange, purple, and green, but you can make a purple cream cheese layer, and pick colors within one color family like orange, yellow, white, etc.
- Instead of chocolate crumb crust, you can use graham cracker crust, gingersnap cookies, shortbread cookies, or chocolate wafers. They all do a great job for crust.
- The topping can also have color! Orange to be a pumpkin, green whipped topping to make a cute Frankenstein, purple food coloring like a witch hat, etc. Then you can adjust the decoration too – the dessert is highly customizable and fun!
- You can use frozen whipped topping or fresh whipped cream, including homemade.
- Instead of whipped topping you can use the crushed cookies again! And use cookie tombstones or spooky skeletons as decorations (like a graveyard at witching hour).
Tips To Make The Best Halloween Lush Dessert
- Usually, just a few drops of food coloring gives already a nice opaque color. I never had to use more than 10 drops per layer.
- Waiting for the cake to chill is mandatory. If you are impatient, make the dessert ahead and leave it overnight. It will be set while you sleep.
- Chill the pressed crust in the refrigerator. It will help it set properly before you layer the cake.
- The best way to cut lush desserts is when they are cold and the knife is hot, you can even pop it in the freezer for 15 minutes before slicing and dip the knife in the hot water, dry it, and then cut.
- Keep cream cheese at room temperature. It will help you get the smoothest cheesecake layer possible.
- Between layers, put the dessert in the refrigerator. It will allow you to spread the mixes easier and more evenly.
- Make small to mid-size portions. Because of its many layers, textures, and flavors, it is a very filling dessert
If you love this no-bake recipe, you’re going to love these other tasty treats too. Please click each link below to find the easy, printable recipe!
More Great No-Bake Treats
DON’T MISS THESE HOLIDAY E-BOOKS!



CONNECT WITH YUMMI HAUS!
Be sure to follow me on my social media, so you never miss a post!
Halloween Lush
Ingredients
Crust
- 1½ cups chocolate cookie crumbs
- ¼ cup butter – melted
Orange Layer
- 8 oz cream cheese softened
- 1 cup confectioner’s sugar
- 1 cup whipped topping
- Orange food coloring
Purple Layer
- 3.4 oz instant vanilla pudding mix – 1 box
- 1¾ cups milk cold
- Purple food coloring
Green Layer
- 3.4 oz instant pistachio pudding mix – 1 box
- 1¾ cups milk cold
- Green food coloring
Topping
- 1 cup whipped topping
- Halloween-themed sprinkles
Instructions
Crust
- Combine chocolate cookie crumbs and melted butter in a mixing bowl. Stir to moisten the cookie crumbs.
- Press the mixture into the bottom of a 9×13-inch baking dish.
- Chill in the refrigerator while preparing the other layers.
Orange Layer
- Beat the softened cream cheese and confectioner’s sugar in a mixing bowl until smooth.
- Fold in the whipped topping.
- Add orange food coloring and mix until the color is evenly distributed.
- Spread the orange layer over the chilled crust.
Purple Layer
- Whisk the vanilla pudding mix and cold milk in a mixing bowl until it thickens.
- Add purple food coloring and mix until the color is evenly distributed.
- Spread the purple layer over the orange layer.
Green Layer
- Whisk the pistachio pudding mix and cold milk in a mixing bowl until it thickens.
- Add green food coloring and mix until the color is evenly distributed.
- Spread the green layer over the purple layer.
Topping
- Spread the remaining whipped topping over the green layer.
- Refrigerate for at least 2 hours before serving to allow the layers to set.
- Just before serving, decorate the top with Halloween-themed sprinkles.
- Cut into squares and serve chilled.
Nutrition
Nutritional information for the recipe is provided as a courtesy and is approximate. Please double-check with your own dietary calculator for the best accuracy. We at Yummi Haus cannot guarantee the accuracy of the nutritional information given for any recipe on this site.



Share Your Thoughts