Soft sugar cookies cut into cute Grinch faces and decorated with sweet royal icing. These Grinch Cookies are the perfect holiday treat for kids of all ages.
Do you or your kids love the Grinch? We all grew up with that iconic character and I think we all probably know a few people in real life that we might refer to as the Grinch. (lovingly or otherwise) I kid!
This time of year I love to make something super cute and this year it was these Grinch cookies. I invited a friend over who is great at cookie decorating and we had a little holiday fun making these adorable little goodies.

My mom was always the one to make goodies like these. She was so patient with the process and made them turn out so adorable.
I love that these ones have eyelashes – just like my mom used to make on all her faces she would create when making fun decorated treats like this. The best part is that you can get as creative as you like with these cookies.
They make a great treat for an office party, fun church potluck, kids class party, or leaving out for Santa. I know you’ll love them as much as we do.
Grinch Cookies Recipe

Here are some commonly asked questions
How to Store Grinch Cookies
You can store the frosted cookies for several days in an airtight container. Be sure to store between layers of parchment paper so they are less likely to stick together.
How do I properly measure the flour?
The official way is to spoon the flour into the measuring cup & level off. This makes sure the flour isn’t packed tightly into your measuring cup, adding more than you need, as that will make your recipe too dry.
Grinch Sugar Cookies

Can these cookies be made ahead of time?
You bet. This cookie dough can be made ahead of time and kept in the refrigerator for up to 4 days prior to baking. You may need to let it sit out at room temperature for about 10 minutes before rolling out and cutting into shapes.
You can also make the cookies up to 2 days prior to decorating them. Just make sure to cool them to room temperature before placing them in an airtight container.
This works great if you are hosting a cookie decorating party. Just make all the cookies a couple of days before the party and then they are ready to go when you have all those extra hands to get them all decorated.
PRO TIP – Dip your Grinch cookie cutter and stamp in flour between cutting out and stamping cookies to make sure the dough doesn’t stick to the cutter or stamp.
Chewy Sugar Cookies
Ingredients for Grinch Cookies
- unsalted butter – room temperature
- granulated sugar
- large egg – room temperature
- vanilla extract
- all-purpose flour
- salt
Ingredients for Royal Icing
- confectioner’s sugar – sifted
- meringue powder
- warm water
- red and green food coloring gel
How to Make Grinch Cookies
- Combine the butter and sugar in the mixing bowl and beat until light and fluffy, using a stand mixer with the paddle attachment.
- Add the egg and vanilla and beat until combined.
- Add the flour and salt and beat until it forms a smooth dough.
- On a lightly floured surface, roll out the dough to a thickness ¼-in (1 cm).
- Cover with plastic and refrigerate for at least 30 minutes.
- Preheat the oven to 350 F (175).
- Line 1 large or 2 small baking sheets with parchment paper.
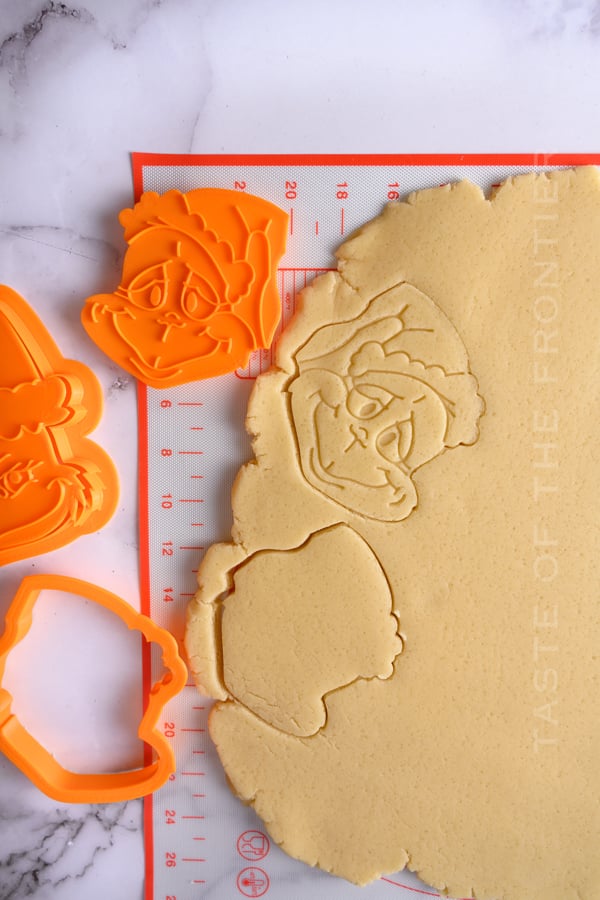
- Cut out the Grinch shapes and stamp then using the Grinch cookie cutter set (the link below or use one similar).
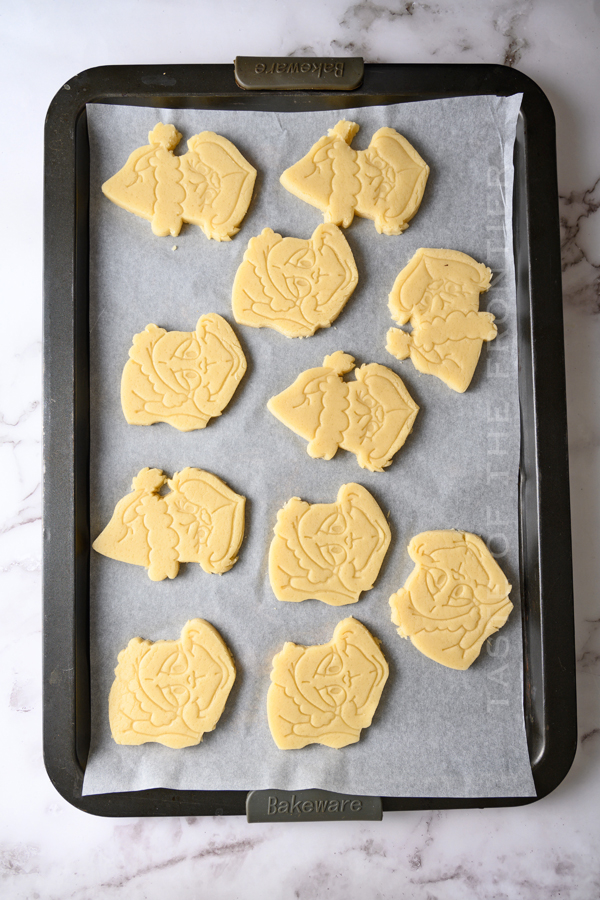
- Transfer to the prepared baking sheet.
- Bake for 10-12 minutes or until the edges are just golden brown.
- Allow cookies to cool completely before decorating or enjoy plain!
How to Make Royal Icing with Meringue Powder
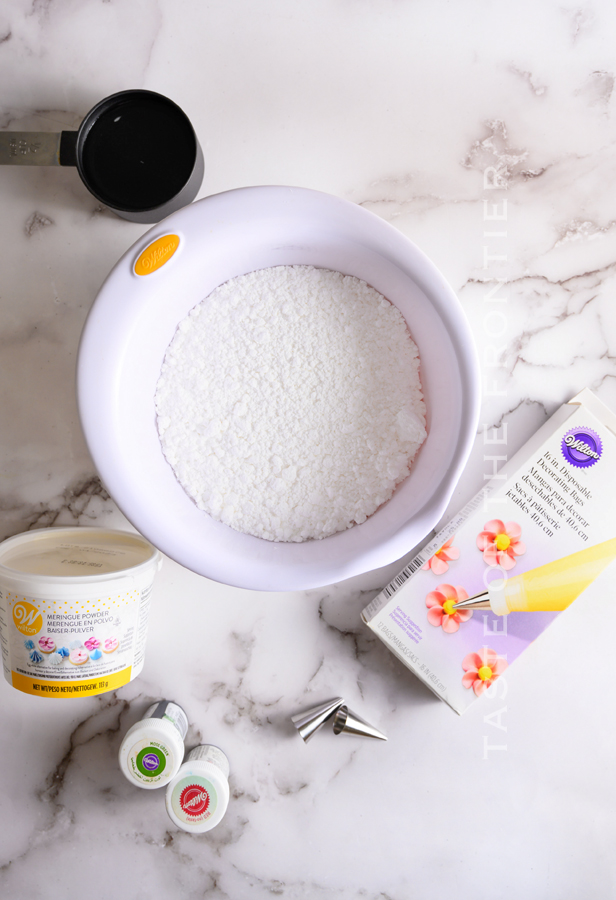
- In the bowl of a stand mixer (or with a hand mixer) slowly stir the sugar and meringue powder together until combined.
- Add the water and beat on medium until stiff peaks form, about 5 minutes.
- Separate the icing into 3 bowls.
- Tint one portion of the icing with green food coloring gel (add a few drops of gel color and stir until the color is even and streak-free). I recommend adding in a drop or two at a time until you get a color you like.
- Reserve 1/2 cup of white icing and tint the remaining icing with the red food coloring gel.
Don’t miss these other fun Grinch-inspired recipes
- Grinch Donuts
- Chocolate-Dipped Grinch Pretzel Rods
- Grinch Christmas Cookies
- Green Grinch Crinkle Cookies
- Grinch Truffles
- Grinch Pancakes
Royal Icing with Egg Whites: If you cannot find meringue powder or prefer to use raw egg whites, you could just replace both the water and meringue powder called for in the recipe with 2 large egg whites and 2 teaspoons of lemon juice.
Do I really need to chill the dough?
Yes, Yes, Yes! Chilling the dough is important for a couple of reasons. First – while the dough is chilling the ingredients are coming together. It gives a better overall flavor to the cookie.
The second and probably even more important than the first – is that chilling helps the dough hold together during the baking process.
Without chilling, the dough would not only be too sticky to really roll it and cut it. But it would also spread way too much while baking – leaving flat and not very appealing cookies in the end. Please don’t skip the chilling process.

How to Decorate Grinch Cookies
- Transfer the icing into piping bags with a # 1 or # 3 tips.
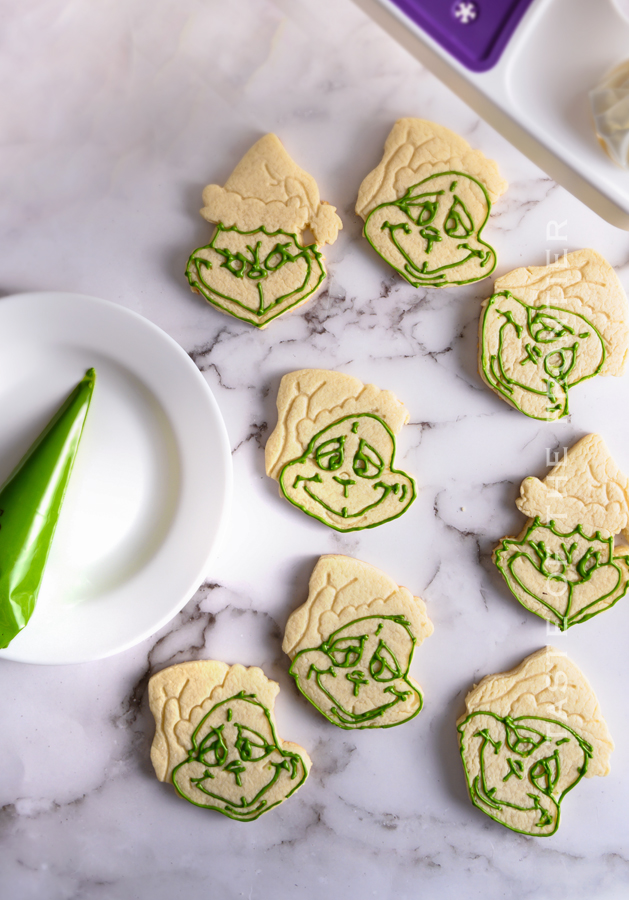
- Decorate your Grinch cookies by first outlining the border and face features of Grinch face using green icing.
- Then fill in the middle with the green icing, leaving the eyes.
- Use a toothpick to fill in any gaps by spreading the icing around. Tap the cookie a few times to help the icing settle.
- Fill eyes with the white icing. You can fill nose too if desired or draw it later.
- Now, outline the border of the fur part of the Grinch hat with the white icing and fill in the middle.
- Using red icing, outline and fill the hat.
- Fill the pompom part of the hat with white icing.
- Set aside to dry for about 15-20 minutes before moving onto the black. This is very important as you don’t want to pull the wet icing as you work and ruin the nice smooth icing you just created.
- Place ⅛ – ¼ teaspoon of Wilton black food coloring gel on the plate.
- Using a 1 mm brush, draw the face features and outline the Grinch hat. Be creative! It is fun to do it with kids.
- Dry cookies at room temperature for 6-8 hours until the icing is completely firm.
Grinch Recipes

What do you mean by soft butter?
You will need to take your butter out of the fridge about an hour before you would like to make the recipe for the butter to soften but not get too soft.
Can this recipe be cut in half?
I understand wanting to cut this recipe in half. Aside from trying to cut an egg in half – there is already a small amount of dough overall, cutting the recipe would make it more difficult to work with.
You would be better off making the recipe as written and then freezing half of the dough for a later time.
Grinch Face Cookies

How to soften the butter to room temperature?
First
There are a couple of ways to do this. The first being that you can take the butter (& any other ingredients that need to be at room temperature) out, leave it on the counter for about 30 minutes while you prep for baking.
I usually start with all my chilled ingredients and pull everything I need out onto the counter before getting started – so I know for sure I have everything before I’m mid-way through I realize I’m out of something.
But sometimes it’s winter and that isn’t enough time to get the ingredients warmed up – OR – I’m just not that organized to plan ahead. It happens. So I have another couple of tricks.
Second
I place the butter in the microwave – wrapped in the paper. (don’t do this if it is wrapped in foil) Then I microwave for 2 seconds – flip – go another 2 seconds – flip again – and continue for 2 seconds on each side.
This is usually enough to get it perfect – sometimes stopping before if it feels soft enough. Take care when doing this method – overly softened butter from the microwave WILL ALTER the end result of the recipe. Don’t over-do it.
Third
My third method is to place the wrapped butter sticks in a zip-top bag and place it in a bowl of warm water. I do this with the eggs too. If the water isn’t too hot it can be THE PERFECT way to get “room-temperature” ingredients.
baking sugar cookies

Why do the ingredients need to be at room temperature?
Room temperature ingredients help to ensure that everything blends together perfectly. You don’t want any pockets of unblended butter. You want everything evenly disbursed for the perfect texture.
When your dairy products are at room temperature, they can create an emulsion. It’s essential to have an emulsion because air gets trapped, so the baked goods expand and get fluffy as it bakes.
Can this recipe be doubled?
You can, and we do it often. I actually find it easier to work with a larger portion of dough – but I do have to use my larger mixer to accommodate the increase in volume.
Grinch Christmas Cookies

Products I love when making these Grinch Cookies…
This Grinch Sugar Cookie Recipe is SUPER CUTE and delicious – and if you’re like me this time of year, then you maybe already have some of these items on hand OR maybe you have never made decorated sugar cookies before, & you might be a bit nervous – but you’re going to love it. I have made a list below of the things I absolutely can’t live without when it comes to making this cookie recipe.
- bowls
- stand mixer
- rolling pin
- Grinch cookie cutter
- 3 icing bags
- Wilton tip #1 and #3
- black food coloring gel
- 1 mm brush – food grade
- granulated sugar
- vanilla extract
- all-purpose flour
- salt
- confectioner’s sugar – sifted
- meringue powder
- Red and green food coloring gel

If you love this Grinch Cookie recipe, you’re going to love these other holiday treats too. Please click each link below to find the easy, printable recipe!









If you love this recipe for Homemade Grinch Cookies as much as I do, please write a five-star review, and be sure to help me share on Facebook and Pinterest!

CONNECT WITH YUMMI HAUS!
Be sure to follow me on my social media, so you never miss a post!

Grinch Cookies
Ingredients
Cookies
- ½ cup unsalted butter room temperature (113 grams)
- 1 cup granulated sugar 200 grams
- 1 large egg room temperature
- 2 teaspoons vanilla extract
- 1 ¾ cups all-purpose flour
- ½ teaspoon salt
Royal Icing
- 2 ½ cups confectioner’s sugar sifted
- 2 tablespoons meringue powder 20 grams
- ½ cup warm water 120 ml
- Red and green food coloring gel I used Wilton Christmas red and moss green food coloring gel that can be found at their store or on-line
Instructions
NOTE- You will need an additional 6-8 hours of drying time once the cookies are decorated – before they are ready to be stacked or stored in a container.
Cookies
- Combine the butter and sugar in the mixing bowl and beat until light and fluffy, using a stand mixer with the paddle attachment.
- Add the egg and vanilla and beat until combined.
- Add the flour and salt and beat until it forms a smooth dough.
- On a lightly floured surface, roll out the dough to a thickness ¼-in (1 cm).
- Cover with plastic and refrigerate for at least 30 minutes.
- Preheat the oven to 350 F (175).
- Line 1 large or 2 small baking sheets with parchment paper.
- Cut out the Grinch shapes and stamp then using the Grinch cookie cutter set (the link below or use one similar).
- Transfer to the prepared baking sheet.
- Bake for 10-12 minutes or until the edges are just golden brown.
- Allow cookies to cool completely before decorating or enjoy plain!
Royal Icing Using Meringue Powder:
- In the bowl of a stand mixer (or with a hand mixer) slowly stir the sugar and meringue powder together until combined.
- Add the water and beat on medium until stiff peaks form, about 5 minutes.
- Separate the icing into 3 bowls.
- Tint one portion of the icing with green food coloring gel (add a few drops of gel color and stir until the color is even and streak-free). I recommend adding in a drop or two at a time until you get a color you like.
- Reserve 1/2 cup of white icing and tint the remaining icing with the red food coloring gel.
Decorating
- Transfer the icing into piping bags with a # 1 or # 3 tips.
- Decorate your Grinch cookies by first outlining the border and face features of Grinch face using green icing.
- Then fill in the middle with the green icing, leaving the eyes.
- Use a toothpick to fill in any gaps by spreading the icing around. Tap the cookie a few times to help the icing settle.
- Fill eyes with the white icing. You can fill nose too if desired or draw it later.
- Now, outline the border of the fur part of the Grinch hat with the white icing and fill in the middle.
- Using red icing, outline and fill the hat.
- Fill the pompom part of the hat with white icing.
- Set aside to dry for about 15-20 minutes before moving onto the black. This is very important as you don’t want to pull the wet icing as you work and ruin the nice smooth icing you just created.
- Place ⅛ – ¼ teaspoon of Wilton black food coloring gel on the plate.
- Using a 1 mm brush, draw the face features and outline the Grinch hat. Be creative! It is fun to do it with kids.
- Dry cookies at room temperature for 6-8 hours until the icing is completely firm.
Notes
Equipment
- Bowls
- Stand mixer
- Rolling Pin
- Grinch cookie cutter ( the link in post)*
- 3 Icing bags
- Wilton tip #1 and #3
- Wilton black food coloring gel
- 1 mm brush – food grade
Nutritional information for the recipe is provided as a courtesy and is approximate. Please double-check with your own dietary calculator for the best accuracy. We at Yummi Haus cannot guarantee the accuracy of the nutritional information given for any recipe on this site.


Share Your Thoughts