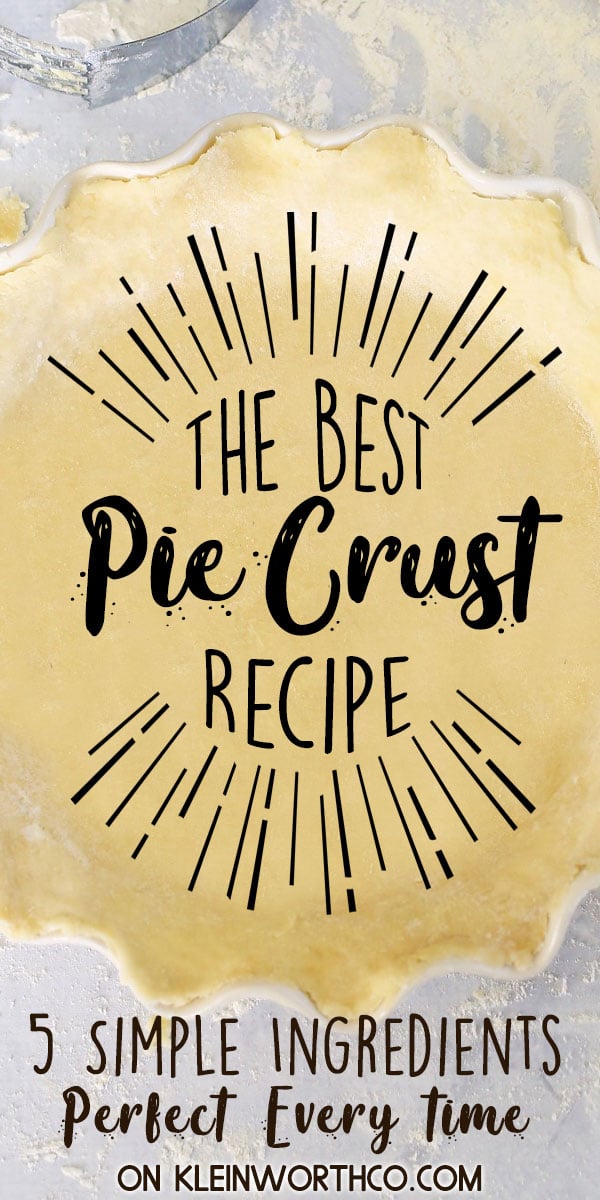
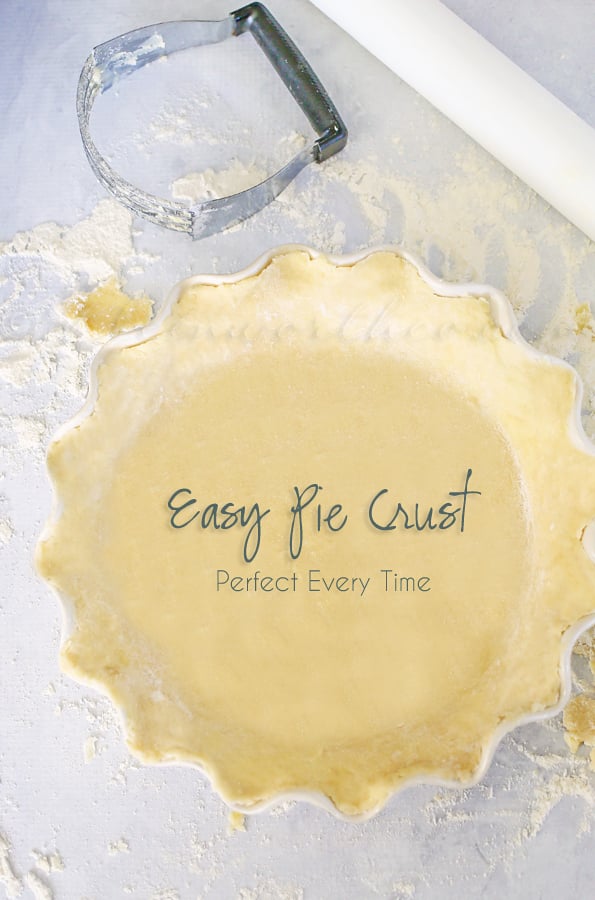
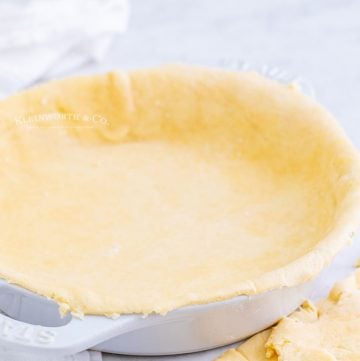
This Easy Pie Crust recipe has been passed down through generations, from my grandmother, the PIE QUEEN. Just 5 simple ingredients to make.
It’s that time of year again!! Pie season! When I was a little girl I would visit over at my great grandmother’s house.
She and my grandmother would spend ALL DAY making pies – literally in batches of 20+ a day. They were both known for the family pumpkin pie recipe.
Gina’s Recipe Rundown:
Texture: Layers of dough that puff slightly and separate when baked, creating a crisp, light texture.
Taste: Butter provides a rich, savory flavor with a hint of sweetness. It also caramelizes slightly during baking, adding depth.
Ease: This pie crust is relatively easy to make, especially for beginners or when you want something quick and simple. The ingredients are basic, and the process is straightforward, though there are still a few key steps to get a good result.
Why I love it: I love this recipe because I know it is made with love. It has been passed down through the generations in my family and it has NEVER FAILED ME!
The family always went nuts for that pumpkin pie. But spending all that time with them- I did learn a thing or two about pie.
So since you (and I) will be needing this recipe through the end of the year – I thought I would share my great grandmother’s recipe for Easy Pie Crust.
Now her recipe was for pies in BULK. She sort of jotted it down but for the most part, she worked off memory. However – I was able to break it down to what a normal recipe would be for the regular person making just one pie. It’s perfect every single time.
Try using this recipe to make our Spanakopita (Spinach Pie) Recipe or my Easy Chicken Pot Pie recipe.
- Gina’s Recipe Rundown:
- About this quick pie crust recipe
- Featured Comment
- Why You’ll Love this Pie Crust
- The Secret to the Best Pie Crust
- Basic Pie Crust Ingredients:
- What recipes can I make with this crust?
- How to make Pie Crust with butter?
- Do I need a Food Processor to Make Pie Dough?
- What is the easiest way to transfer the crust to the pie pan?
- How to Pre-bake Pie Crust (Blindbake)
- When to Blind-Bake:
- What Can I use Instead of Pie Weights?
- How to Flute a Pie Crust
- Thoughts on Butter, Shortening, and Lard in Pie Dough
About this quick pie crust recipe
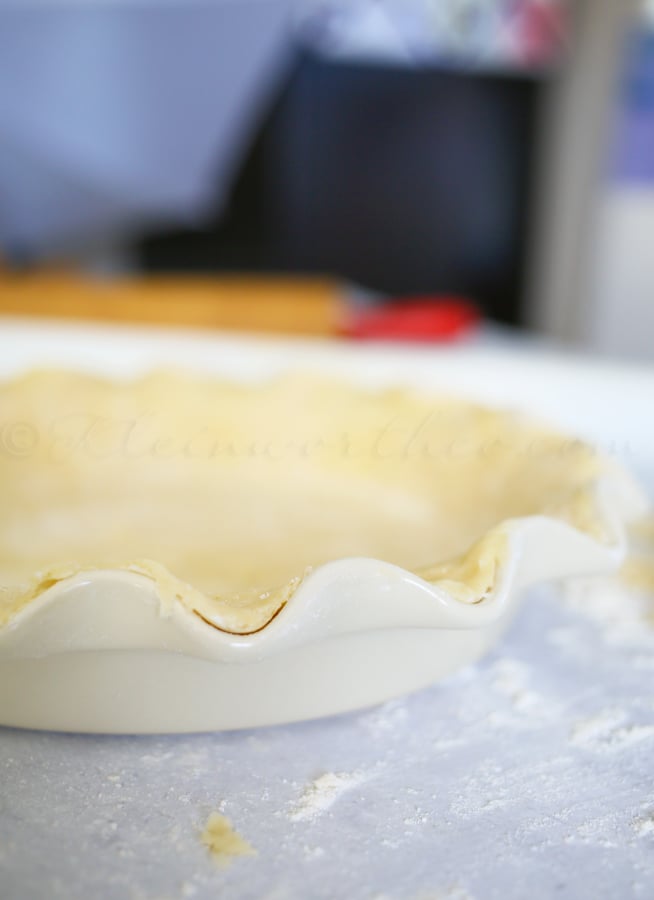
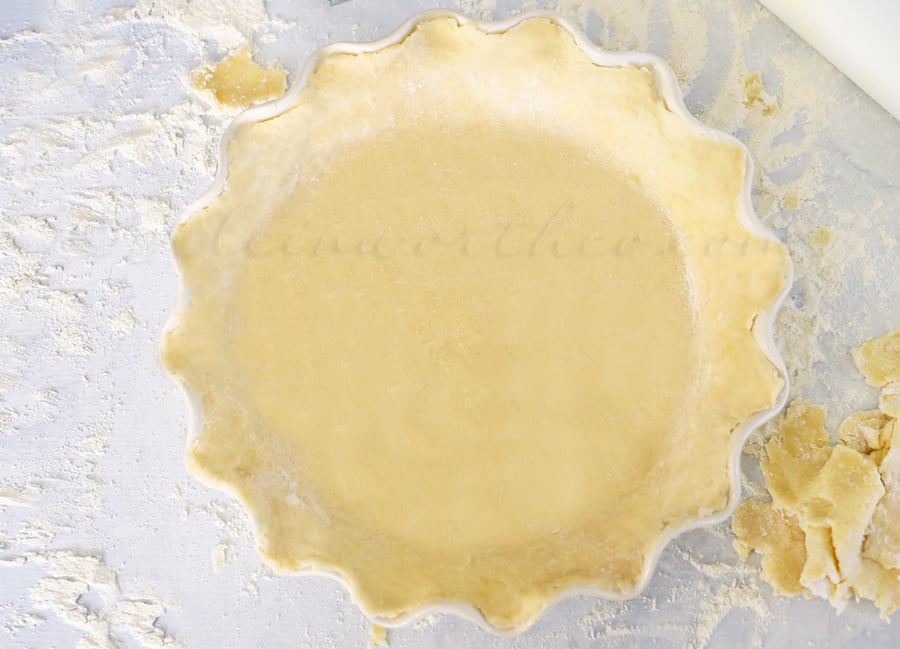
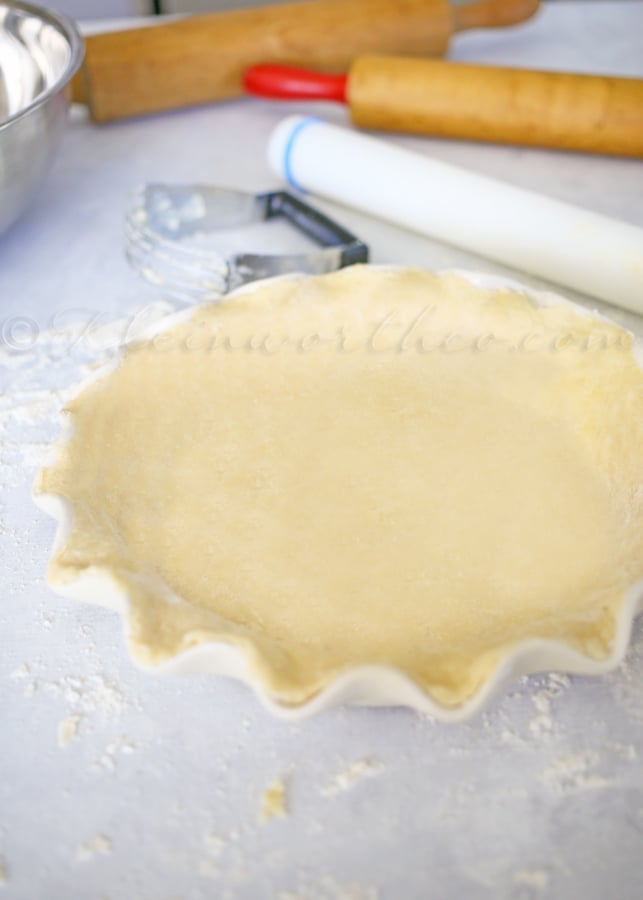
It’s moist and springy while working with the dough prior to baking, which is so nice. For years I had one that was way too dry and was so difficult to work with.
I am so happy I was able to get this one down because it really is just SO EASY from start to finish.
This recipe is just for the one crust. You can double it if you are wanting crust on top too.
I tend to make all my pies open – be it a French Apple, or some sort of cream pie or fresh strawberry. I don’t know why.
Maybe this year will be the time to change that and expand my horizons. Stay tuned for that.
I have a few other recipes up my sleeve that I use this recipe for. I can’t wait to share them with you. This is such a fun time of year. I so TRULY enjoy making fall recipes.
Featured Comment
“In September, I entered my beloved Triple Berry Pie into the Virginia State Fair. While I often use a premade crust for convenience, the competition rules required a handmade crust. I came across your recipe, drawn in by its promise of being “easy,” and I have to say, it truly was! The crust was not only simple to make but also incredibly delicious, perfectly complementing my pie. I wasn’t the only one who thought so—my pie won Best Fruit Pie and then went on to win Best in Show and Best Pie at the State Fair! Thank you so much for sharing your wonderful recipe!”
Mary Leipertz
Why You’ll Love this Pie Crust
You’ll love this pie crust because it brings together all the best qualities for a perfect pie: flakiness, tenderness, and delicious flavor. Here’s why this pie crust stands out:
1. Perfect Flakiness
The secret to a great pie crust is layering the fat (butter, shortening, or lard) into the dough. As it bakes, the fat melts and creates tiny pockets of air that puff up and create those light, flaky layers that make pie crust so irresistible. When you bite into it, you get that satisfying crispness combined with a tender bite.
2. Buttery, Rich Flavor
Using butter (or a butter-shortening blend) gives the pie crust a rich, slightly sweet, and deliciously buttery flavor that pairs beautifully with both sweet and savory fillings. The buttery aroma that fills your kitchen as the pie bakes is the ultimate reward.
3. Tender and Light
By using cold fat and minimal handling, you avoid overworking the dough, which results in a tender, melt-in-your-mouth texture. You won’t have to worry about the crust being tough or dense—this pie crust is light and soft inside, with a perfect balance of crispness outside.
4. Easy to Make
Despite its perfect texture, this pie crust is easy to make. With only a few basic ingredients—flour, fat, salt, and water—it’s a straightforward process. Whether you’re using your hands, a pastry cutter, or a food processor, you’ll be able to create a pie crust with minimal effort. You don’t need to be a professional baker to achieve great results!
5. Versatility
This pie crust works for any kind of pie—whether it’s a fruit pie, custard pie, or savory pie like quiche or pot pie. Its texture holds up beautifully, no matter the filling. Plus, it’s a wonderful base for top crusts if you’re making a double-crust pie or a lattice.
6. No More Soggy Bottoms
With proper blind-baking (if needed) or the right baking time and temperature, you won’t end up with a soggy bottom. The crust will stay crisp and golden, even under a juicy fruit filling or custard.
7. Customizable Flavor and Texture
By experimenting with fats (butter, shortening, lard, or a combo), you can adjust the flavor and texture of the crust to your liking. If you want a more flaky crust, go heavier on the shortening or lard. For a richer, buttery flavor, use all butter. You can even play with seasonings, like adding a pinch of sugar or a dash of cinnamon for sweet pies.
8. Satisfying to Make and Enjoy
There’s something special about making your own pie crust from scratch—it adds a personal touch and a sense of accomplishment to your baking. And when you finally slice into that pie and enjoy the flaky, buttery crust, it’s a feeling of pure satisfaction.
Whether you’re making a classic apple pie for the holidays, a rich chocolate cream pie, or a savory pot pie for dinner, this crust will become your go-to recipe. It’s easy, reliable, and guaranteed to deliver the perfect pie every time.
Frequently asked questions
The Secret to the Best Pie Crust
1. Use Cold Ingredients
- Why it matters: Cold ingredients are essential for creating a flaky texture. When fat (usually butter or shortening) is cold, it doesn’t fully blend into the flour. Instead, it forms small pockets of fat that expand as the dough bakes, creating layers of flakiness.
- What to do:
- Chill your butter and shortening in the fridge (or freezer) before using.
- Use ice-cold water when mixing your dough.
- Even chill the flour and mixing bowl if you’re working in a warm kitchen.
2. Perfect the Fat-to-Flour Ratio
- Why it matters: The right ratio of fat to flour determines the texture and flavor. Too little fat and your crust will be tough; too much fat and it might be overly greasy.
- What to do:
- A good starting point is 1 part fat to 2 ½ parts flour, but this can vary slightly depending on your recipe.
- For the best flavor and flakiness, use a combination of butter (for flavor) and shortening (for flakiness). Butter gives a rich flavor, while shortening creates a light, crisp texture.
3. Don’t Overwork the Dough
- Why it matters: Overworking the dough develops the gluten in the flour, leading to a tough crust instead of a tender one.
- What to do:
- Mix just until the dough begins to come together.
- When rolling out, handle the dough as little as possible. If the dough starts to get soft or sticky, chill it again.
4. Use the Right Technique to Cut in the Fat
- Why it matters: The way you incorporate fat into the flour affects the texture of the crust.
- What to do:
- Use a pastry cutter, two forks, or your hands to cut the cold fat into the flour.
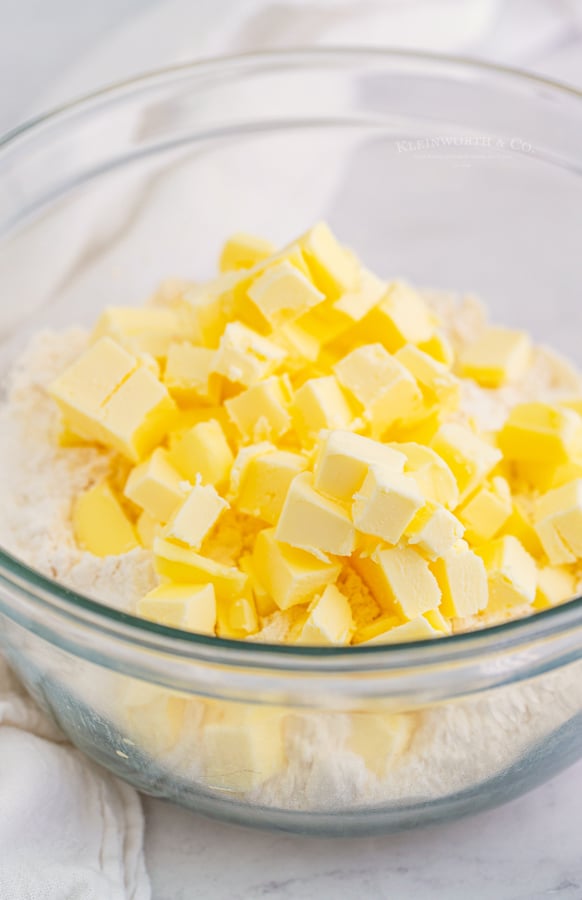
- You want the fat to be in pea-sized pieces, which will create flaky layers as the fat melts in the oven.
5. Chill the Dough (And Your Rolling Pin)
- Why it matters: Chilling the dough relaxes the gluten, helping prevent shrinkage and ensuring the crust stays tender. It also keeps the fat from melting before it goes into the oven.
- What to do:
- After forming the dough, wrap it in plastic wrap and refrigerate it for at least 30 minutes (preferably 1 hour).
- If you’re rolling the dough out, chill the rolling pin, or dust it with a bit of flour so it doesn’t stick.
6. Add a Little Vinegar or Lemon Juice
- Why it matters: Adding a teaspoon of vinegar or lemon juice to the dough helps tenderize it by inhibiting gluten development. It also makes for a slightly flakier, more flavorful crust.
- What to do:
- Add a teaspoon of vinegar (white or apple cider) or lemon juice to your ice water.
7. Blind Bake If Necessary
- Why it matters: For pies with very wet fillings (like custard or cream pies), blind-baking helps prevent a soggy crust.
- What to do:
- Line your unbaked pie crust with parchment paper or aluminum foil and fill it with pie weights or dried beans.
- Bake the crust in a preheated oven until the edges are golden brown (usually about 15–20 minutes at 375°F), then remove the weights and bake for a few more minutes.
8. Don’t Skip the Egg Wash
For an extra-crispy finish, sprinkle the crust with a bit of coarse sugar before baking (especially for sweet pies).
Why it matters: An egg wash (a mixture of egg and water or milk) gives your pie crust a beautiful golden finish and adds an extra layer of richness.
What to do:
Brush the surface of the crust with egg wash just before baking.
Bonus Secret: Patience Is Key
The best pie crust requires time and attention. Rushing through the process or neglecting any of the steps can result in a less-than-ideal texture. The extra time spent chilling the dough, handling it gently, and allowing the crust to rest all contribute to a tender, flaky, and flavorful pie crust.
Recap of the Best Pie Crust Secrets:
- Cold ingredients = flaky texture.
- Right fat-to-flour ratio = tender and flavorful.
- Minimal handling = tender, not tough.
- Chill the dough = less shrinkage and better texture.
- Egg wash = golden, crispy finish.
Can I use gluten-free flour?
I have not tried it. When swapping out flours in my recipes, I recommend using a brand with a 1:1 ratio (such as this Bob’s Red Mill) so you don’t have to add anything else to the recipe to get the same consistency.
Can I use a sugar substitute?
I have not personally tried it, so I can’t say how that would turn out. But if you would like to try it, I suggest a product that offers a 1:1 swap. Please let me know how it turns out.
Can this pie crust be frozen?
I prefer to freeze my pies once they have been baked. The dough can dry out when frozen and then be thawed and baked later.
How many can this serve?
This recipe makes 1 pie crust. We usually get 6-8 slices out of a standard-size pie. But this will depend on how you slice it.
Can I use shortening instead of butter?
So, my grandmother would do it one of two ways. This recipe with all butter, because the flavor you get with butter is incredible.
But sometimes she wanted that dough to be a little flakier, so she would sub in half of the called for butter with shortening. It does give a slightly flakier crust, so I like to reserve that version for the top layer.
I just don’t like it AS MUCH for the bottom layer because I want it to hold together differently than I would for the top.
Can this flaky pie crust recipe be doubled?
You can absolutely double this recipe. If you are making a top crust for your pie, you will want to double this.
Be sure to check out my Easy Sweet Potato Pie recipe you can make with this crust too!
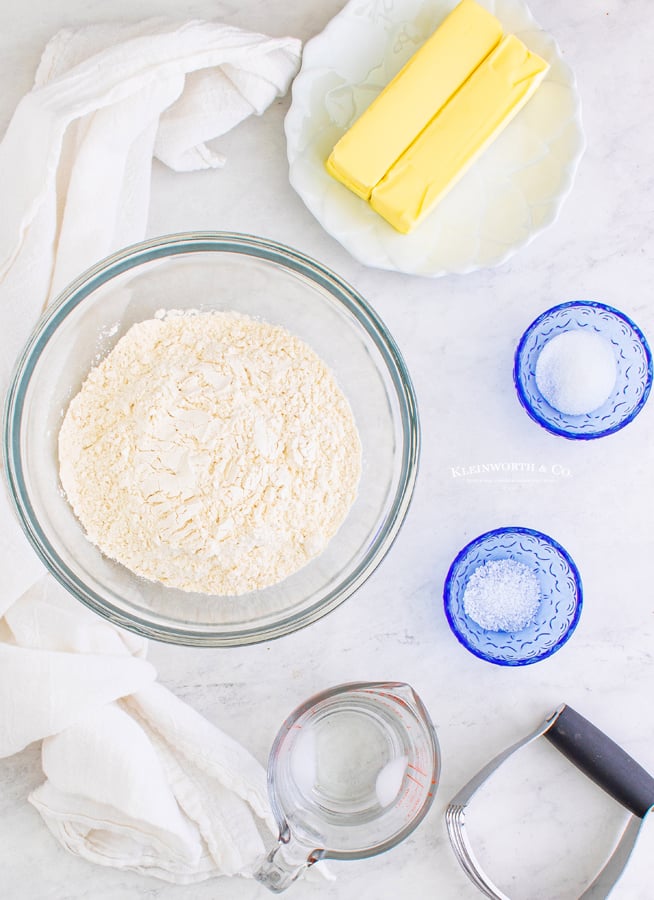
Basic Pie Crust Ingredients:
- Flour
- Role: Provides structure to the crust.
- What to use: All-purpose flour is most common, but you can also use pastry flour for a more tender result. Some recipes mix in a little whole-wheat flour for added flavor and texture.
- Fat (Butter, Shortening, or Lard)
- Role: The fat gives the pie crust flavor and creates flakiness.
- What to use:
- Butter gives a rich, flavorful taste.
- Shortening (vegetable or animal fat) creates a flakier texture.
- Lard is an excellent fat for pie crusts, producing an extremely flaky and tender texture, though it’s less common today.
- Many recipes use a combination of butter and shortening or lard to get the best of both worlds.
- Salt
- Role: Enhances flavor and balances the sweetness of the filling.
- What to use: A pinch or ½ teaspoon of salt is usually enough. Sea salt or kosher salt is often preferred for better flavor.
- Sugar (Optional)
- Role: Adds sweetness and helps the crust brown.
- What to use: For sweet pies (like fruit pies), a small amount of sugar (about 1–2 teaspoons) is common. For savory pies, sugar is usually omitted, but a pinch of sugar can sometimes enhance the flavor of savory pies.
- Water (Ice Water)
- Role: Binds the ingredients together, helping the dough come together without becoming too sticky. Cold water prevents the fat from melting prematurely.
- What to use: Ice-cold water is essential for keeping the dough cold and maintaining flakiness.
Optional Add-ins for Flavor or Texture:
- Vinegar or Lemon Juice: Adds a little acidity, which helps inhibit gluten formation and results in a more tender crust.
- Egg: Sometimes used in the dough for added richness, or brushed on top of the crust for a shiny, golden finish.
Why does the butter have to be cold?
So here’s a little tidbit shared by grandma. You want the dough to stay as cold as possible before baking because it is those little cold fat pockets of butter that will melt and create the flakiness you desire.
If your butter is too warm, the fat will result in hard, greasy clumps. Not good for pie, or anything else, really.
What recipes can I make with this crust?
The possibilities are pretty much endless – but here are a few of our favorite pies to make with this crust.
- The Best Pumpkin Pie
- Mini French Apple Pies
- French Apple Pie
- Easy Cherry Pie in the Air Fryer
- Cinnamon Pie Crust Dippers
- 30-Minute Strawberry Pie
How to make Pie Crust with butter?
- Combine flour, butter, sugar, and salt in a large bowl.
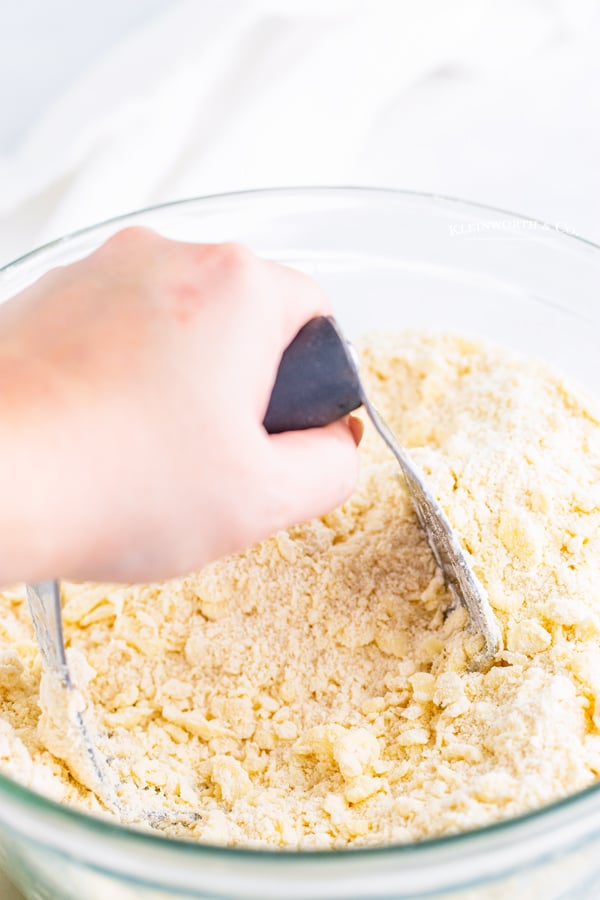
- Using a pastry cutter, start working the butter into the dry ingredients until it looks like crumbles. (You can also use 2 butter knives & cross them through the ingredients to combine.)
- Once you have reached a crumbly texture add the water.
- Work it together with your hands pressing & lightly kneading it together until you have a moist ball of dough that holds together well.
- Place the dough on a well-floured surface.
- Flour your rolling pin & start working from the center pushing outward in all directions.
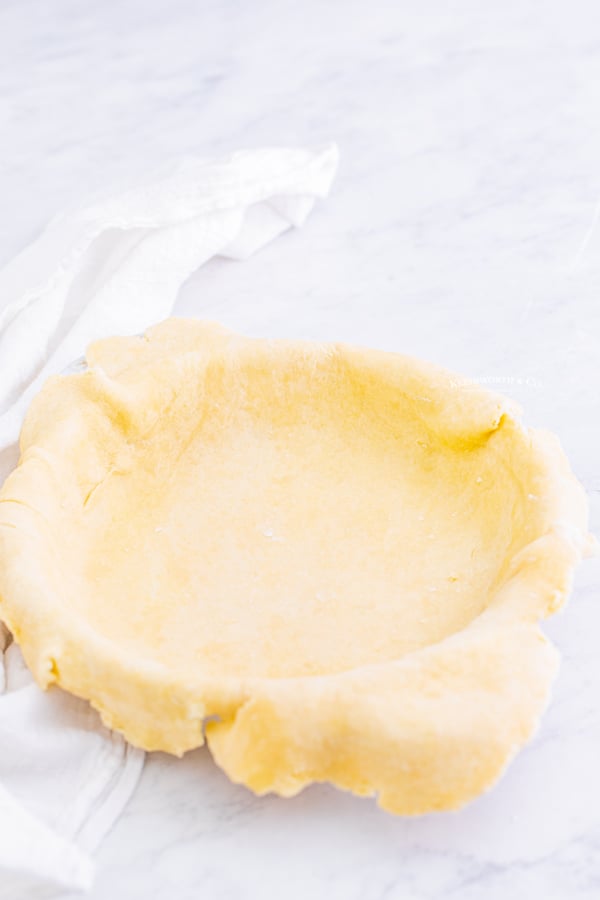
- Once you have stretched the dough large enough to fill your pie plate carefully transfer it to your plate.
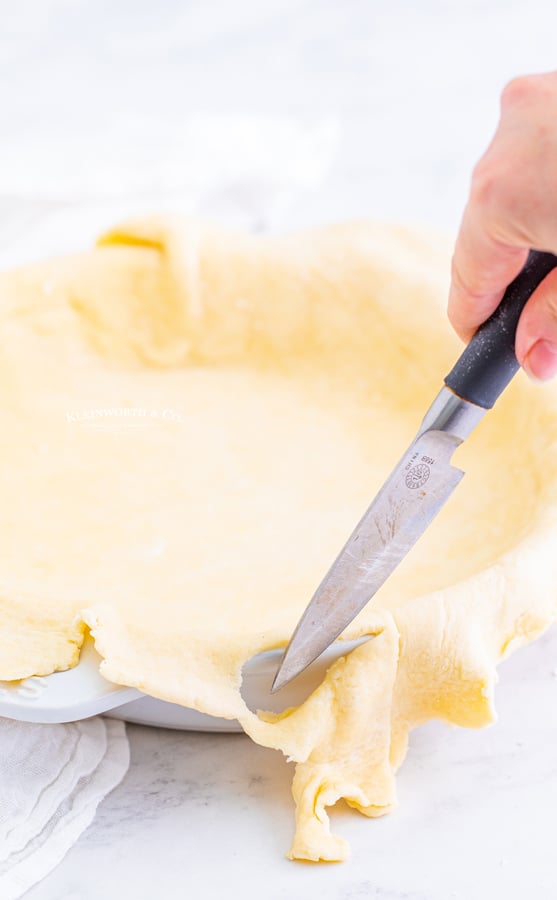
- Trim any excess dough that hangs over the edge of the pie plate.
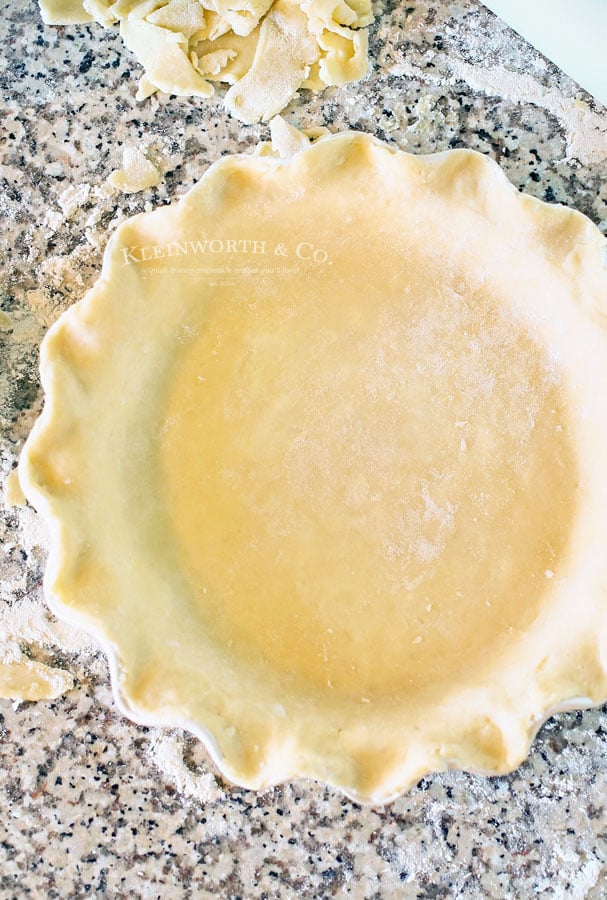
- Flute your edges by crimping between your fingers and pinching the dough every ½ inch or so.
- If you are baking this pie & filling it afterward – Poke holes in the bottom of the crust with a fork. Bake at 425 degrees for a conventional/ 400 degrees for convection for approximately 15 minutes.
- Baking time is just for the crust. If you are filling the pie before baking – do not poke holes in the crust.
- Baking times for a filled pie will vary depending on the filling you are baking.
Notes
- *Recipe is for 1 bottom crust. You can easily double this for a top & bottom or continue doubling for the number of pies you are making.
Do I need a Food Processor to Make Pie Dough?
Pros and Cons of Using a Food Processor:
Pros:
- Faster: The food processor can quickly combine the ingredients and cut in the fat in just a few pulses.
- Efficient: It’s easy to incorporate the right amount of water, and it’s harder to overwork the dough.
- Convenience: If you’re making a large batch of dough or need to save time, the food processor is a great tool.
Cons:
- Less hands-on: Some bakers prefer the tactile approach of making dough by hand, which allows for more control over the texture.
- Potential for overmixing: With a food processor, it’s easy to mix the dough too much, which can lead to a tougher crust.
- More cleanup: A food processor involves more parts to clean than simply using a bowl and pastry cutter.
What is the best way to store leftover pie crust?
If you are just making the pie crust and not filling it, the best way to store it is to wrap it in plastic wrap and refrigerate it until ready to use.
If you have filled the crust and you need to store the whole pie, I recommend transferring it to an airtight container and then refrigerating it.
What is the easiest way to transfer the crust to the pie pan?
Here’s another tip from grandma. After rolling the dough out, she would loosely fold it in half and then in half again, making a triangle. Then she would place it in the pie plate and then unfold it. This way there is less chance of tearing it when lifting it into the pie plate.
How to Pre-bake Pie Crust (Blindbake)
1. Prepare the Pie Dough:
- Roll out the dough: After preparing your pie dough, roll it out to fit your pie pan. Trim any excess dough, leaving about 1 inch around the edges. Crimp the edges as desired.
- Chill the dough: After rolling, refrigerate the dough for at least 30 minutes to firm it up. This helps prevent shrinkage during baking.
2. Line the Crust with Parchment or Aluminum Foil:
- Why: This helps hold the shape of the crust during baking and prevents the edges from shrinking or burning.
- How: Place a piece of parchment paper or aluminum foil over the chilled pie crust, making sure it covers the entire bottom and sides of the crust.
3. Add Pie Weights (or Alternatives):
- Why: Pie weights help prevent the dough from puffing up or shrinking while baking. They hold the crust in place, especially the bottom.
- What to use: You can use ceramic pie weights, dried beans, or uncooked rice. Pour them into the crust on top of the parchment or foil to ensure it stays in shape. Fill the crust about halfway with weights.
4. Bake the Crust:
- Temperature: Preheat your oven to 375°F (190°C).
- How long: Bake the crust for about 15–20 minutes, or until the edges begin to turn golden and the dough looks set.
- Tip: Check halfway through and gently lift the edges of the parchment to make sure the crust isn’t bubbling. If it does, gently press it back down.
5. Remove Weights and Paper:
- Why: After the initial baking, you need to remove the weights to let the bottom of the crust cook through.
- How: Carefully remove the parchment and weights, then return the pie crust to the oven for 5–10 more minutes, or until the bottom is golden and fully baked. You can also poke a few holes with a fork in the bottom (called “docking”) before the final baking phase to prevent air bubbles from forming.
6. Finish Baking (Optional for Full Blind-Bake):
- If you need a fully baked crust (for cream pies, no-bake fillings, etc.), bake until the crust is golden brown all over. The final baking time will depend on the thickness of your crust, but typically it’s around 10 more minutes after removing the weights.
Tips for Perfect Blind-Baking:
- Chill the dough: This prevents the crust from shrinking during baking.
- Dock the crust: Poking a few holes in the bottom of the dough with a fork before blind-baking can help prevent bubbles from forming.
- Use heavy pie weights: If you don’t have pie weights, dried beans or rice work well, but make sure they’re heavy enough to keep the dough in place. You can use the beans or rice again in future blind-baking (just label them so they don’t get used in cooking!).
- If you want a crisp bottom: Brush the bottom of the baked pie crust with a thin layer of egg wash (1 egg beaten with 1 tablespoon of water) before returning it to the oven for the final few minutes. This will help seal the crust and create a barrier between the filling and the crust, keeping it from becoming soggy.
When to Blind-Bake:
- For pies with wet fillings: Cream pies, custard pies, or quiche.
- For pies with no-bake fillings: Cheesecake pies or pudding pies.
- For fruit pies with juicy fillings: Blind-baking the crust first ensures the bottom is crisp and doesn’t get soggy from the filling.
What Can I use Instead of Pie Weights?
1. Dried Beans or Rice
- How to use: Simply pour a generous amount of dried beans or uncooked rice into the lined pie crust, covering the bottom and sides.
- Why it works: The weight of the beans or rice keeps the crust in place while it bakes.
- Tip: You can reuse these beans or rice for blind-baking multiple times, but make sure to label them so they’re not accidentally used in cooking!
2. Sugar
- How to use: Fill the pie crust with granulated sugar. Make sure it’s evenly distributed across the bottom and up the sides.
- Why it works: Sugar is dense and heavy, making it a good substitute for pie weights. It also won’t burn at the typical blind-baking temperature.
- Tip: After baking, you can use the sugar for another purpose (like in a recipe or for sweetening drinks), as it won’t have taken on any undesirable flavors.
3. Coins or Clean Metal Objects
- How to use: Place a layer of parchment paper or aluminum foil in the crust, then arrange clean, food-safe metal objects (like coins or metal washers) on top. They will weigh the crust down during baking.
- Why it works: The metal objects will provide the necessary weight to prevent the dough from puffing.
- Tip: Make sure the objects are completely clean and avoid any metals that could react with the heat.
4. Uncooked Pasta
- How to use: Dried pasta, such as penne or rigatoni, can be used as a weight in the same way as beans or rice.
- Why it works: Pasta is dense and will hold the crust in place while it bakes. It’s a great option if you’re in a pinch.
- Tip: Similar to beans and rice, you can reuse the pasta for blind-baking purposes but not for cooking afterward.
5. Heavy Metal Utensils
- How to use: You can place heavy kitchen utensils, like cleaned metal spoons, measuring cups, or even a small pot inside the crust.
- Why it works: The weight of these items will help keep the dough in place and prevent it from shrinking.
- Tip: Avoid utensils with non-stick coatings, as they could get damaged with prolonged heat exposure.
6. Pie Pan Lids or Other Pans
- How to use: Place a second pie pan or another oven-safe pan inside the pie crust, using it as a weight.
- Why it works: This method will press down on the dough and ensure it holds its shape while baking.
- Tip: Be sure that the second pan is slightly smaller than the pie pan you’re using.
7. Aluminum Foil (with Salt or Other Weight)
- How to use: Crumple aluminum foil into a ball and use it as a weight to hold the pie crust in place. For added weight, fill it with a layer of salt or rice.
- Why it works: The foil holds the shape of the crust while the salt or rice adds weight.
- Tip: Use the foil carefully so it doesn’t tear, and make sure to remove it carefully after baking.
How to Flute a Pie Crust
Fluting the edges of a pie crust is a decorative way to finish your pie, and it also helps to keep the crust in place during baking. There are several methods for fluting, but here are a few easy and popular ones to make your pie look beautiful and polished:
1. Pinching the Crust (Hand Fluting)
This is the most common and easiest method, where you pinch the dough between your fingers to create a simple, classic fluted edge.
Steps:
- After rolling out your dough and placing it in the pie pan, trim any excess dough, leaving about 1 inch around the edges.
- Gently press the dough against the sides of the pan.
- Use your thumb and index finger to pinch the dough at regular intervals. Pinch the dough between both fingers to form a small, even ridge, and repeat all around the edge.
- To make it even more decorative, you can alternate pinching with your thumb and forefinger on both hands or pressing the dough with your index finger while your thumb holds the opposite side.
Tip: Try to keep the pinches consistent in size for a neat appearance.
2. Forked Edge
Using a fork to flute the edges gives a more rustic, but still attractive look.
Steps:
- After placing the dough in the pie pan and trimming the edges, press the dough firmly against the sides of the pan.
- Using the tines of a fork, press down all around the edge of the crust to create an even, decorative pattern.
- For added flair, you can lightly press the fork in a crisscross pattern or just gently press along the edge for a simple, rustic look.
Tip: For a more polished look, you can brush the edges with a little beaten egg wash before using the fork for a shiny, golden effect.
3. Scalloped Edge (Twisting Method)
This method involves using your fingers to twist the dough into loops for a more intricate, scalloped look.
Steps:
- After trimming the dough, fold the edges of the dough over slightly, leaving about 1 inch of excess dough.
- Using your thumb and forefinger, twist small sections of the dough to form a scalloped edge, creating a small “loop” shape all around the perimeter.
- Press gently as you go to ensure the scallops are even.
Tip: This technique works best when the dough is chilled and firm, as it helps keep the twists intact during baking.
4. Braided Edge
A braided edge creates a beautiful, textured border for your pie and is perfect for rustic or elegant pies.
Steps:
- Roll out additional dough to create long strips, about ½ inch wide.
- Braid the strips together (like a simple 3-strand braid).
- Gently place the braided dough around the pie’s edge, pressing the ends into the crust.
- Trim any excess, and press gently to attach it to the crust.
Tip: Brush the braided edge with a bit of egg wash (1 egg whisked with 1 tbsp water) for a golden finish.
5. Rope Edge
A rope edge looks elegant and is made by twisting the dough into a rope-like design.
Steps:
- Roll out your dough and place it in the pan, trimming the edges as you go.
- Roll the excess dough between your palms to form a long, thick rope.
- Gently lay the rope along the edge of the pie and press lightly to secure it in place.
- Pinch both ends of the rope together and tuck them under the pie to secure them.
Tip: For added shine, brush the rope edge with an egg wash before baking.
Myths Behind The Best Flaky Pie Crusts
There are many myths surrounding the creation of a flaky pie crust, and some of them can actually lead to mistakes if taken too literally!
While achieving a perfect flaky crust can seem like a delicate art, separating fact from fiction can help you achieve the best results. Here are some common myths and the truths behind them:
1. Myth: The Dough Must Be Mixed Until Smooth
Truth: Overworking the dough is the enemy of flakiness. While it’s important to bring the dough together, mixing until smooth will lead to a tough, dense crust, not a flaky one. The goal is to create a dough with visible chunks of fat (butter, lard, or shortening) that will melt during baking, leaving pockets of air that form the flaky layers.
Tip: Mix the dough just until it starts coming together, then gently knead or fold it to form a disk.
2. Myth: The Butter Must Be Fully Incorporated into the Dough
Truth: Small bits of fat in the dough are key to a flaky texture. Many recipes recommend cutting the fat into small pieces or using a pastry cutter or food processor to incorporate it into the flour. But it’s actually better if the fat is in small, uneven chunks. This creates layers in the dough as the fat melts during baking, leading to a more tender and flaky crust.
Tip: Aim for pea-sized clumps of butter or fat in the dough, rather than blending it completely.
3. Myth: Cold Ingredients Are Overrated
Truth: Cold ingredients (especially cold butter and water) are crucial to a flaky crust. The cold fat creates pockets of air and steam when baking, contributing to the flakiness. If the butter gets too soft or the water is too warm, the fat will begin to blend into the flour instead of staying in distinct chunks, resulting in a tougher texture.
Tip: Use cold butter straight from the fridge and ice-cold water. You can even chill your mixing bowl and utensils!
4. Myth: You Should Use Only One Type of Fat
Truth: Many bakers believe that butter is the only fat to use for a flavorful crust. While butter does give the crust excellent flavor, it’s actually common (and beneficial) to combine butter and shortening (or lard) to get the best of both worlds: the flavor of butter and the tenderness of shortening or lard. Shortening and lard create an extra-flaky texture, while butter adds rich flavor.
Tip: For a balance of flavor and texture, consider using half butter and half shortening or lard.
5. Myth: You Should Never Handle the Dough with Your Hands
Truth: While it’s true that overhandling can cause the dough to warm up and lose its flakiness, gently working the dough with your hands can help you control the texture. The warmth of your hands can soften the fat, which is important in certain stages. The key is to avoid excessive kneading or rolling.
Tip: Gently handle the dough just enough to bring it together into a disk. Use your hands to fold it or press it into shape rather than relying solely on a rolling pin.
6. Myth: You Can Skip Chilling the Dough
Truth: Chilling the dough is essential to achieving a flaky pie crust. Resting the dough in the fridge (or freezer) allows the gluten to relax and the fat to firm up again, making the dough easier to work with and preventing shrinkage. Skipping this step can result in tough or unevenly baked crusts.
Tip: Chill the dough for at least 30 minutes before rolling it out, and again after you place it in the pie dish. If you’re in a rush, you can even chill the dough for just 10-15 minutes between steps.
7. Myth: Adding More Water Will Help Bring the Dough Together
Truth: Adding too much water makes the dough too wet and can result in a tough crust. The key is to add just enough water to bring the dough together, using the least amount necessary. Over-wetting the dough activates the gluten too much, leading to a dense crust.
Tip: Add water 1 tablespoon at a time and stop once the dough holds together when gently pressed.
8. Myth: You Should Always Roll Out the Dough Thin
Truth: While you do need to roll the dough out to fit your pie pan, rolling it too thin can result in a crispier, drier crust rather than a flaky one. Thicker layers of dough allow for the fat to create more layers and provide a flaky texture.
Tip: Aim for a dough that’s about ⅛ inch thick. Don’t worry if it’s not paper-thin!
9. Myth: The Dough Should Never Be Sticky
Truth: Slight stickiness is normal, especially if you’re working with a rich, buttery dough. Rather than adding excessive flour (which can make the dough tough), lightly flour your work surface and rolling pin as needed.
Tip: If the dough is a little sticky, don’t panic. Just use a light dusting of flour on your work surface and rolling pin, but avoid over-flouring it.
10. Myth: Pie Crusts Only Work for Sweet Pies
Truth: Flaky pie crusts can be used for both sweet and savory pies. The texture and technique used to make a flaky crust are the same, whether the pie is filled with fruit, custard, or savory ingredients like quiche or pot pie.
Tip: For savory pies, you can omit sugar in the dough to keep the crust savory and add seasonings like herbs for extra flavor.
Thoughts on Butter, Shortening, and Lard in Pie Dough
The choice of fat in your pie dough significantly affects the texture, flavor, and overall quality of the crust. Here’s a breakdown of butter, shortening, and lard in pie dough, and how each one contributes to the final result:
1. Butter
Flavor:
- Butter is beloved for its rich, creamy flavor. It adds a delicious, slightly sweet taste to the crust that many people prefer, especially in dessert pies. It’s perfect for pies that highlight the flavor of the crust, like fruit or custard pies.
Texture:
- Butter creates a tender crust, but it doesn’t make it as flaky as shortening or lard. The reason is that butter has a lower melting point, which means the fat melts more quickly during baking, giving less time for the layers to form.
- Too much butter can result in a greasy crust, so it’s important to balance the amount and work it into the dough carefully to achieve a desirable texture.
Best For:
- Dessert pies such as apple, cherry, or pecan pies, where flavor is a priority.
Pro Tip: Use cold, unsalted butter for better control over the salt content. For extra flakiness, you can combine butter with another fat like shortening.
2. Shortening
Flavor:
- Shortening is flavor-neutral compared to butter. It doesn’t contribute much in terms of flavor, but it’s excellent for achieving the desired texture.
Texture:
- Shortening has a high melting point, which makes it ideal for a flaky crust. Because it stays solid longer than butter, it creates thin, distinct layers in the dough, making it more flaky and crisp. This is particularly important for savory pies like quiches or pot pies where you don’t want a strong buttery flavor competing with the filling.
- Shortening makes the crust more tender than butter alone, but it won’t have the same richness.
Best For:
- Savory pies such as quiche, pot pies, or any dish where the crust should not overpower the filling with flavor. It’s also great for making pie crusts for pies where texture is more important than flavor, like certain cream pies.
Pro Tip: Use hydrogenated shortening for a superior flaky texture. However, some prefer to avoid it due to its trans fats content, and in this case, there are trans-fat-free shortening options available.
3. Lard
Flavor:
- Lard, rendered from pig fat, adds a slightly savory, meaty flavor that can be very pleasant in certain pies, but it may not be ideal for all types of pies. It’s often used in traditional pie recipes because of its ability to provide a distinct texture and depth to savory pies, but it works well in sweet pies too when combined with other fats.
Texture:
- Lard is the best fat for achieving a super-flaky texture. It creates incredibly light, flaky layers due to its high fat content and ability to remain solid at a higher temperature. It’s often considered the gold standard for pie dough texture.
- Like shortening, lard also has a high melting point, which means it creates more layers in the dough and results in a crispier, tender crust.
Best For:
- Traditional pies like apple, peach, or cherry pies, where you want a flaky texture and don’t mind a bit of savory flavor in the background. It’s also commonly used in savory pies like meat pies or chicken pot pies.
Pro Tip: If you’re using lard, you can balance its savory flavor by using a combination of butter and lard for both the flavor and flakiness.
Products I love when making pie crust…
This pie crust recipe is SUPER EASY and delicious – and if you’re like me this time of year, then you maybe already have some of these items on hand.
OR maybe you have never made homemade pie crust before, & you might be a bit nervous – but you’re going to love it. I have made a list below of the things I absolutely can’t live without when it comes to making homemade pie crust.
- mixing bowl
- rolling pin
- pastry cutter
- disposable pie plates
- aluminum pie plate
- ceramic pie plate
- airtight pie container
DON’T MISS THESE HOLIDAY E-BOOKS!

If you love this Easy Pie Crust recipe, you’re going to love these pie-filling recipes too. Please click each link below to find the easy, printable recipe!
pie dough
If you love this recipe for Homemade Pie Crust as much as I do, please write a five-star review, and be sure to help me share on Facebook and Pinterest!
CONNECT WITH KLEINWORTH & CO!
Be sure to follow me on my social media, so you never miss a post!
FB, Pinterest, IG, Email Subscription
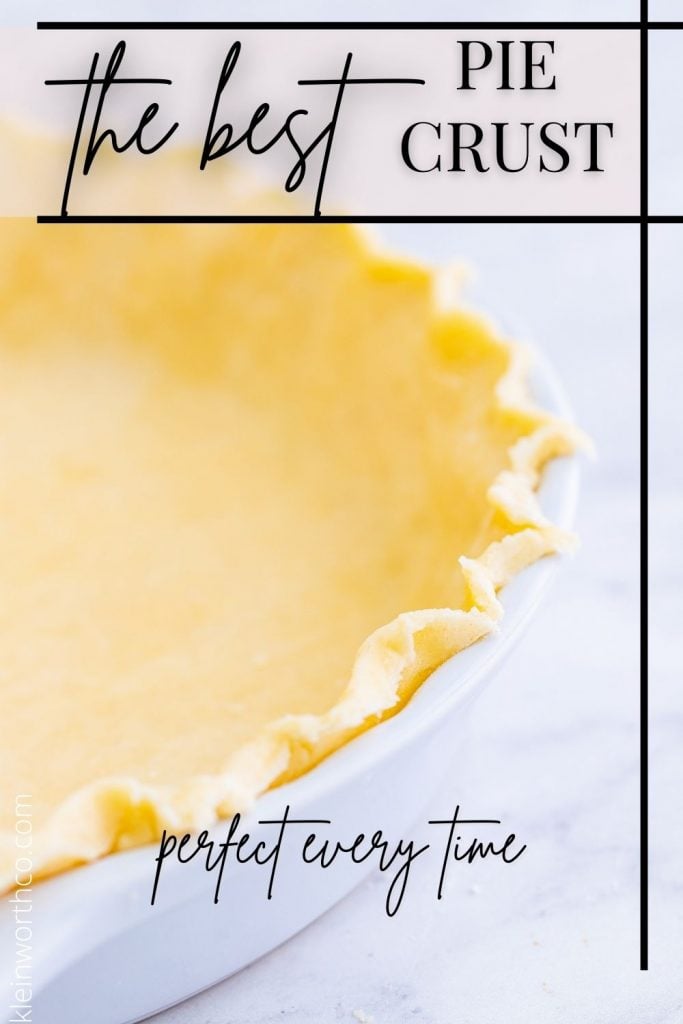
Easy AWARD WINNING Pie Crust
Ingredients
- 1¼ cup all-purpose flour
- ½ cup cold butter (1 stick – cut into cubes)
- ½ tsp granulated sugar
- ¼ tsp salt
- ¼ cup ice water
Instructions
- Combine flour, butter, sugar, and salt in a large bowl.
- Using a pastry cutter, start working the butter into the dry ingredients until it looks like crumbles. (You can also use 2 butter knives & cross them through the ingredients to combine.)
- Once you have reached a crumbly texture add the water.
- Work it together with your hands pressing & lightly kneading it together until you have a moist ball of dough that holds together well.
- Place the dough on a well-floured surface.
- Flour your rolling pin & start working from the center pushing outward in all directions.
- Once you have stretched the dough large enough to fill your pie plate carefully transfer it to your plate.
- Trim any excess dough that hangs over the edge of the pie plate.
- Flute your edges by crimping between your fingers and pinching the dough every ½ inch or so.
- If you are baking this pie & filling it afterward – Poke holes in the bottom of the crust with a fork. Bake at 425 degrees for a conventional/ 400 degrees for convection for approximately 15 minutes.
- Baking time is just for the crust. If you are filling the pie before baking – do not poke holes in crust.
- Baking times for a filled pie will vary depending on the filling you are baking.
Notes
Nutrition
Nutritional information for the recipe is provided as a courtesy and is approximate. Please double-check with your own dietary calculator for the best accuracy. We at Yummi Haus cannot guarantee the accuracy of the nutritional information given for any recipe on this site.




Excellent!! I will never buy another pie crust!! This one is so easy, tasty and flaky!! My first time!!
Sorry this may seem like a dumb question but do I poke holes and bake and then fill it once I make the filling?
Looking to do apple pie
So – it depends on the type of pie you are making. When you poke holes in the crust and bake by itself, then add the filling – that is called blind baking the crust. In the case on an apple pie, I make the crust, fill it with the filling and bake altogether. (more detailed instructions here – https://www.kleinworthco.com/french-apple-pie/)
I have been looking for a recipe to make my own and this is truly amazing. It’s not the prettiest but its my first. And i thought it was great. Can you make this pie crust and freeze it? Thank you for sharing your recipe. This will what i use from know on. Thank you
I’m so glad you liked it. Yes you can freeze in a “freezer-safe” pie plate. You will need to either thaw completely before using or bake longer once filled. Enjoy!!
Thank you so much for taking the time to share your recipe with us. When you say to use ice water. Does that just mean ice cold water? Or should there actually be ice cubes? If so, how does that affect measuring the volume as well as the kneading process?
You can use ice cold water. I usually just place a bowl of ice filled water next to where I’m working. When I’m ready for it, I measure it out of the bowl.
In September, I entered my beloved Triple Berry Pie into the Virginia State Fair. While I often use a premade crust for convenience, the competition rules required a handmade crust. I came across your recipe, drawn in by its promise of being “easy,” and I have to say, it truly was! The crust was not only simple to make but also incredibly delicious, perfectly complementing my pie. I wasn’t the only one who thought so—my pie won Best Fruit Pie and then went on to win Best in Show and Best Pie at the State Fair! Thank you so much for sharing your wonderful recipe!
Oh WOW – Congratulations, Mary! That is amazing! I’m so happy to hear that. Thank you so much for coming back over to share that wonderful experience. I’m so glad I was able to be a part of it.
Amazing! The dough tasted wonderful.
Can I freeze the crust in a disk? How long can I be frozen?
I have never frozen this dough, so I can’t say how it will perform once thawed and used. I would imagine it could be frozen for up to a month. But just keep in mind that the texture might change.
Would you pre-bake this crust for a pumpkin pie? Or fill and bake?
For pumpkin pie I would fill and bake. (this goes for apple as well as any other pie that needs to be baked.)
How long do I bake it, if I filling it with pumpkin pie filling?
Bake acording to the directions for your pie recipe. The crust will bake with the pie – if it gets too brown around the edges towards the end, just tent around the edges with foil for the remainder of the baking process.
This the best pie crust recipe I have ever come across!
Super simple and delicious! Flaky everytime..
I use for my pot pies and regular fruit pies.
So good!
That’s AWESOME! I’m so glad you like it.
The calorie count and carb count can’t be right? Is that for the whole entire crust or one piece? 121 carbs has to be for entire pie crust.
There are 120 carbs in 1 1/4 cup of flour. No carbs in butter. How is one serving 121 carbs? That would be for the entire pie crust, is this correct?
As stated in the recipe card – the serving is 1 crust. Calculations are for 1 whole crust – you can divide it however you like. All that being said, if carbs and calories are something you are watching closely, this pie crust is definitely not diet food and I personally wouldn’t eat it if I were trying to eat low-carb or keto. I also recommend using your own nutrition calculator that you trust as I have yet to find two that will calculate the same and produce the same data.