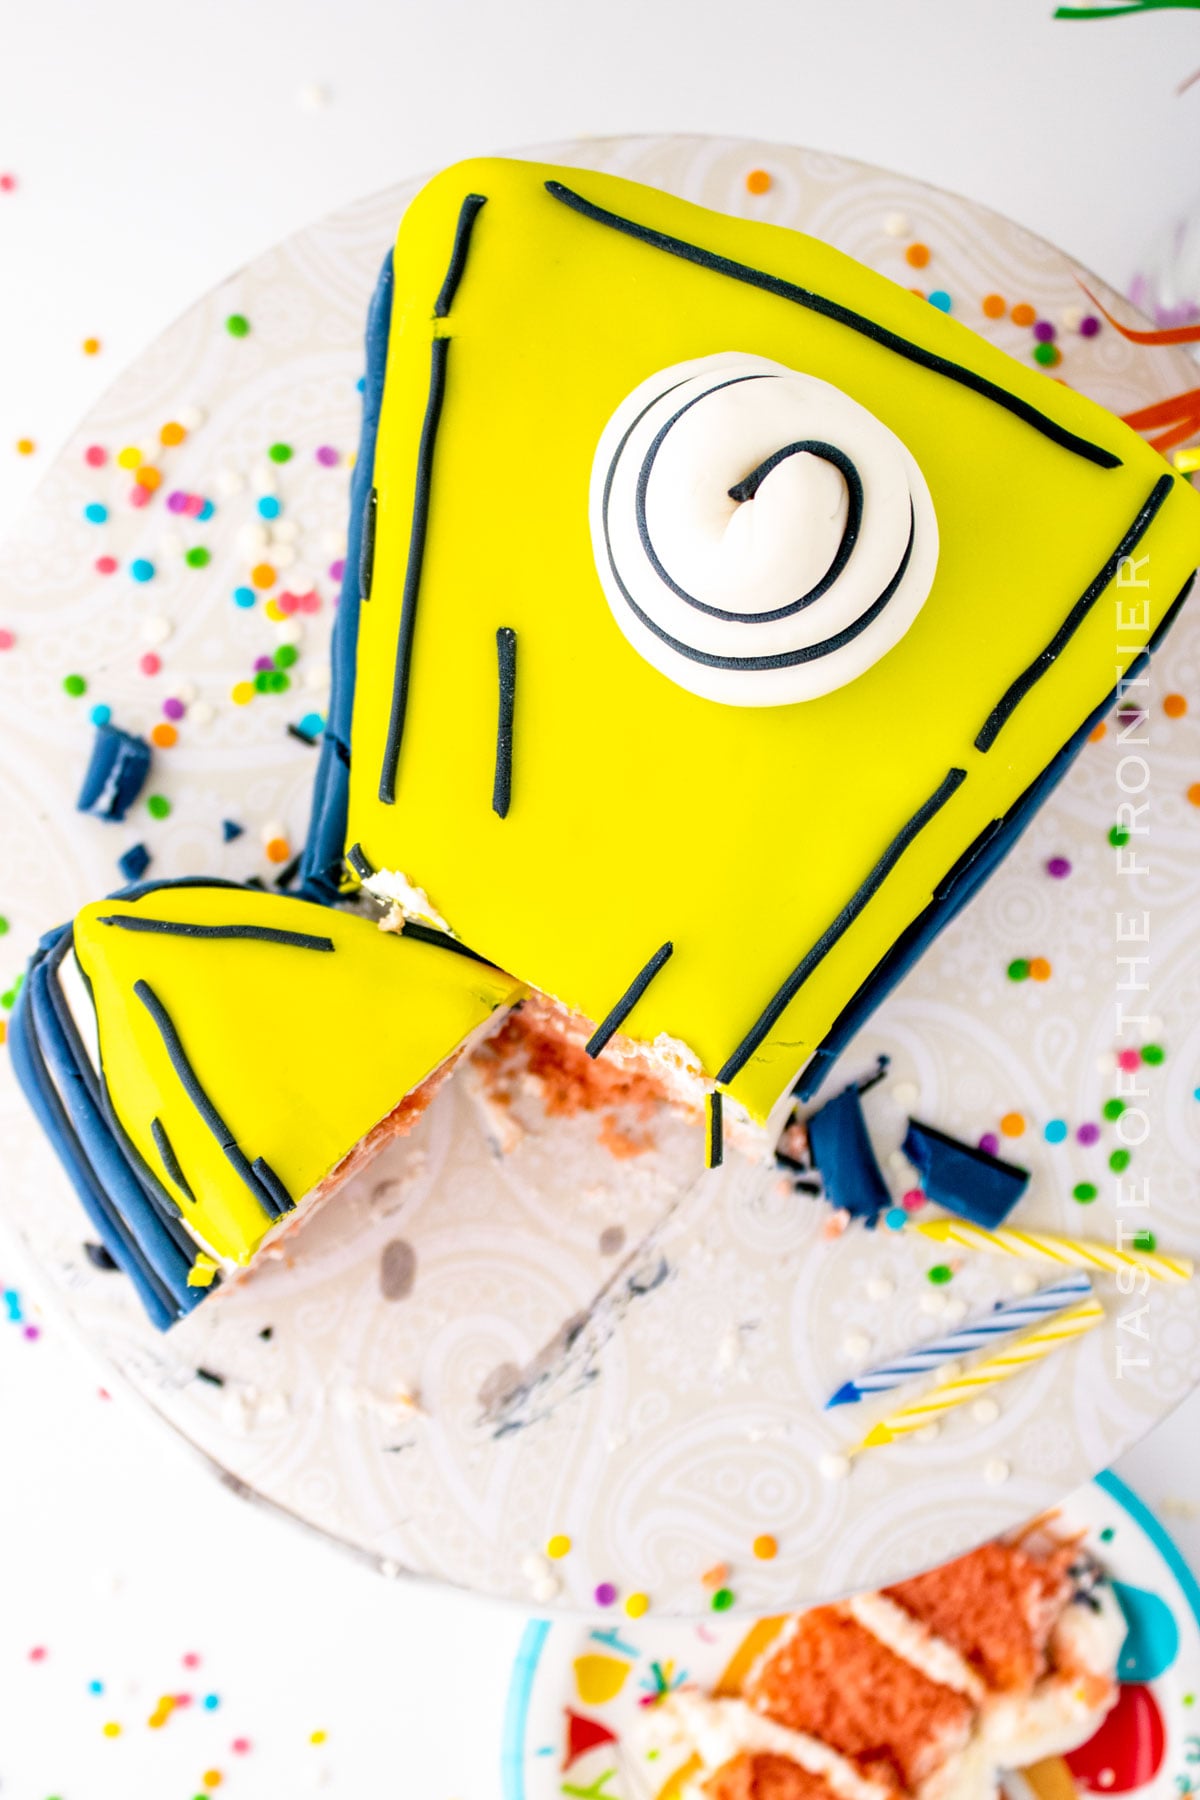
This comic book cake recipe was inspired by a viral clip of Melbourne pastry chef on social media who created a custom-made cake that had an incredibly fun cartoon appearance. It’s such a super simple concept, yet so cute and unique!
Most of this recipe has to do with decorating the cake. To cut down on time, you don’t have to make the actual cake — you can use a sheet cake from the grocery store or your local bakery.
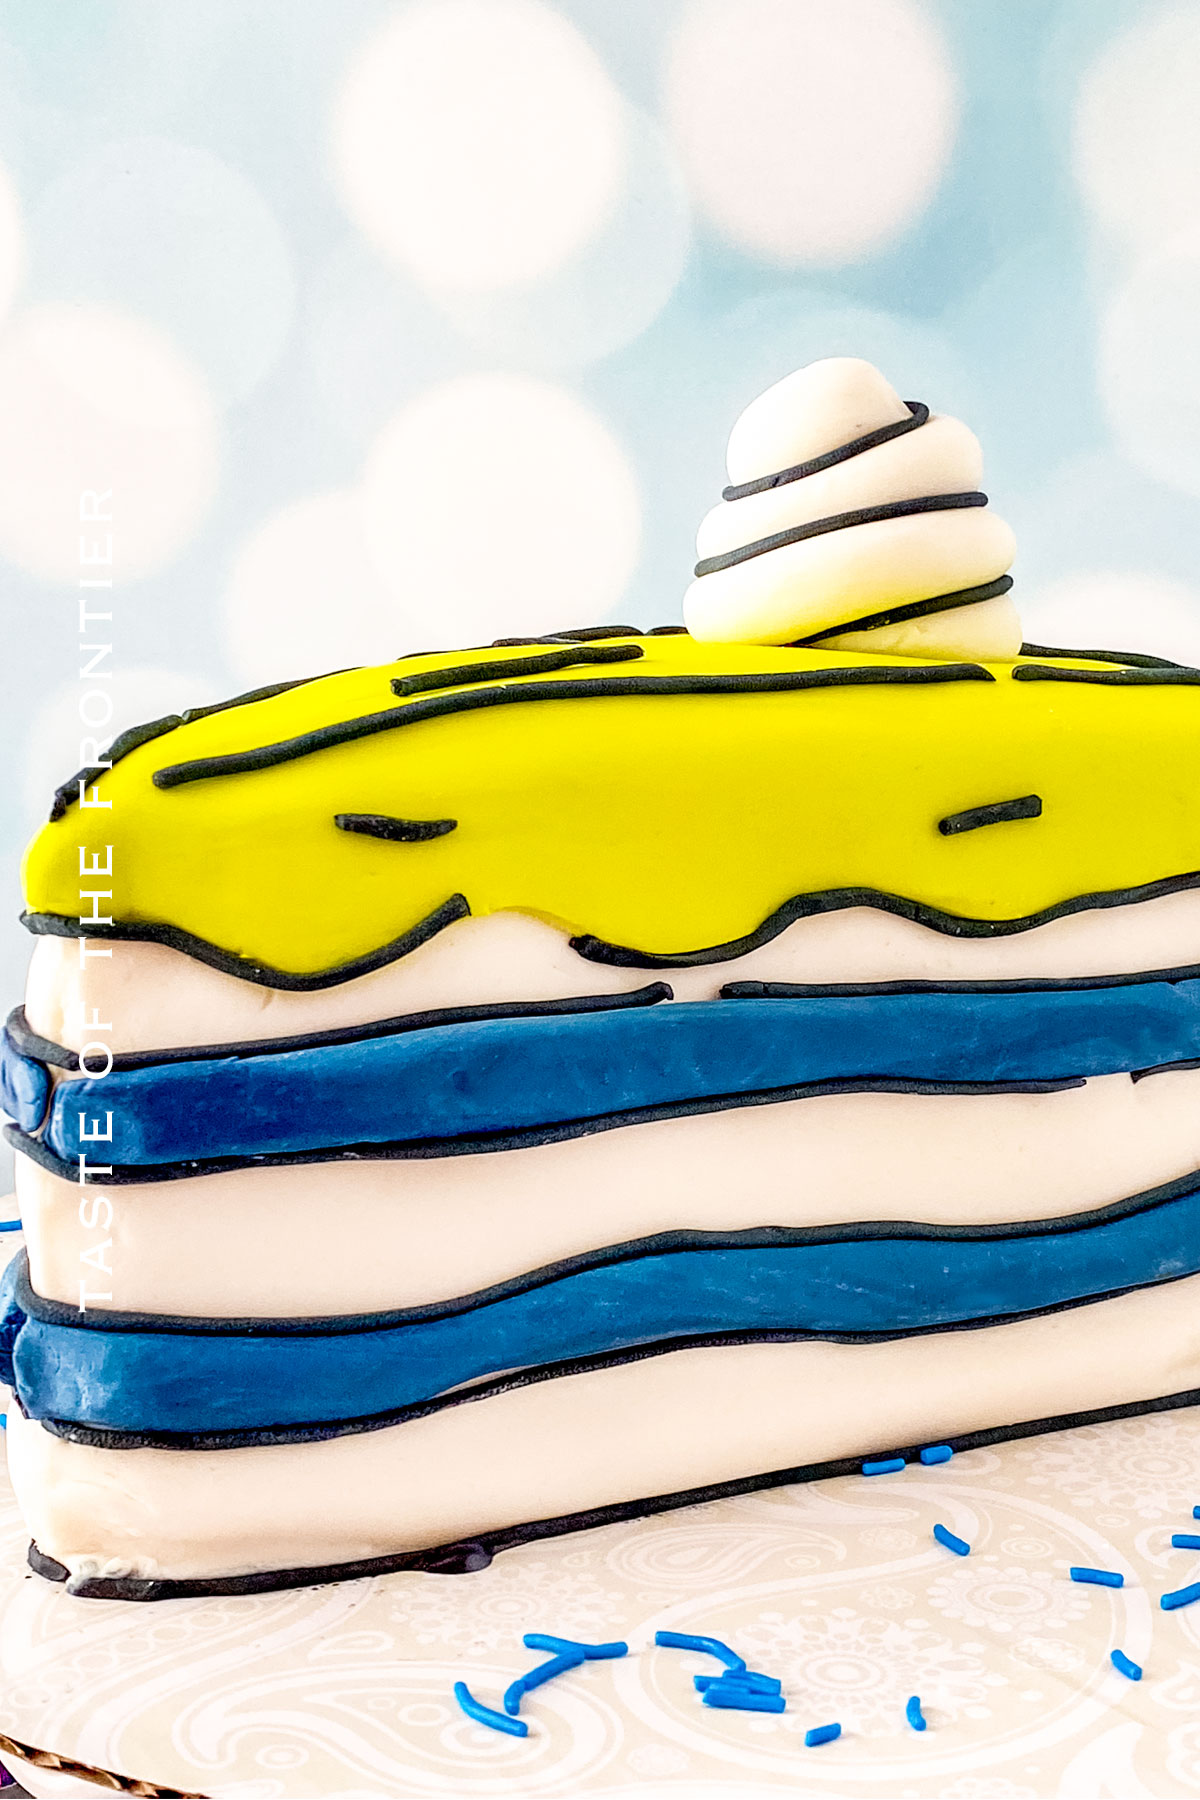
This makes for a perfect birthday cake but you can use it for other occasions, too! You can customize the colors and the flavors and put your own creative spin on it.
The next time you’re looking to get artsy with your cake decorating, definitely check out this whimsical cake!
Common Questions about Comic Book Cake
Who started the comic book style cake trend?
While comic cakes have existed for a while, the trend was started on TikTok by popular Melbourne baker Tigga Maccormack.
What is a comic cake?
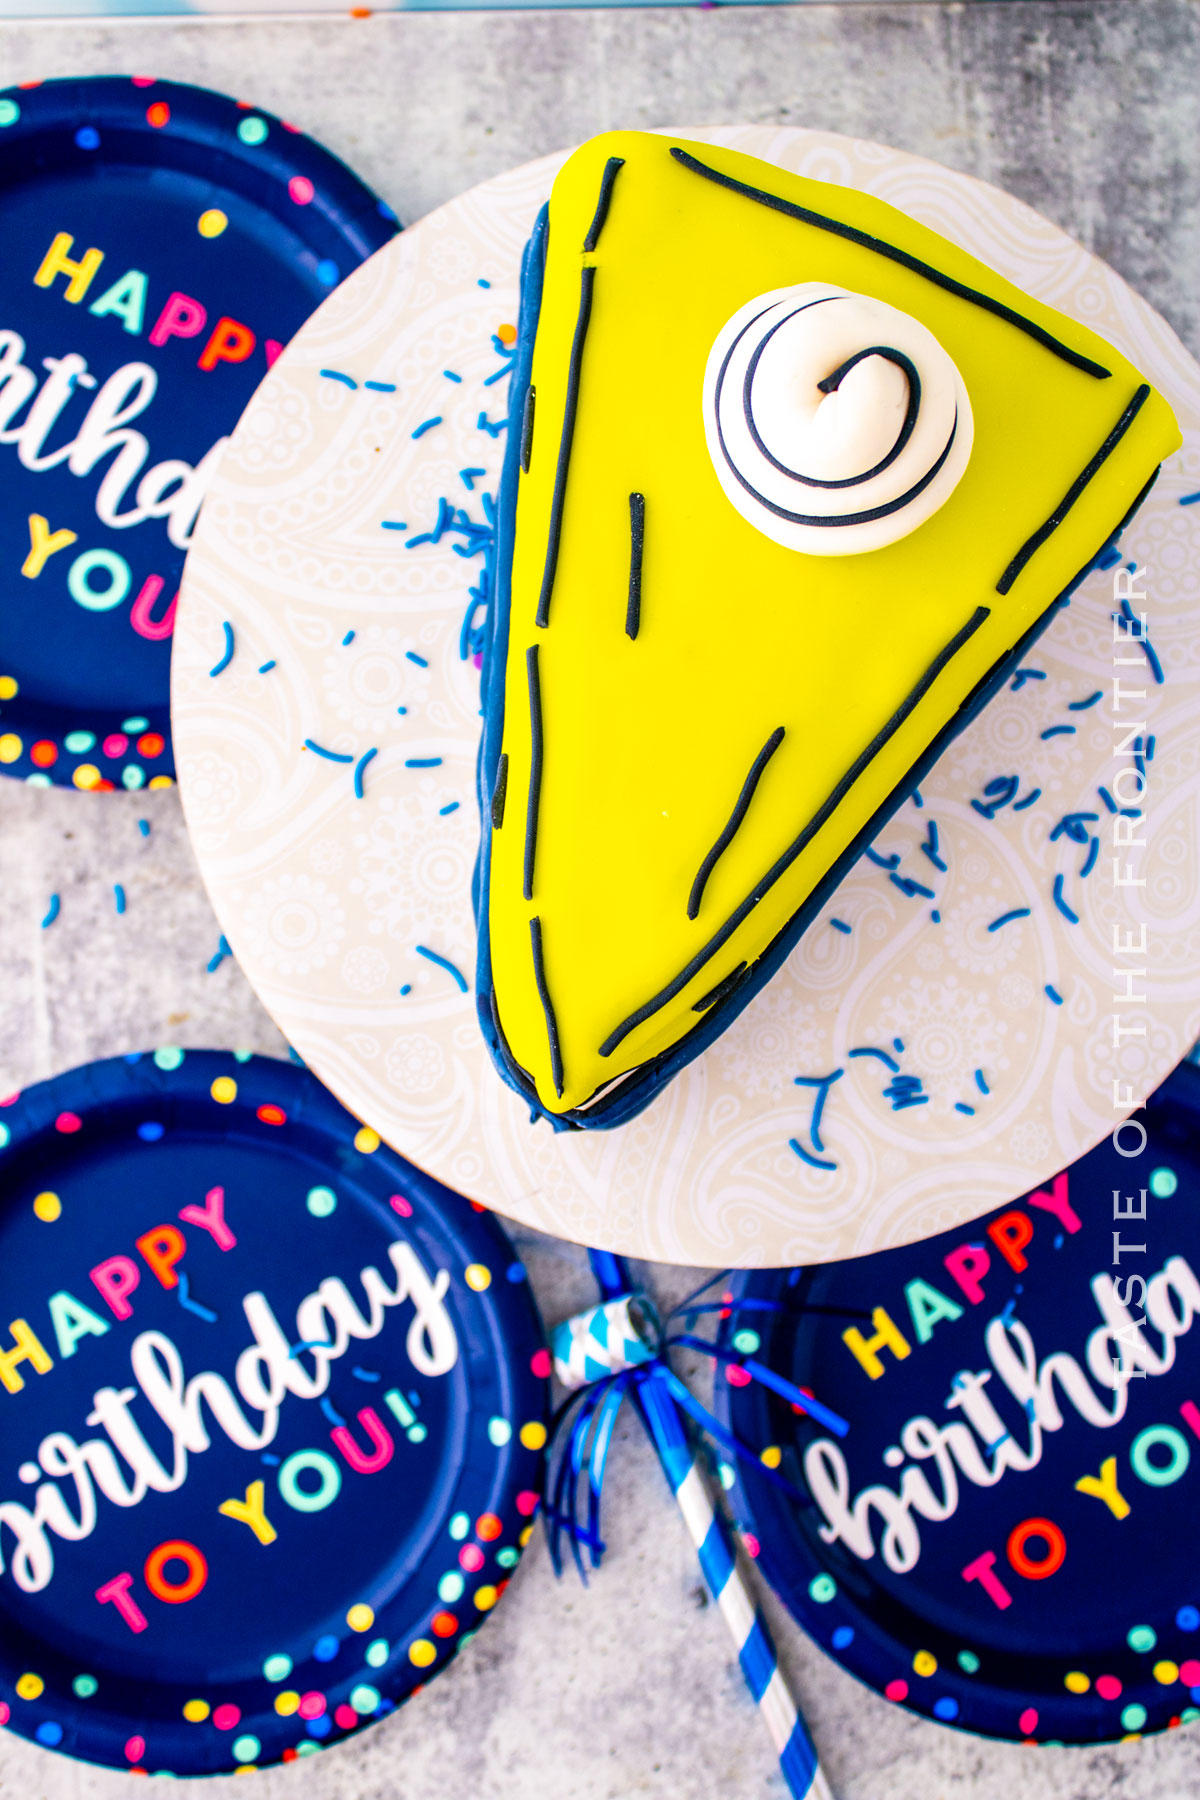
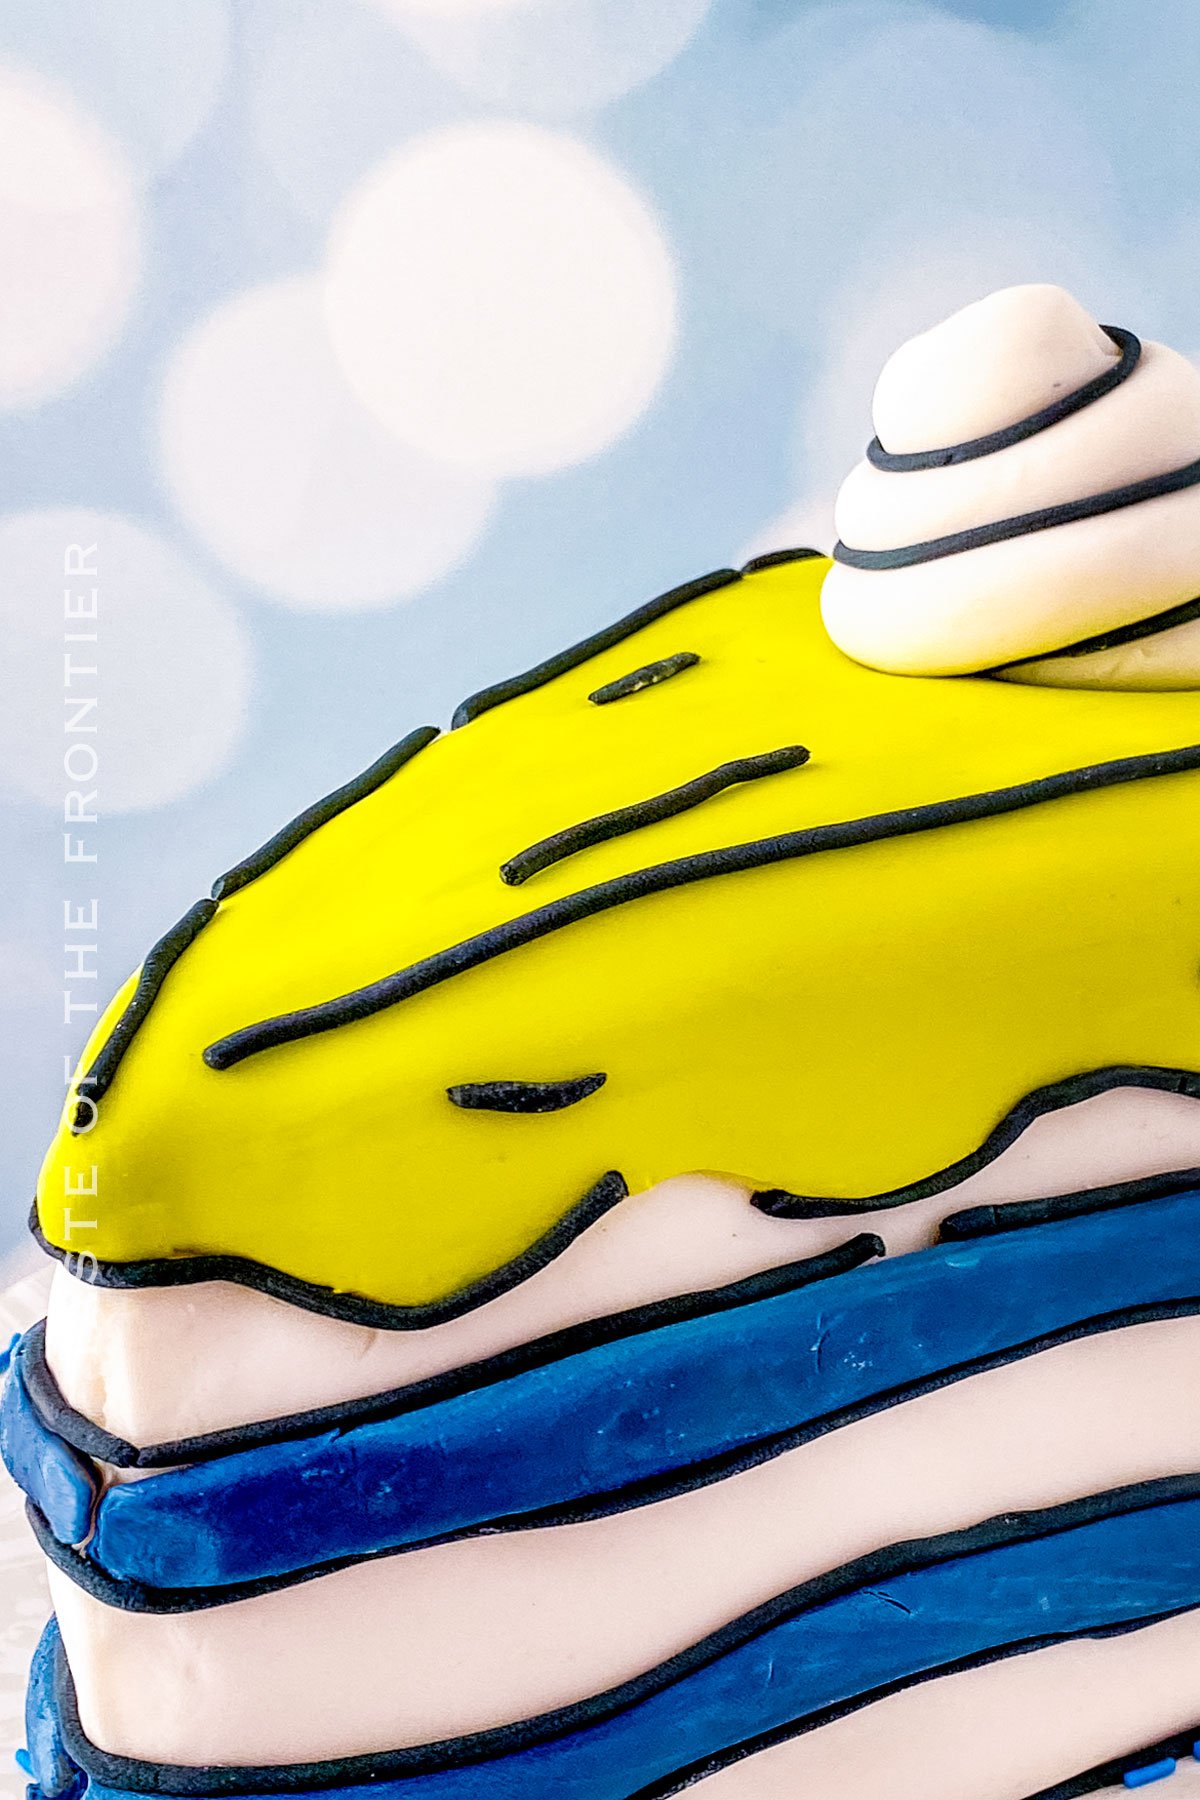
This type of cake is made to look like a drawing in a comic book. It’s intended to have a fun sketch-like appearance.
Making Comic Book Cake Ahead of Time
If you’re making your own sheet cake instead of buying it, you can do that ahead of time. Otherwise, it’s best to assemble this cake all at once.
Storage
Because this cake has buttercream frosting it does need to be stored in the refrigerator. If you have a large box to store the whole cake in, that is ideal — otherwise, cover it in plastic wrap.
Refrigerator – Store in the refrigerator for 3-4 days.
Freezing – Freeze the cake for up to 3 months.
Tips For The Best Comic Book Cake
This is a whimsical dessert — have fun making it and don’t get tripped up on making it perfect!
- When working with fondant, you want to make sure it has a manageable texture. If it’s too hard, add a bit of water, and if it’s too soft use confectioner’s sugar to make it harder.
- Avoid over-kneading the fondant so that it doesn’t become too soft.
- If your fondant is too soft, try covering it with plastic wrap and allowing it to rest for up to an hour in a cool place free of humidity.
- Stick with three layers of cake — it’s the perfect size and helps it to remain stable.
Ingredients
- Sheet cake (single-layer)
- Buttercream frosting
- White fondant
- Green fondant
- Navy blue fondant
- Black fondant
- Water
- Confectioner’s sugar
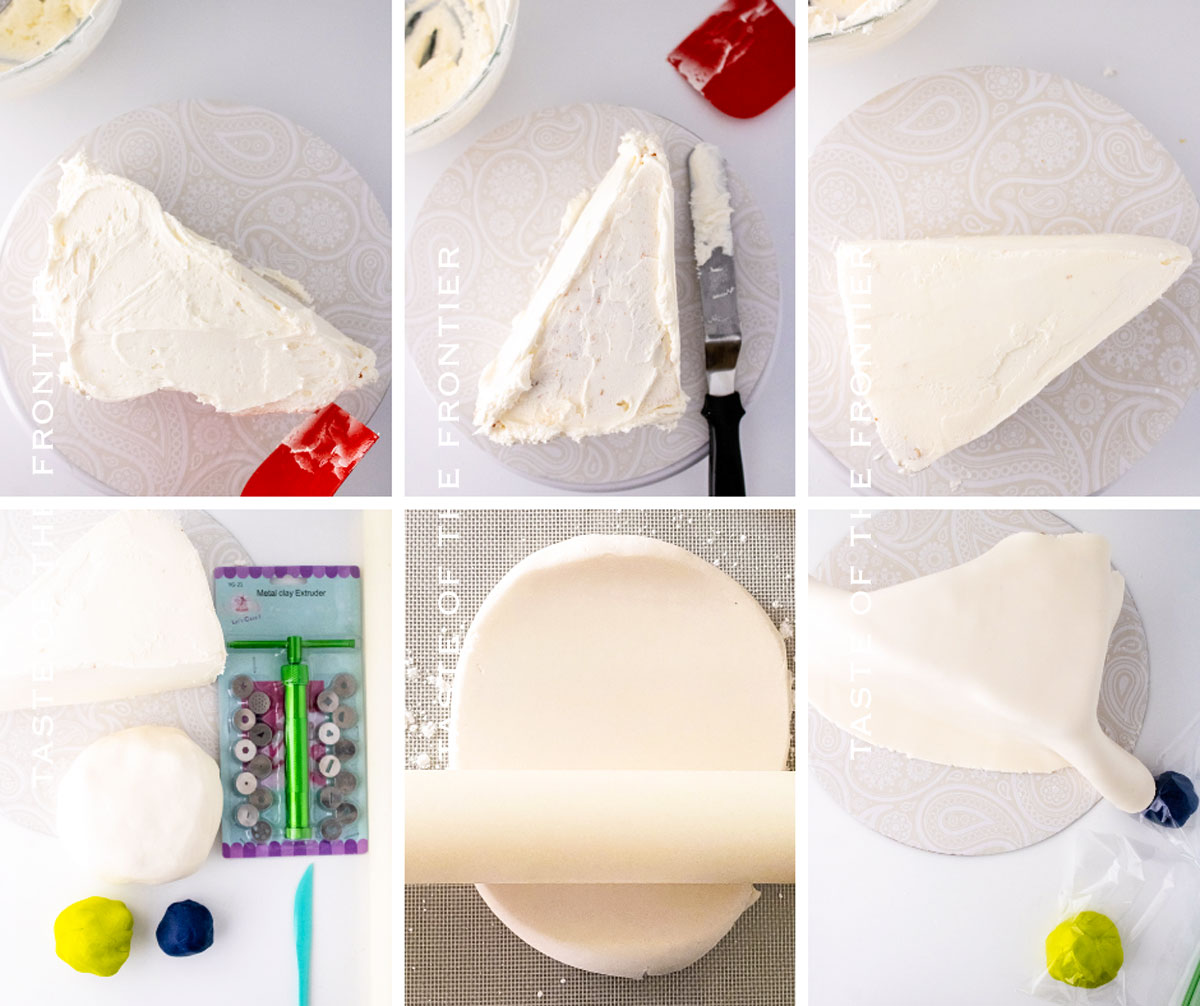
Kitchen Supplies You’ll Need
Make sure to have all of your supplies handy so that you can easily move from step to step when making the cake.
- Clay extruder
- Offset spatula
- Rolling pin
- Spray bottle
How to Make Comic Book Cake
Assemble the Cake
- Using a sharp knife slice 3 triangles. Reserve the remainder of the cake for another dessert.
- Spread the buttercream on the top of the first triangle and stack the second on top. Repeat for the third layer.
- Using an offset spatula, frost the cake with the buttercream, smoothing as necessary.
Fondant instructions for paneling the sides
- Knead fondant until it is smooth and soft and free of cracks and creases.
- Cover the work surface with a light dusting of powdered sugar.
- Using a rolling pin, roll out the fondant.
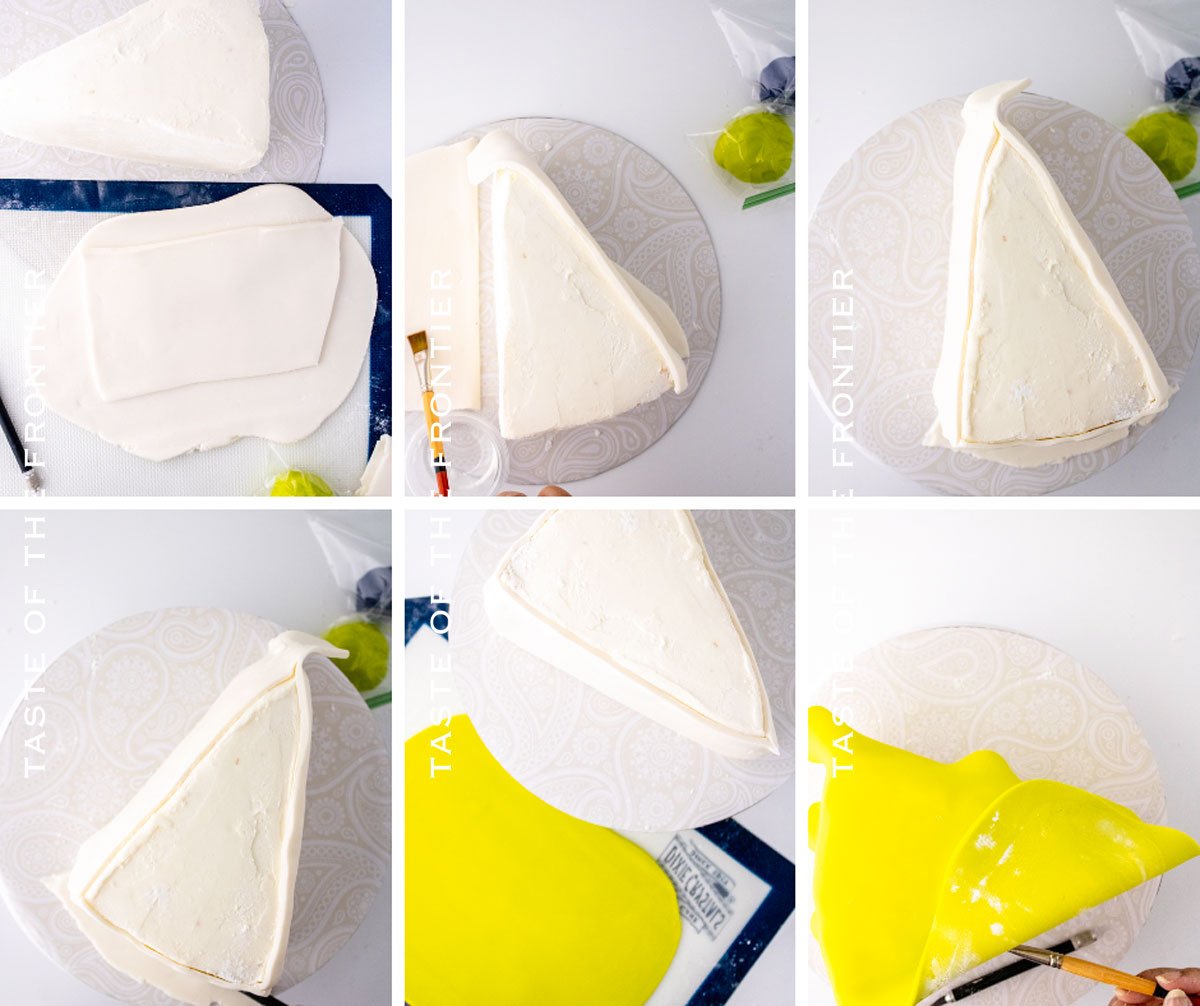
- Press the fondant against the side of the cake.
- Use an X-acto knife to cut the shape.
- Using a spray bottle, mist the side of the fondant then press it onto the cake.
- Use the powdered sugar to dust the work surface again.
- Knead and roll out the green fondant into a triangle shape.
- Place the triangle over the top.
- Mist the sides of the triangle hanging over the side of the cake.
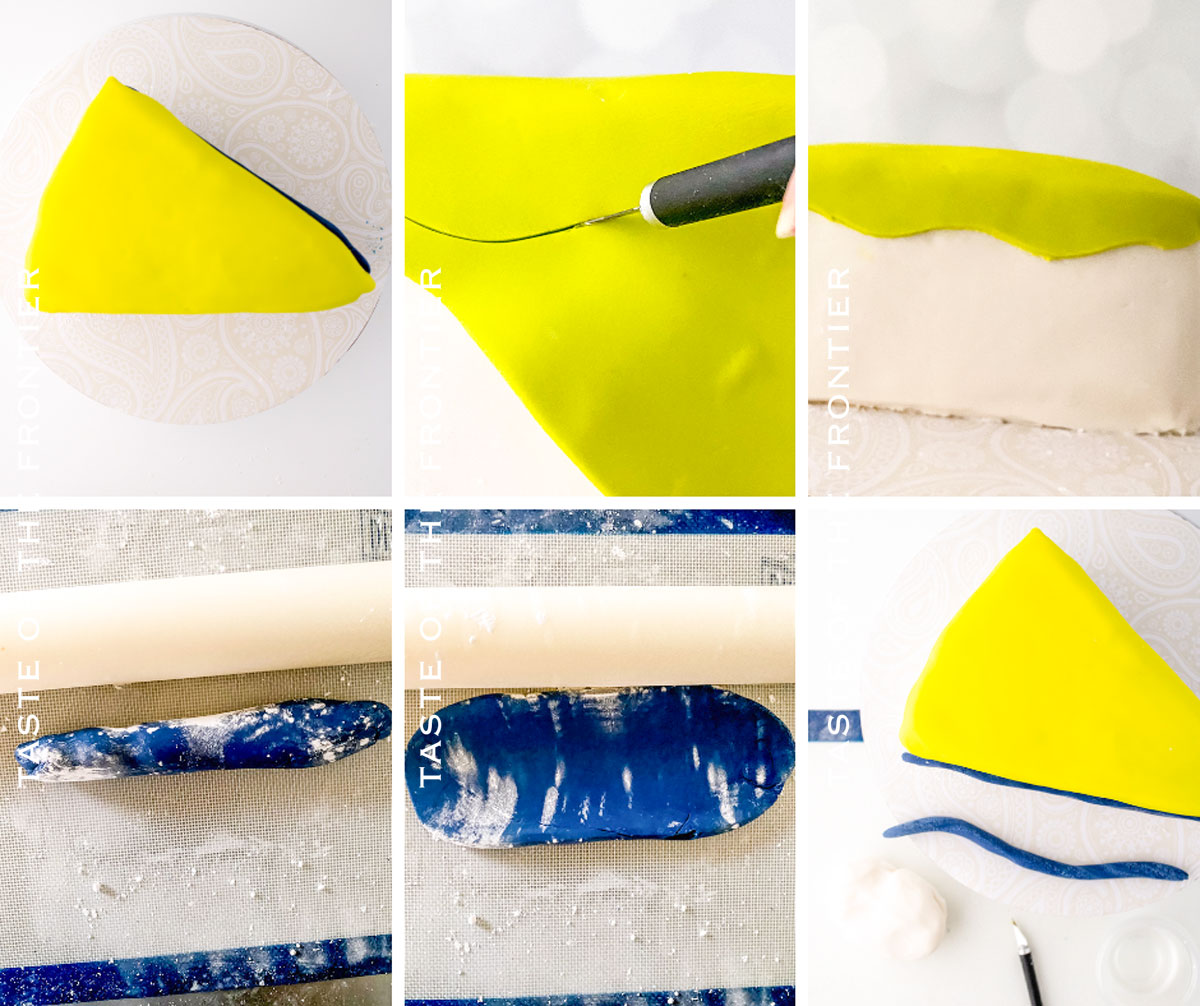
- Using the X-acto knife, carve the lines in the green fondant to create the dripping effect.
- Roll the blue fondant out into a log and press it with your fingers.
- Mist the strips of blue fondant and adhere it to the long sides of the cake.
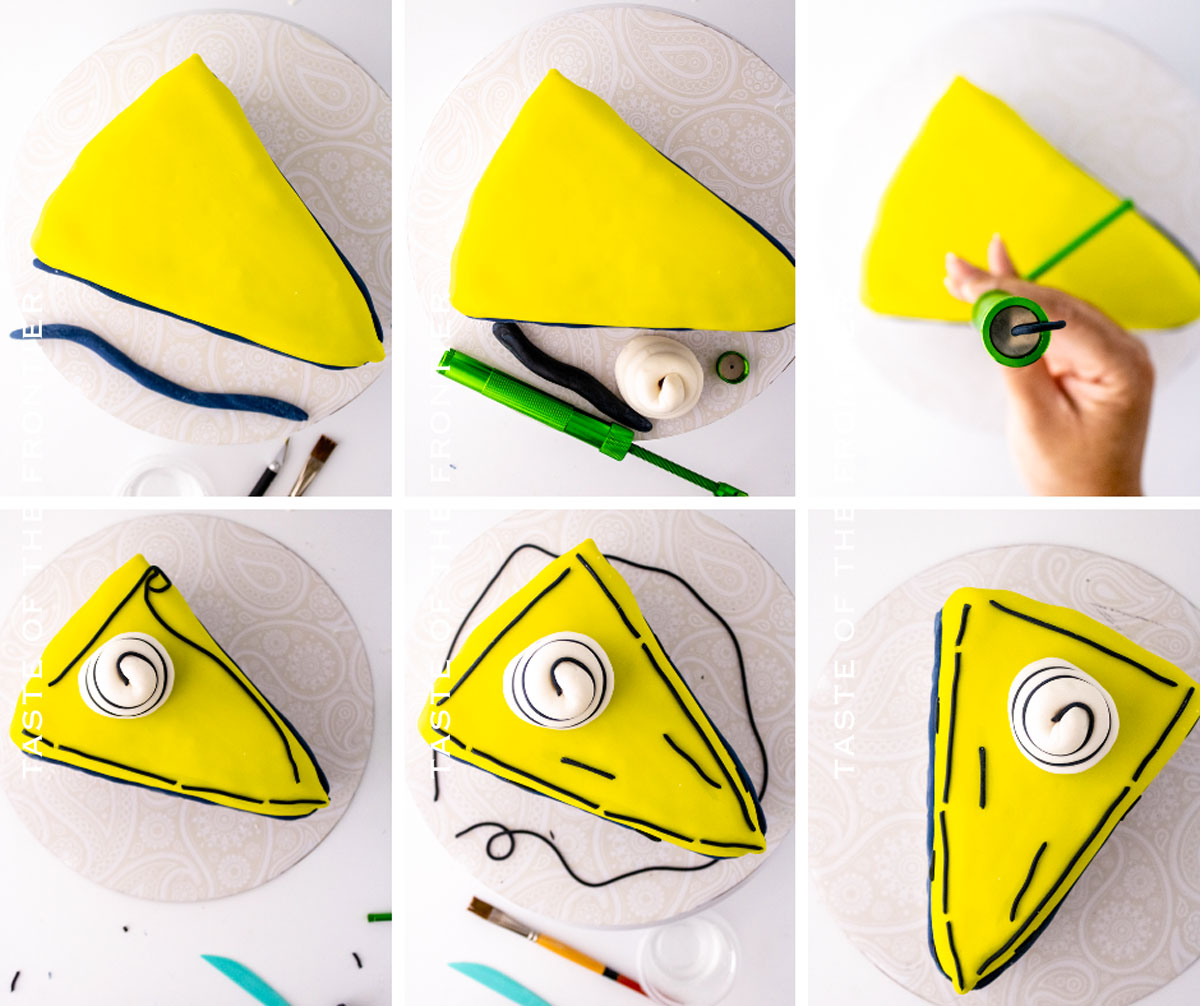
- Roll the white fondant into a log as well, and create a swirl.
Outline in black
- Use the small circle attachment of the clay extruder to create the thin strips of black fondant.
- Mist the black fondant and use it to outline the cake.
To clean up the cake:
- Use either vodka or lemon juice to remove any powdered sugar from the fondant.
What to Serve With Comic Book Cake
You can serve anything with this cartoon cake that you would with traditional desserts.
- Ice cream – Every cake is made even better with a scoop of vanilla ice cream (or your favorite flavor).
- Milk – A big, cold glass of milk, chocolate milk, or your favorite milk alternative pairs perfectly with this cake.
- Warm beverages – A cup of coffee or hot chocolate are great alongside this cake.
Why You Should Make This Recipe
Sure, this cake is a recent TikTok trend, but there are lots of other reasons to make this cute cake.
- Fun – Any kid or comic book lover will get a kick out of this cake.
- Unique – This is a cake you aren’t going to find at every other party you go to!
- Artsy – If you love creating interesting cakes, you’ll love making this one.
- Eye-catching – This beautiful cake is sure to be a show stopper at birthday parties or other gatherings.
Variations and Add-ins
There aren’t too many swaps for this one since it’s such a unique cake but there are a few things you can do to make it your own.
- Colors – Change the colors of the fondant to whichever you prefer. Pastel colors work particularly well.
- Decorator’s sugar – Add some sparkle or color by sprinkling a bit of decorator’s sugar on the top of the cake.
- Edible glitter – Add even more sparkle with edible glitter.
- Fondant additions – Use any excess fondant to make a whimsical fondant candle for a birthday party or a fondant cherry to go on top.
- Images – Use a special edible image printer to print images using edible ink onto edible paper and attach to the fondant.
- Cake flavor – Use any kind of cake flavor that you like for the sheet cake.
If you love this FUN cartoon cake recipe, you’re going to love these other birthday treats too. Please click each link below to find the easy, printable recipe!
Other Creative Cakes
If you love this recipe for Cartoon Cake as much as I do, please write a five-star review, and be sure to help me share on Facebook and Pinterest!
CONNECT WITH YUMMI HAUS!
Be sure to follow me on my social media, so you never miss a post!
Comic Book Cake
Ingredients
- ¼ sheet cake single-layer
- 4 cups buttercream frosting
- 24 oz white fondant
- 4.4 oz green fondant
- 4.4 oz navy blue fondant
- 2 oz black fondant
- small cup of water
- ¼ cup confectioner’s sugar
Instructions
Assemble the Cake
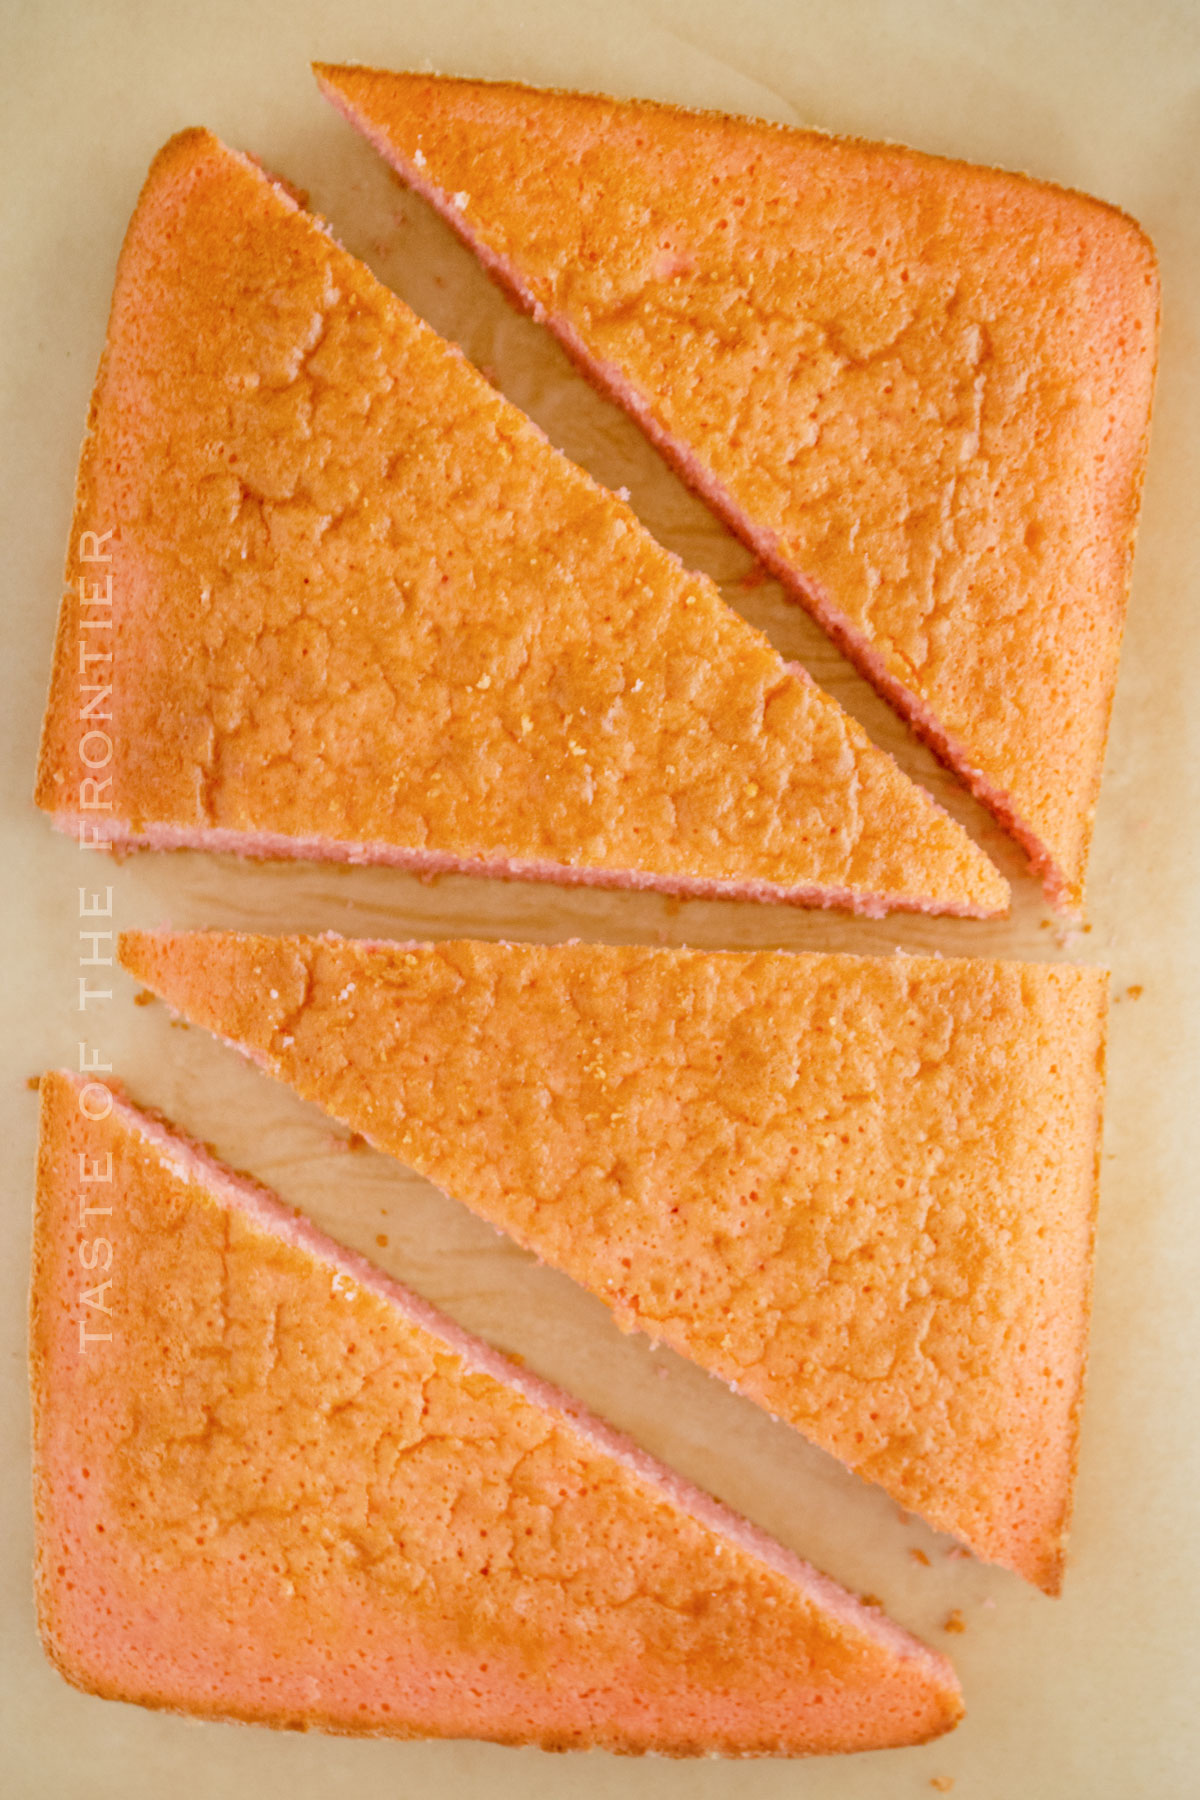
- Slice 3 triangle shapes from the sheet cake. (You will end up with 4 but for this cake, you only need 3. I don’t recommend making a 4th layer as will make the cake less sturdy.)
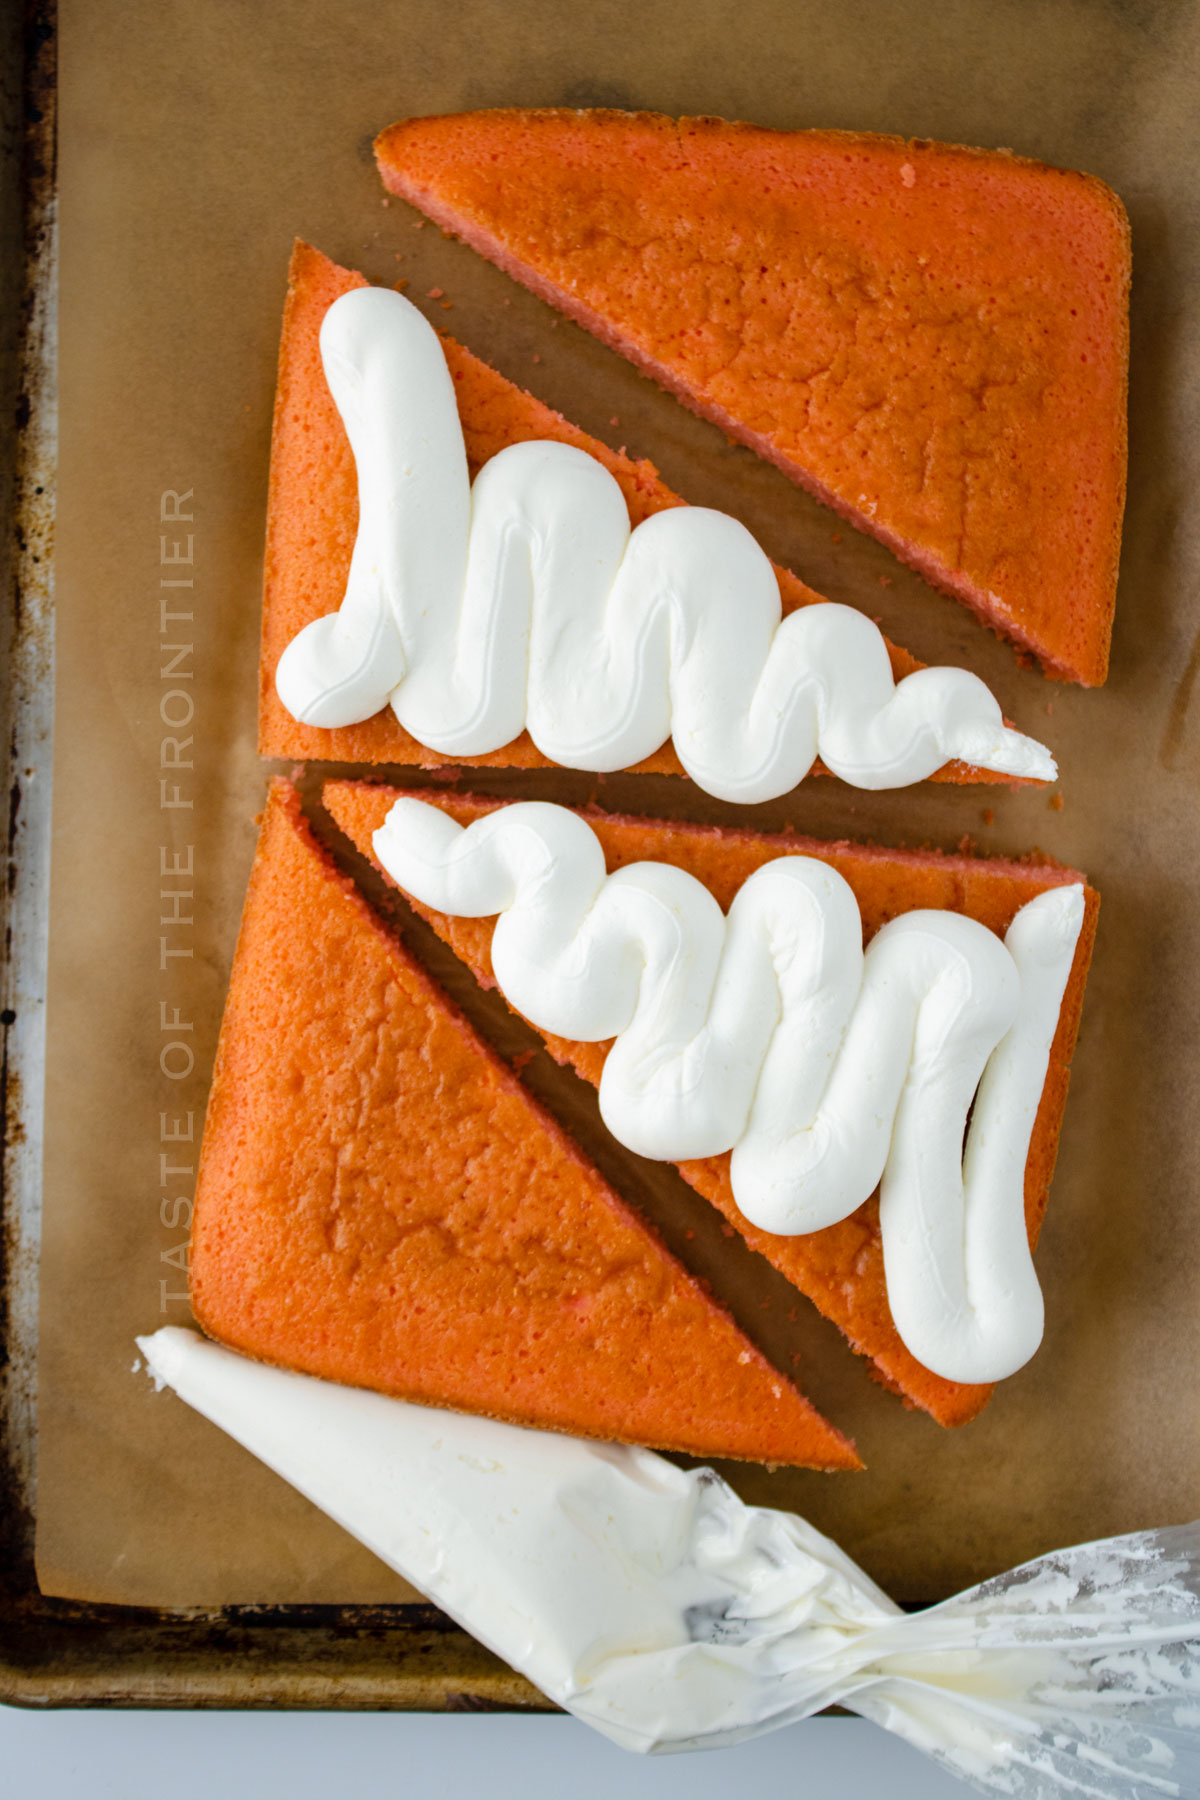
- Add the buttercream frosting in-between the layers and stack the 3 layers.
- Chill if necessary. (see notes)
- Frost the outside of the cake with the same buttercream frosting.
- Smooth out the buttercream, correcting the shape of the cake with frosting, if necessary.
Fondant Instructions for Paneling the sides
- Knead the fondant until it is soft like playdoh, there should be no cracks or creases, the fondant should be smooth.
- Dust the work surface with confectioner’s sugar.
- Roll out the fondant to ¾ inch thickness (just enough to cover one side of the cake). Do not flip the fondant over to roll, only roll on one side.
- Lay the fondant against the side of the cold/frozen cake.
- Cut out the shape of side one with the xacto knife.
- Roll out more fondant and repeat for sides 2 and 3.
- Lightly mist the icing or the fondant with water on the side being adhered to the cake.
- Press gently onto the cake and adhere each of the sides to one another with a little bit of water.
- Dust the work surface again, knead and roll out the green fondant for the “icing” on top.
- Roll it into a long triangle, and drape it over the top.
- Lift up the overhang and add a small amount of water where you want the icing to hang over the sides.
- Use a Xacto knife to carve the squiggle lines mimicking the appearance of a drip icing.
- Roll the blue fondant into a log.
- Press the log down with two fingers, the more imperfect the better for the “filling” in the slice of cake.
- Adhere with a very small amount of water onto the blue fondant, it should be tacky, not wet.
- Place on the side of the cake. (repeat twice per side)
- Roll a thick, long log of white fondant for the “swirl of icing” on top of the cake.
- Circle it around itself until you have the swirl, set aside.
Outline in black
- Add the black fondant to the clay extruder, and use the small circle attachment (but not the smallest circle).
- Outline your entire cake in the black fondant adhering it with a tiny bit of water.
- It’s best to apply it on the cake itself just get it tacky enough to stick.
- If it breaks, that’s ok! It is supposed to look sketched! Broken black lines help make it look more like a cartoon.
- Add additional embellishments as desired.
To clean up the cake:
- You can use vodka or lemon juice to get any remaining confectioner’s sugar off the fondant once the cake has dried. The alcohol content in both will evaporate and dry quickly while leaving the cake without any extra confectioner’s sugar on it.
Notes
Equipment
- Serrated Knife
- 12 inch or 16 inch piping bag
- 12 or 14 inch Cake Board
- Clay Extruder (only used for fondant)
- Roll Pin
- Offset spatula
- Scissors
- Xacto Knife
- Paint brush – food grade
- Ruler, optional
Nutritional information for the recipe is provided as a courtesy and is approximate. Please double-check with your own dietary calculator for the best accuracy. We at Yummi Haus cannot guarantee the accuracy of the nutritional information given for any recipe on this site.




Share Your Thoughts