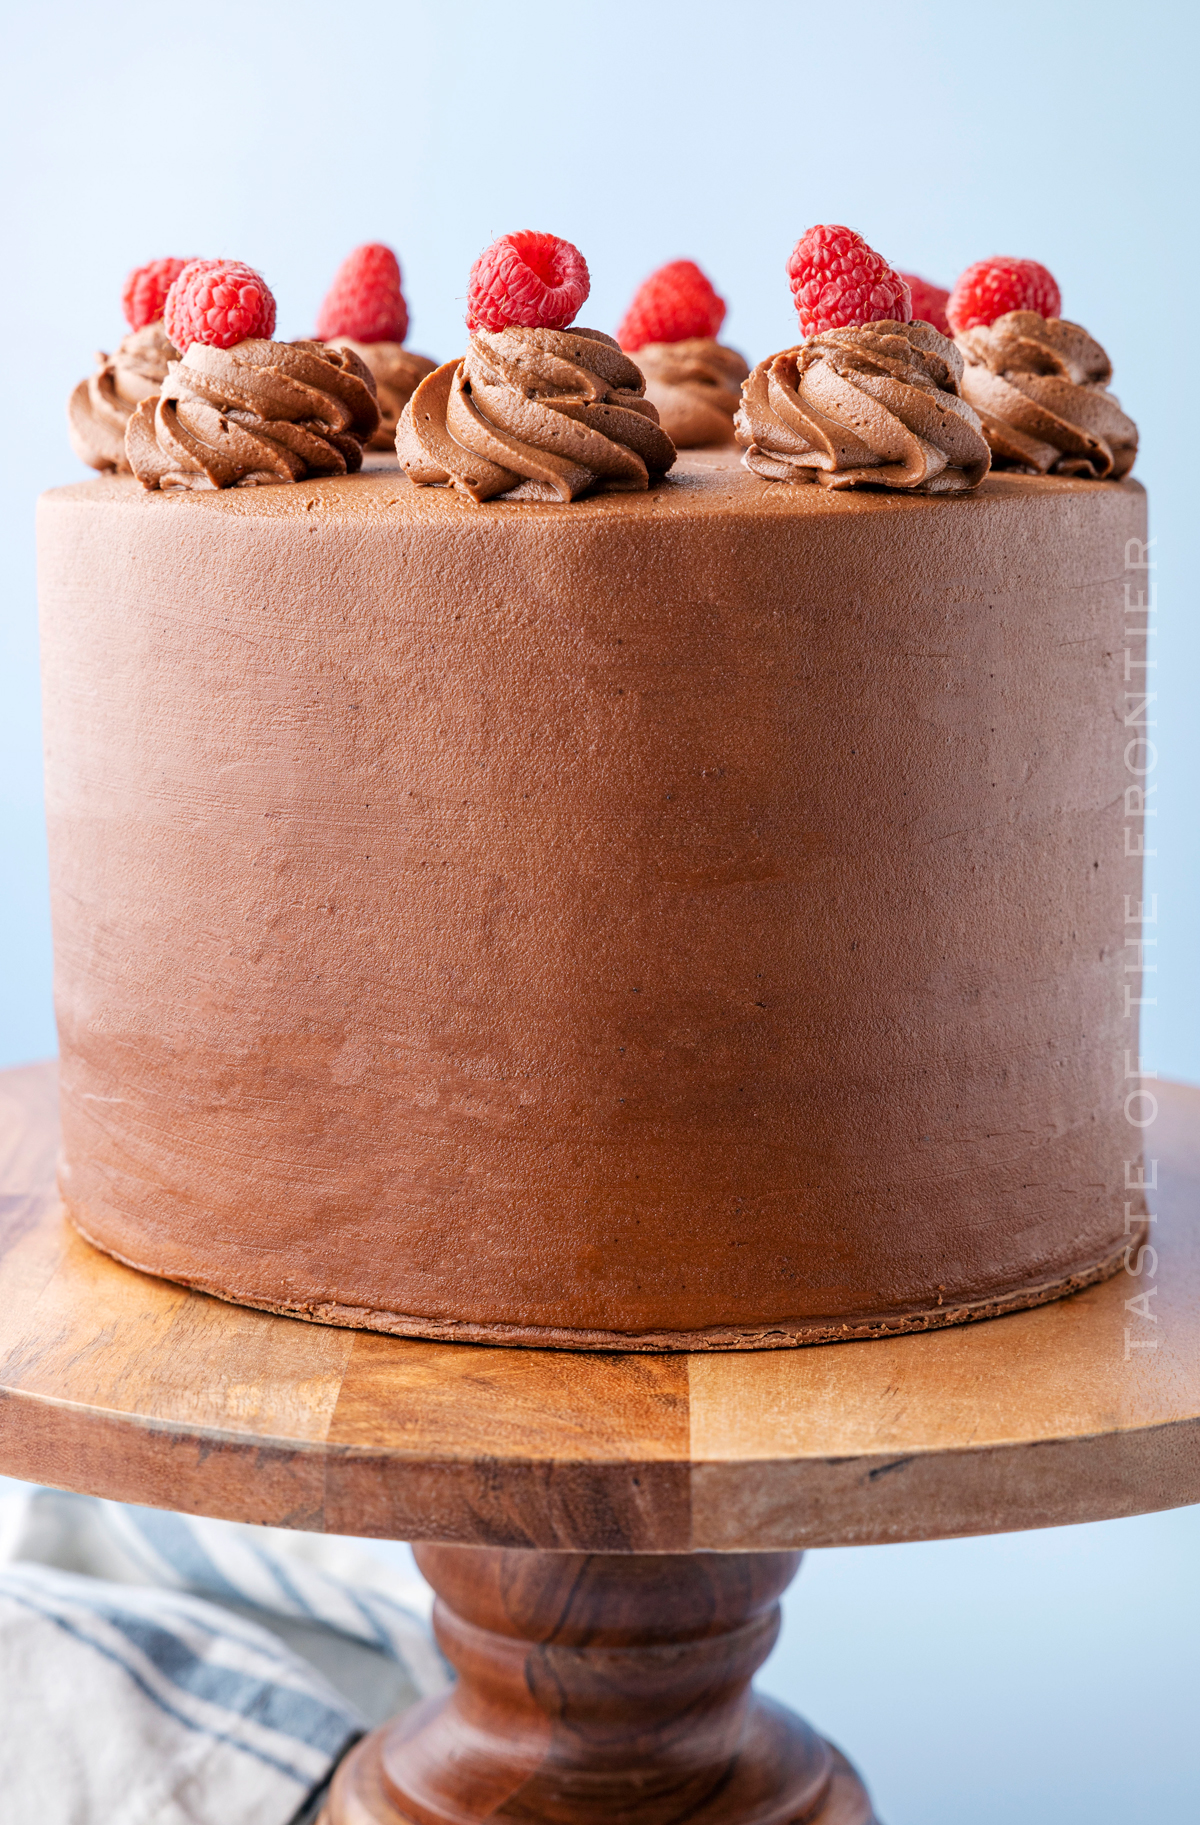
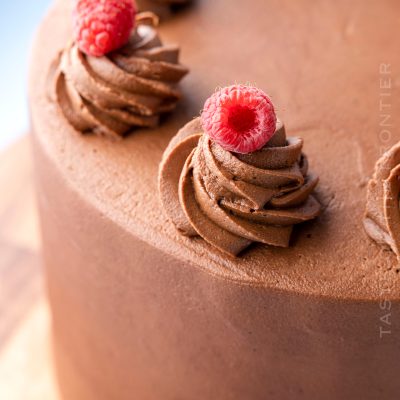
This beautiful 3-layer Chocolate Raspberry Cake is made with raspberry filling, creamy chocolate buttercream frosting, and is decorated with fresh raspberries on top. It’s perfect for any occasion!
Chocolate Raspberry Cake is the perfect way to celebrate any special occasion! This homemade cake is made with three layers of rich chocolate cake – making it a real show-stopper.
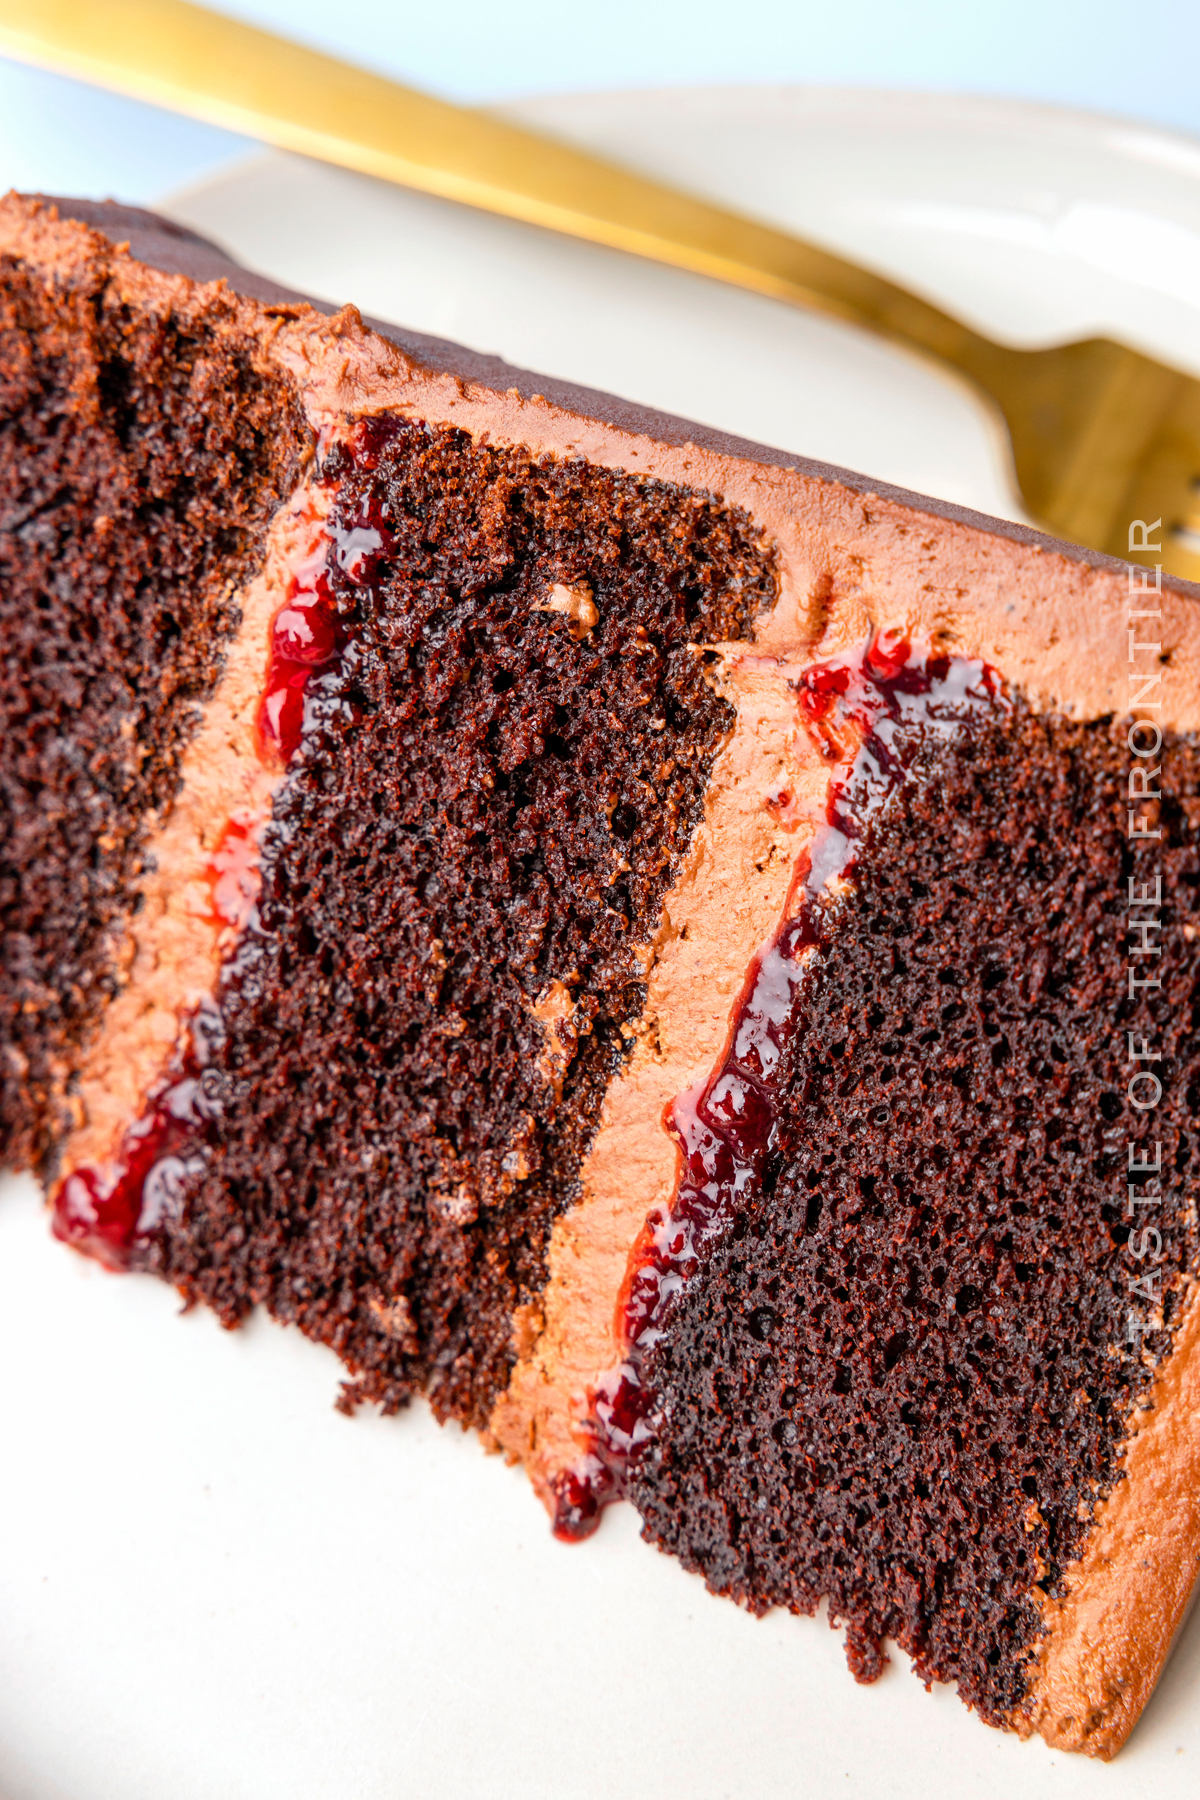
Then we filled it with sweet raspberry jam, and frosted with a rich and creamy chocolate buttercream frosting. It’s sure to be a hit with everyone who tries it!
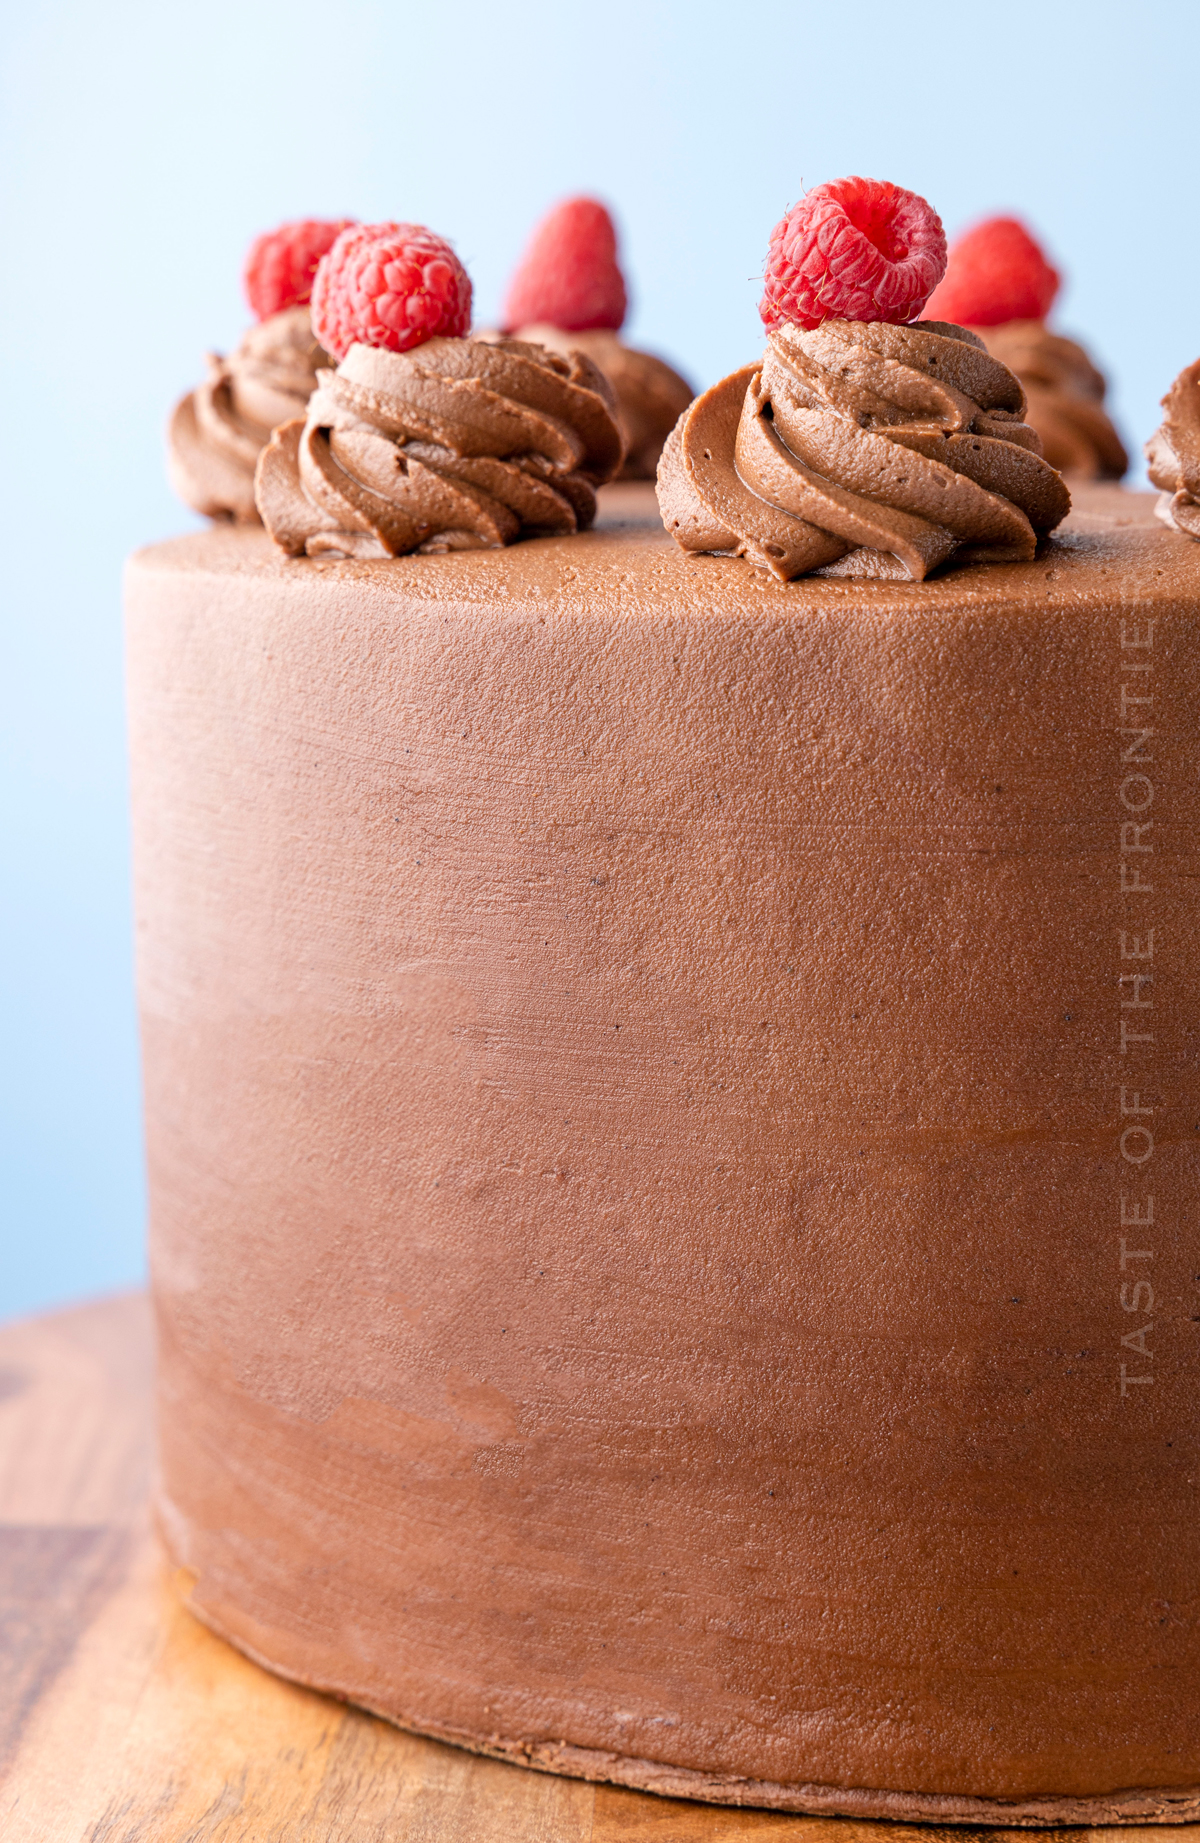
Growing up with a professional cake decorator, we always had cake in the house. For me – it is hard to pick which flavor is my favorite because there were so many to choose from and my mom really did make every single one taste INCREDIBLE.
Her favorite (which I try to make at least once a year) is a white cake with raspberry filling and topped with my Best Bakery Buttercream Frosting.
But this time I wanted to change it up. Keeping with the raspberry vibe but pairing it with chocolate cake and the absolute best chocolate buttercream just made her favorite and sent it over the top. It is DELISH!
Here are some commonly asked questions
What is the best way to store leftover chocolate raspberry cake?
If most of the cake is still remaining after serving, I recommend wrapping it with plastic wrap, taking care to fully cover the cut area that is now exposed. Then add a layer of foil over the whole thing. Refrigerate.
If you only have a couple of slices left, place them in an airtight container, preferably in individual slices and refrigerate.
This cake will stay fresh for up to 5 days if kept wrapped and refrigerated. Let sit at room temperature for about 20 minutes prior to serving again.
Can this be made with dark chocolate cocoa powder?
Yes, you can use dark cocoa powder instead of classic cocoa powder. Sometimes I’ll use a black cocoa powder to give it a nice, rich look without the use of food coloring.
Can I use a gluten-free flour mix in this recipe?
Unfornitally this recipe doesn’t work well with a gluten-free flour mix.
What is the best way to store leftover chocolate buttercream frosting?
Just keep it refrigerated in an airtight container for up to 7 days. As long as you don’t let it sit out at room temperature for too long, this should keep well when chilled.
You can also freeze it for up to 3 months. Just make sure to thaw in the refrigerator for 24 hours prior to using it again.
What’s the best way to evenly cut off the tops of the cakes?
I have found a couple of different ways to do this. Sometimes I’ll place it on a turntable. Then place the knife right on the edge of the dome and turn the turntable around until the knife gets through the cake.
If I am working with soft cake – I’ll take a long piece of floss and pull it through the cake – sort of sawing it side to side – gently pulling towards me until the top has been sliced off.
Can this be made with different size cake pans?
You bet – if you need to change the size of the cake you are making – please see the variations below. As with all cakes – bake until the toothpick test is clean as different ovens, climate, elevation, and other factors can change the baking time.
- TWO 9″ pans – These tend to dome and crust a bit more. Baking time will change to 30-35 minutes. This could be varied by the type of pans and true oven temp.
- TWO 8″ pans – divide the batter evenly – should be just about 2-1/2 cups of batter for each. Bake for 28-32 minutes.
- FOUR 6″ pans – divide evenly – should be about 1-1/3 cup of batter each. Bake for 24-30 minutes.
Can I leave this cake out at room temperature?
If you want this cake to be left out at room temperature, I will substitute the milk in the buttercream for warm water. You can leave the cake out at room temperature for up to an hour if you leave the milk in the buttercream recipe.
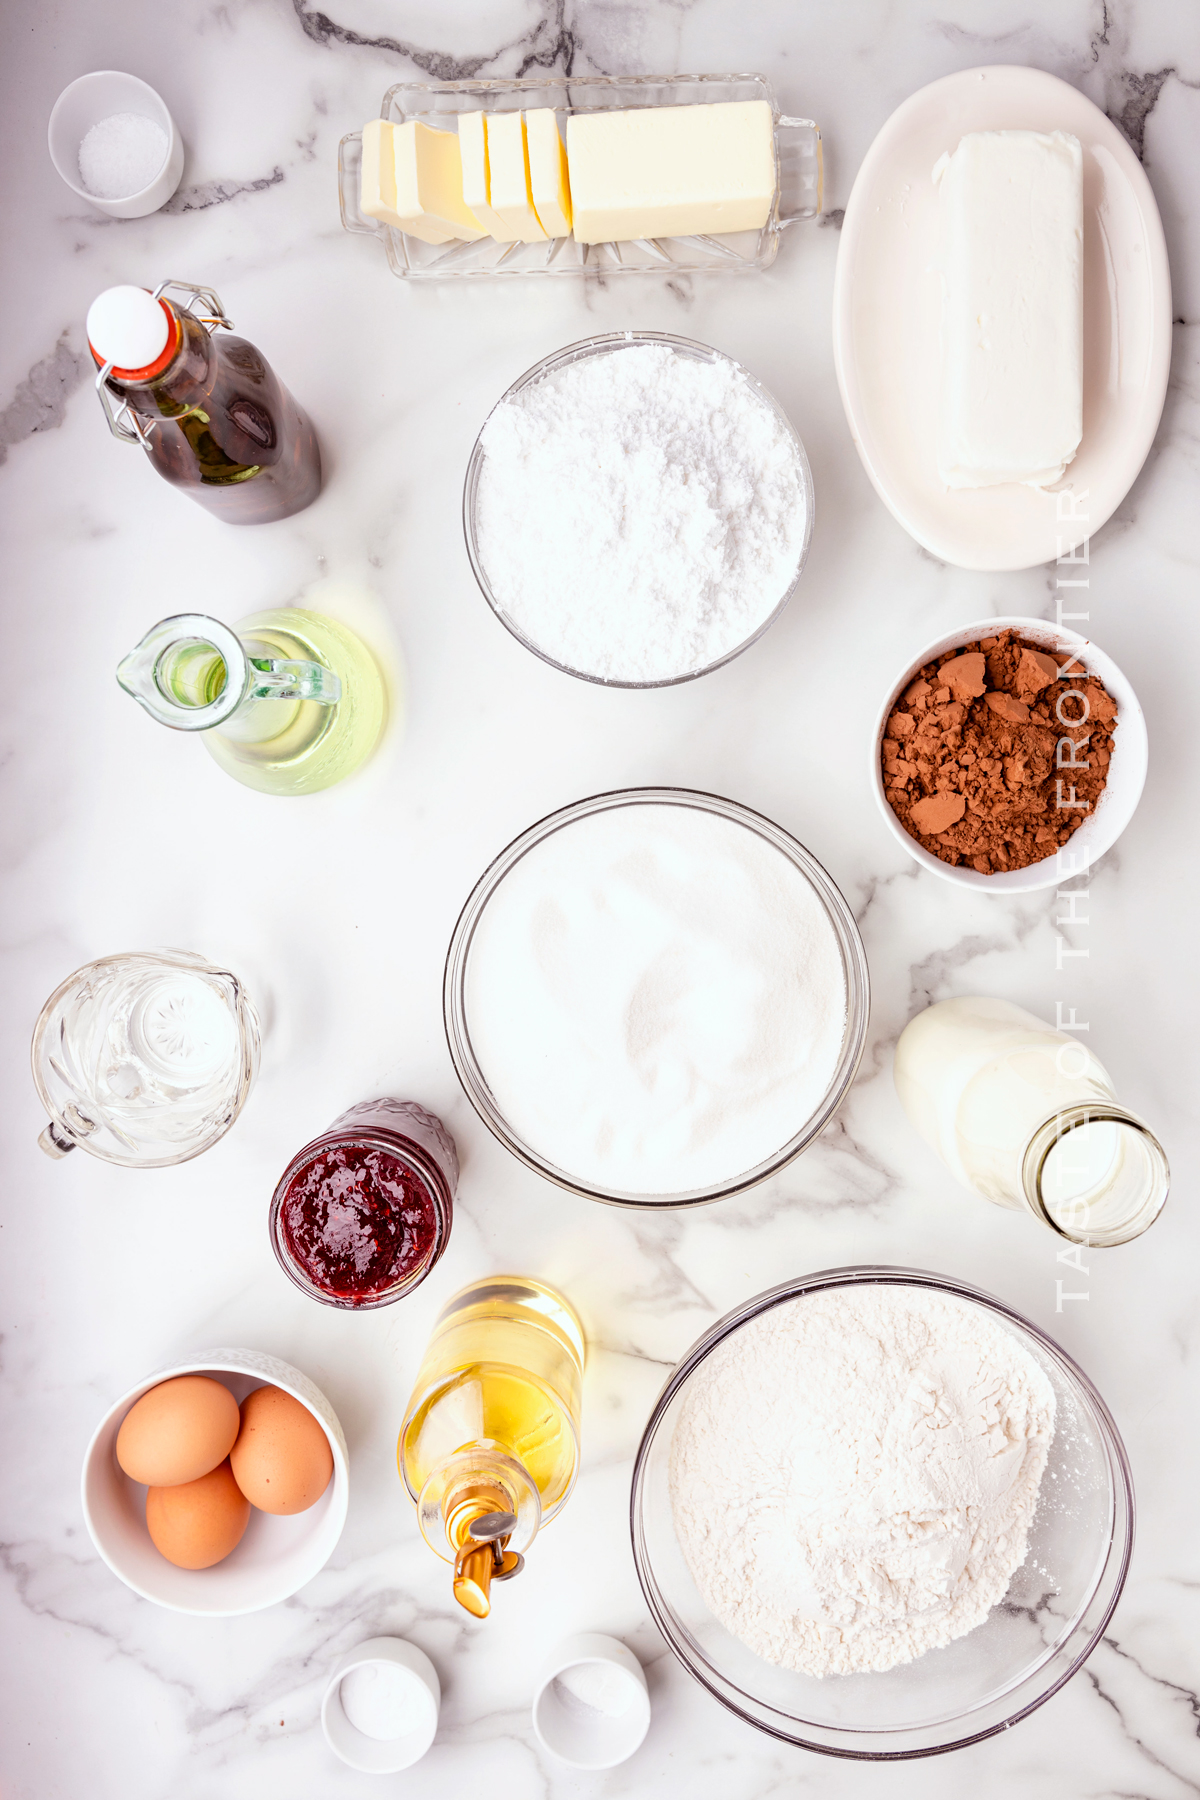
Ingredients for Chocolate Raspberry Cake
Chocolate cake
- all-purpose flour
- granulated sugar
- cocoa powder
- baking soda
- salt
- baking powder
- eggs – room temperature
- milk – room temperature
- vegetable oil
- vanilla extract
- boiling water
Chocolate Buttercream
- butter – room temperature
- shortening
- cocoa powder
- confectioner’s sugar
- milk
- vanilla extract
To Assemble
- raspberry preserves
- fresh raspberries to garnish
What is bakers release?
Bakers release is a combination of oil, flour, and shortening that makes releasing cakes and other baked goods almost effortless.
To make Bakers Release – it is as simple as 1,1 & 1.
- equal parts of all-purpose flour, shortening, and cooking oil – I like to do 1 cup of each.
Mix the ingredients together – whisking well. Store in an airtight container in the pantry or refrigerator. When ready to use, dip a pastry brush into the mixture and spread it over the cake pan.
How many can this serve?
Depending on the size of your slices, this cake will yield approximately 12-16 slices. That being said – in our house, it is “go BIG or go home”. So we usually split the cake between the 5 of us for 2 nights.
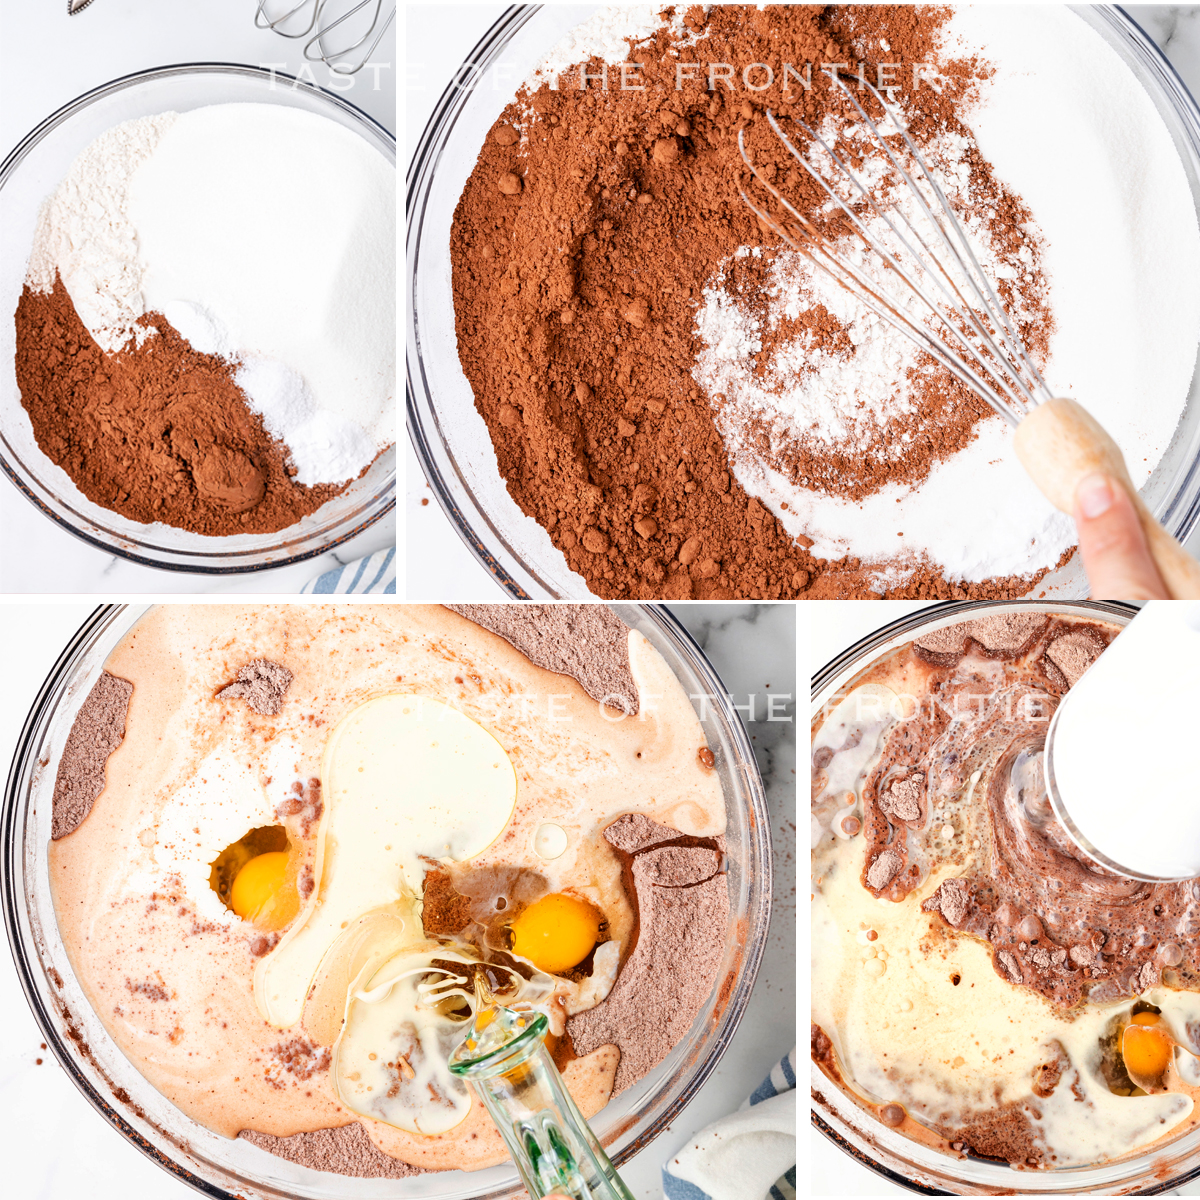
How to Make Chocolate Raspberry Cake
- Pre-heat the oven to 350°F.
- Grease three 8-inch cake pans witheither shortening or bakers release and add a parchment circle to the bottoms. *see notes.
- Whisk the flour, sugar, cocoa powder, baking soda, salt, and baking powder in the bowl of your mixer.
- Add the eggs, milk, oil, and vanilla to the mixing bowl. Beat the mixture on medium-high speed for two minutes.
- Stir in the boiling water.
- Divide the batter equally between the three prepared cake pans.
- Bake for 35 to 45 minutes or until the cake springs back when touched gently in the center.
- Let the cakes cool in the pans on a cooling rack until they have reached room temperature.
- Remove from the pan by gently inverting onto a flat plate.
- Wrap tightly with plastic wrap and place in the freezer until ready to assemble the cake.
What’s the point of adding boiling water to the cake?
When you add the boiling water to the batter, it activates the cocoa powder to give it that rich chocolate flavor and gives the cake the right texture. Note – you can use boiling coffee in place of water if you like – it’s AMAZING!
Don’t miss these other great homemade cake recipes!
- Salted Caramel Mocha Sheet Cake
- Red Velvet Bundt Cake with Kahlua Ganache
- Blueberry Swirl Pound Cake
- Brownie Cookie Dough Freak Cake
- Homemade Funfetti Cake
- German Chocolate Cake
- Slow Cooker Carrot Cake
- Best White Cake Recipe
- Lemon Pound Cake
- Best Yellow Cake Recipe
- Best Chocolate Cupcake Recipe
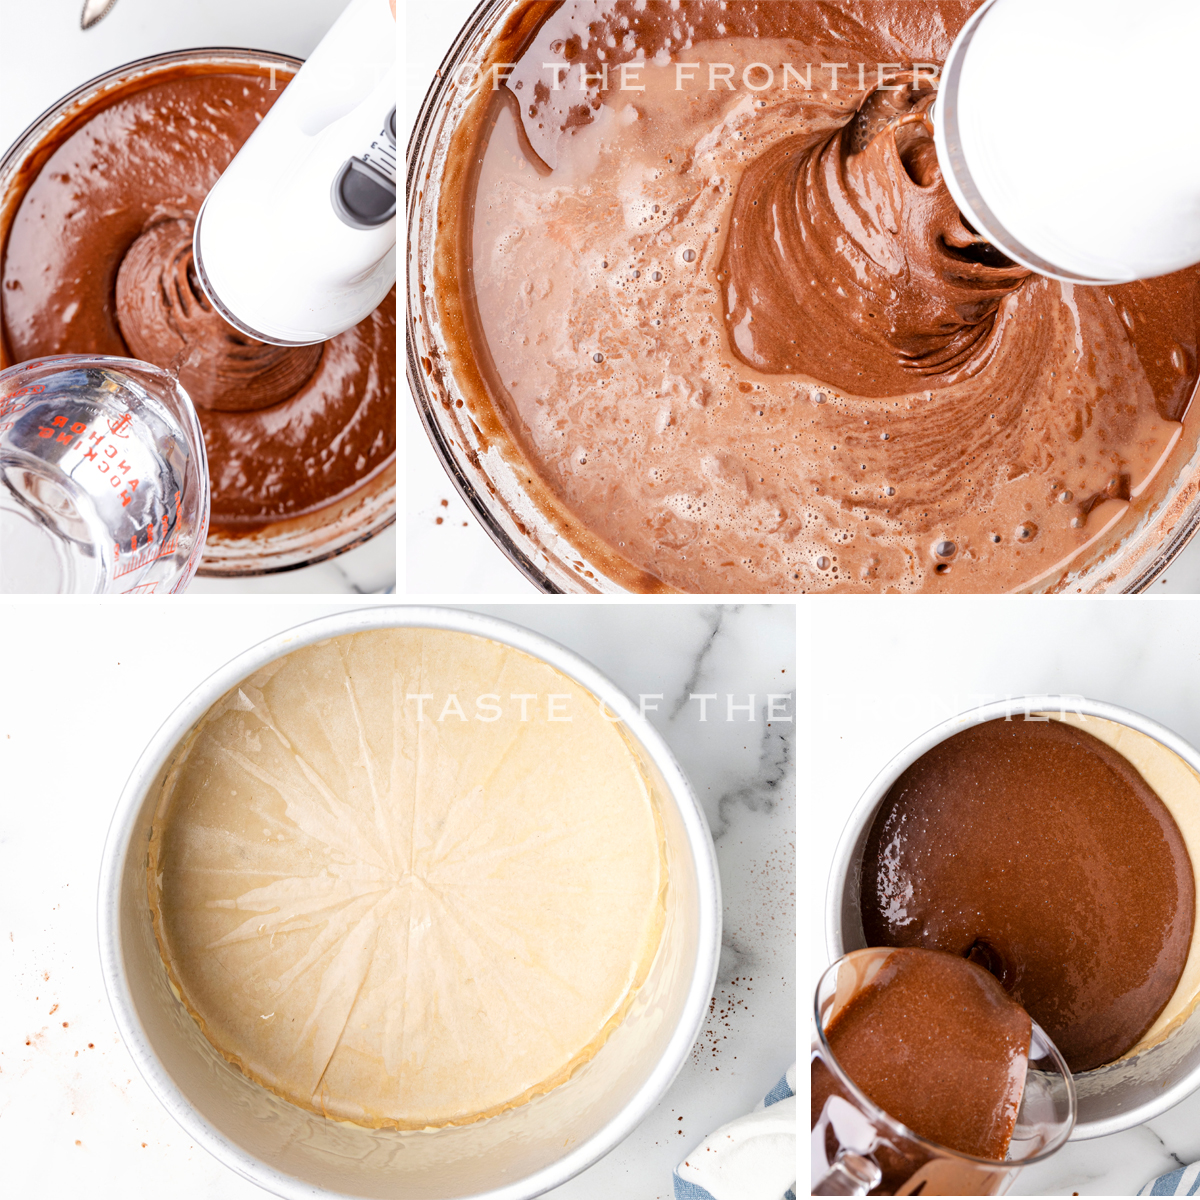
How to Make Chocolate Buttercream Frosting
- In the bowl of a stand mixer- cream, the butter, shortening, and cocoa powder together.
- Place the mixer on a low speed and slowly incorporate the sugar until all of it is incorporated.
- Pour the milk and vanilla slowly into the buttercream and allow it to mix until light and fluffy, about two minutes.
**Once greased, I like to also dust the cake pan with flour for white cakes or cocoa powder for chocolate cakes. It helps with releasing the cake from the pan once it has baked and cooled. You can do this by adding about a tablespoon of either of those and then shake it around over the sink until all of the greased area is coated. Shake out the remaining flour or cocoa before adding the cake batter.
How much frosting does this make?
This is enough to fill, crumb coat, and frost & decorate a 3-layer, 8″ round cake. Increase the recipe by 1/2 if you like your frosting thicker than what you see here or wish to pipe on more decoration.
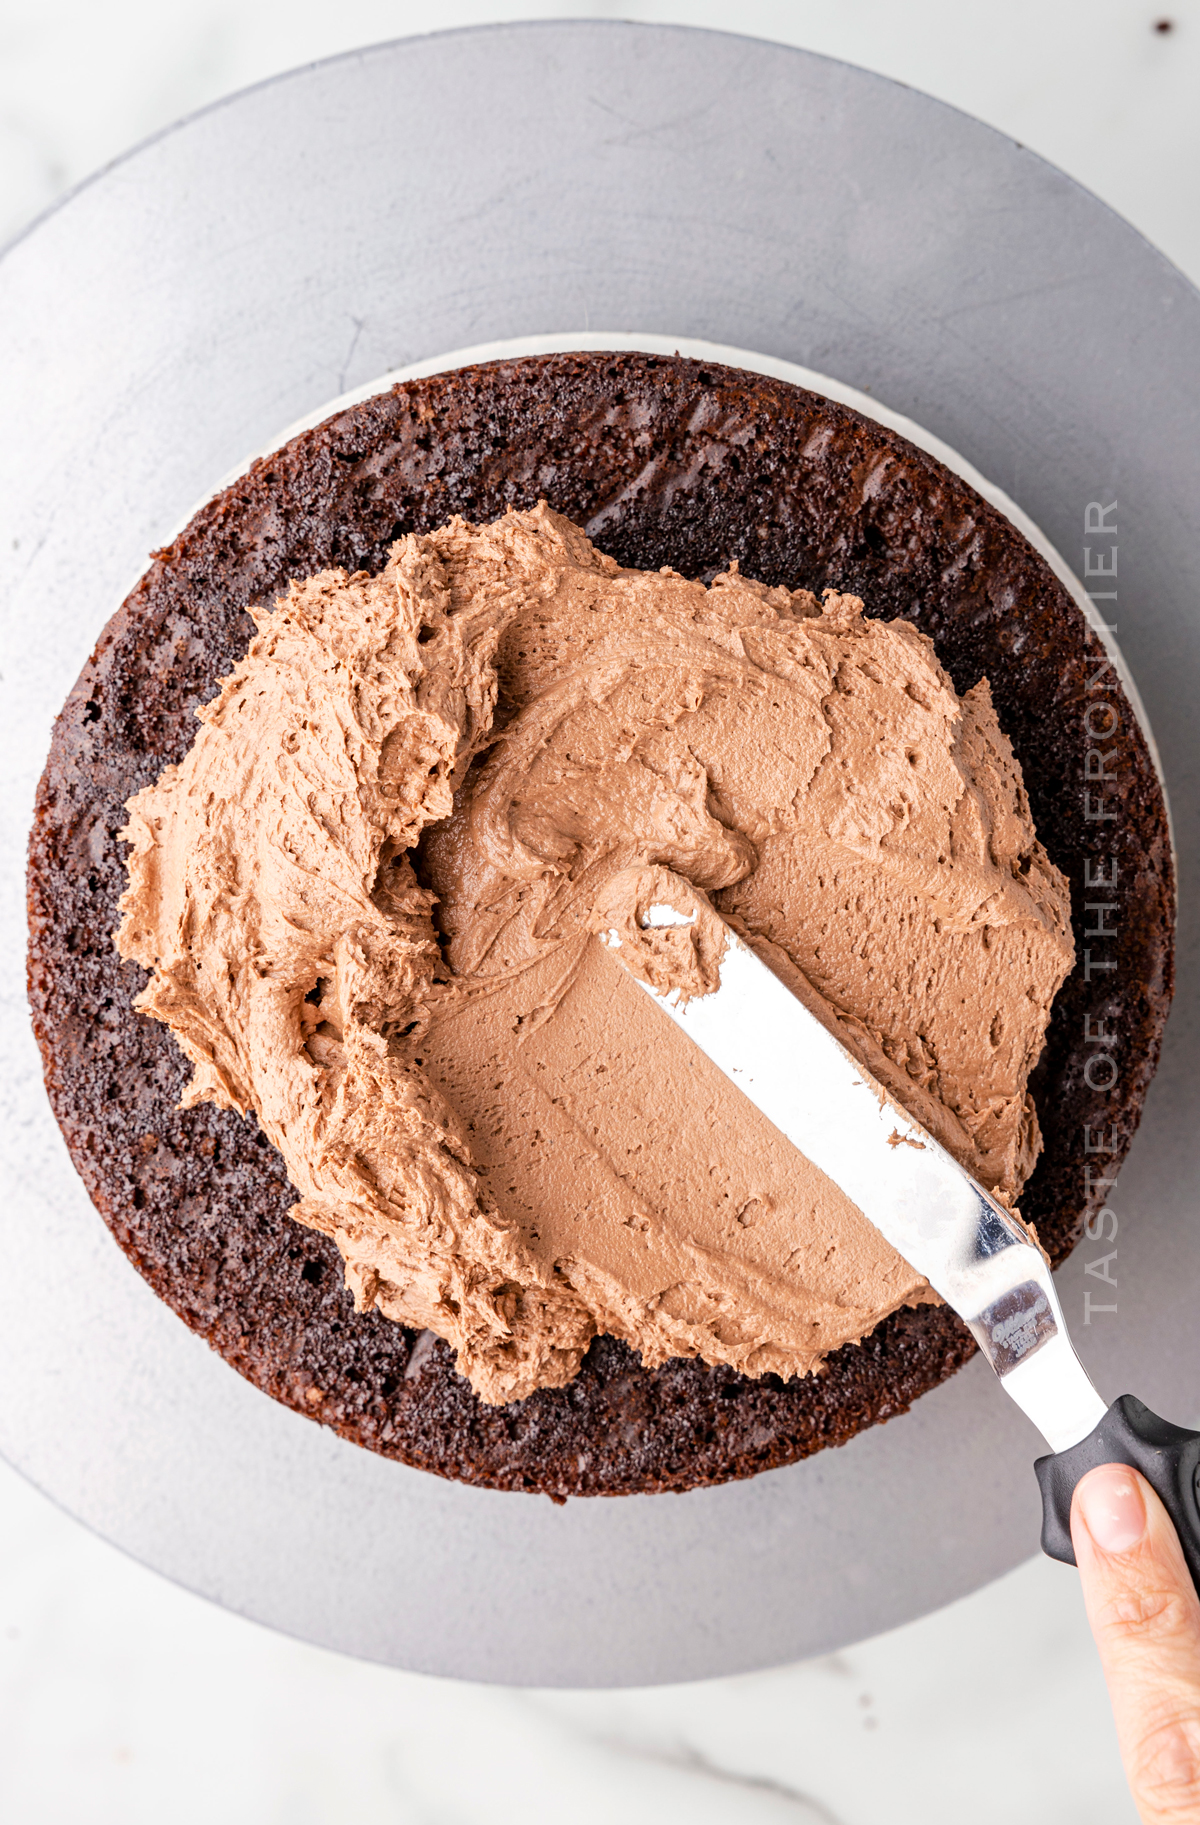
How to Assemble a 3-Layer Chocolate Raspberry Cake
- Trim off the domed top of your cakes so they are level.
- Place one layer of cake onto the plate or your cardboard circle.
- Spread a layer of chocolate buttercream on top- about a quarter-inch thick.
- Spread half of the raspberry preserves on top of the buttercream.
- Repeat this after adding the next layer of cake finishing up with a cake layer at the top.
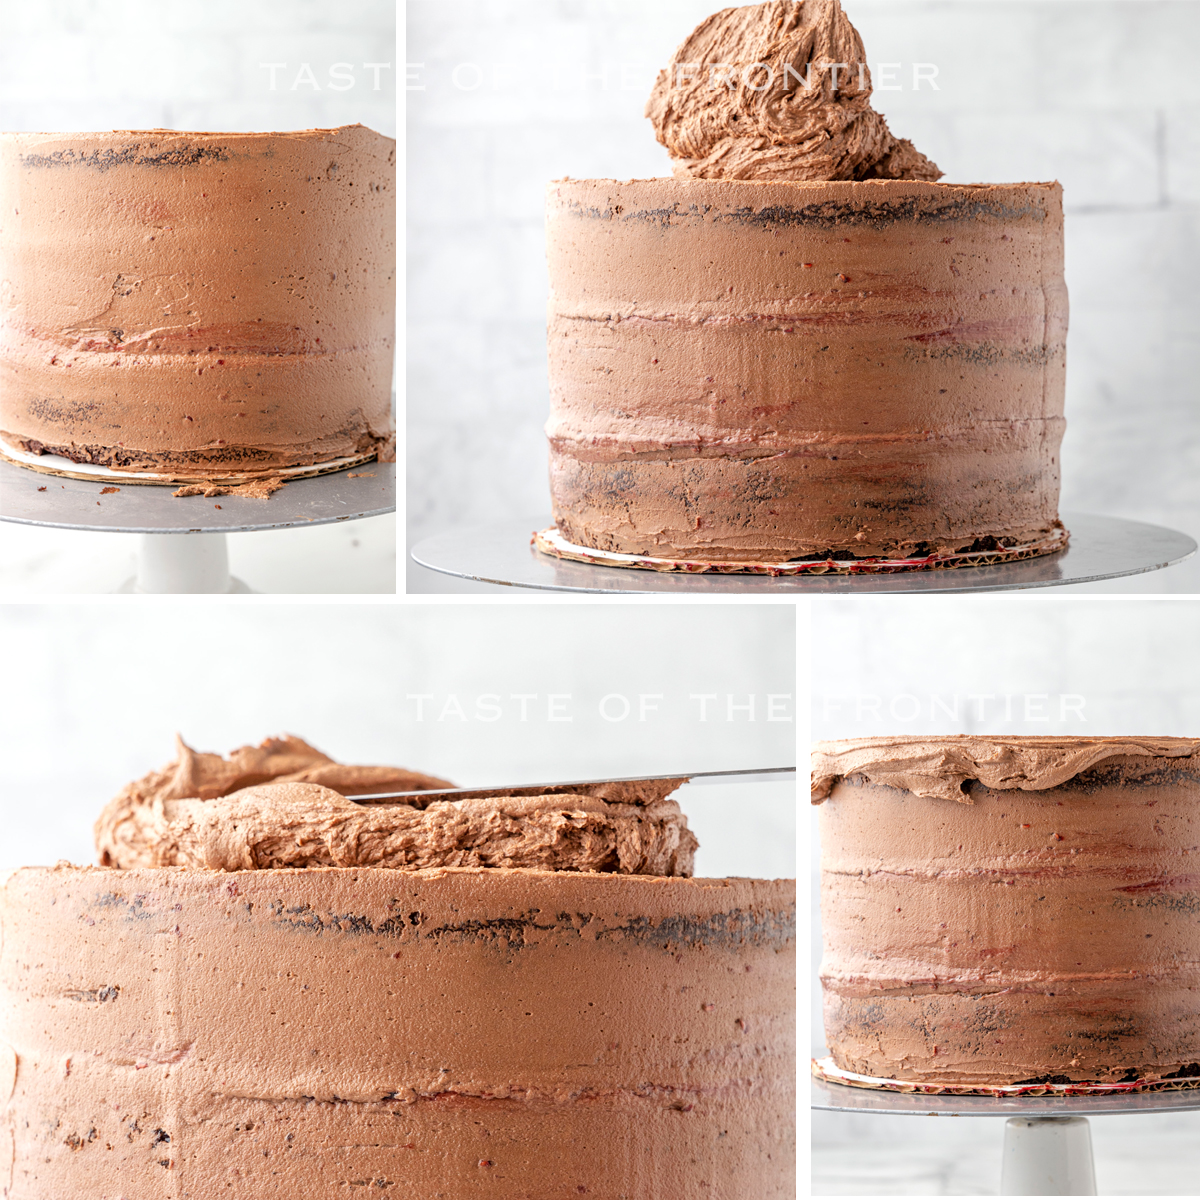
- Spread a thin layer of buttercream around the whole cake and place it in the fridge to set the frosting for 15 minutes. This is your crumb coat.
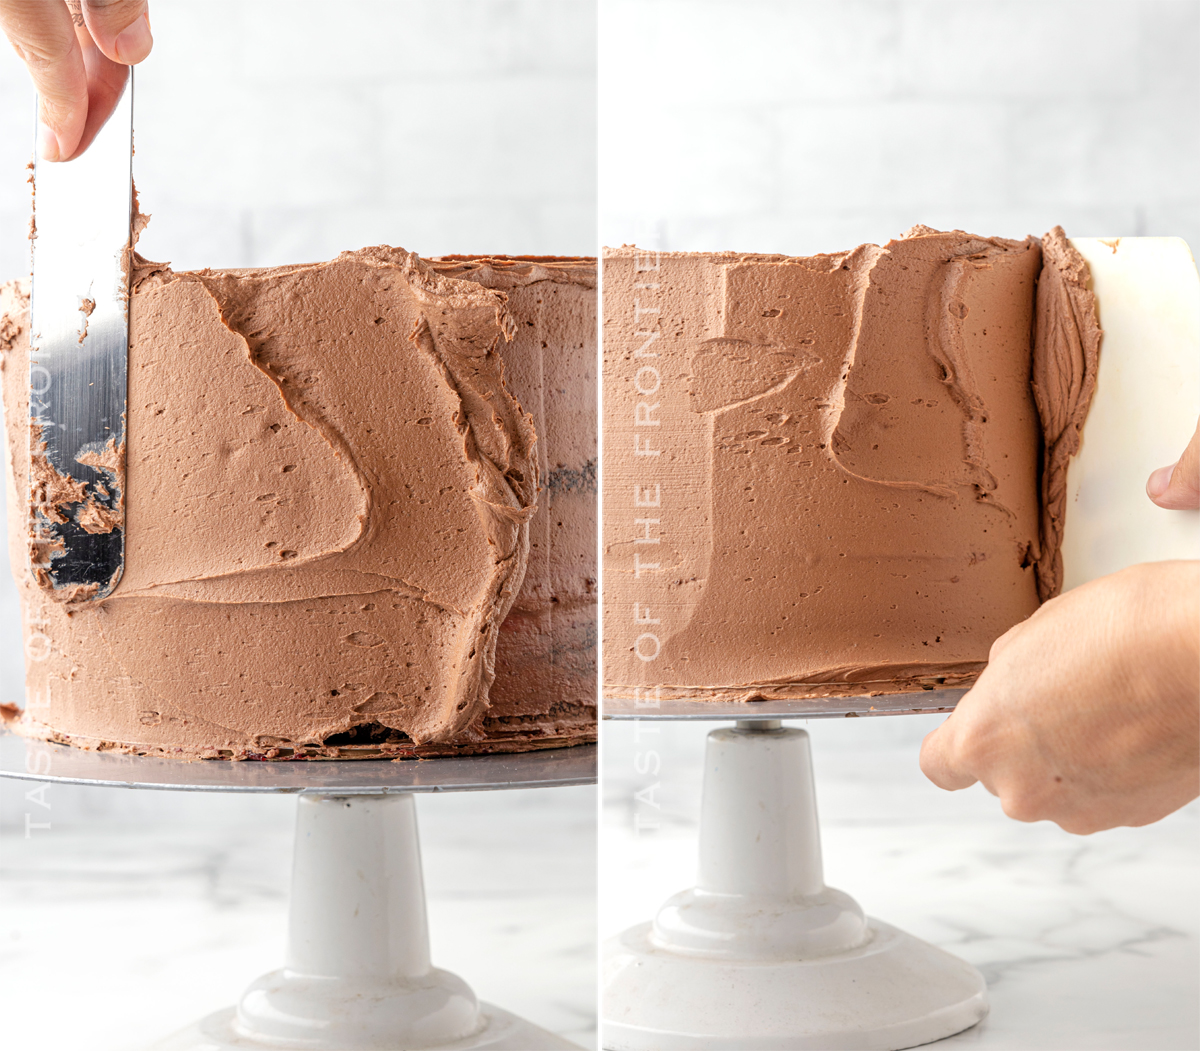
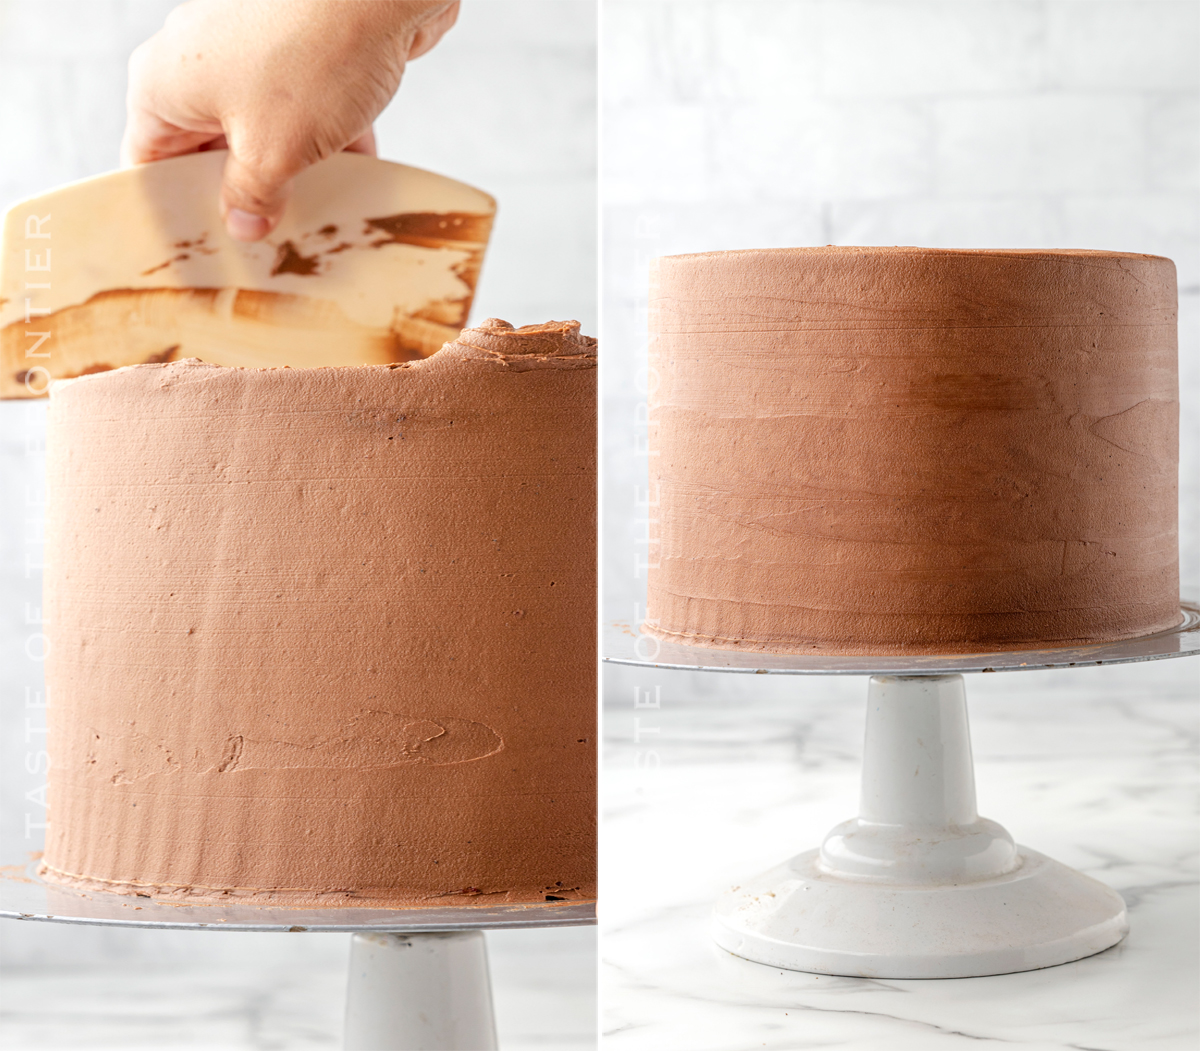
- Add a thicker layer of buttercream around the cake and smooth out the edges. Place the cake back in the fridge for an additional 15 minutes.
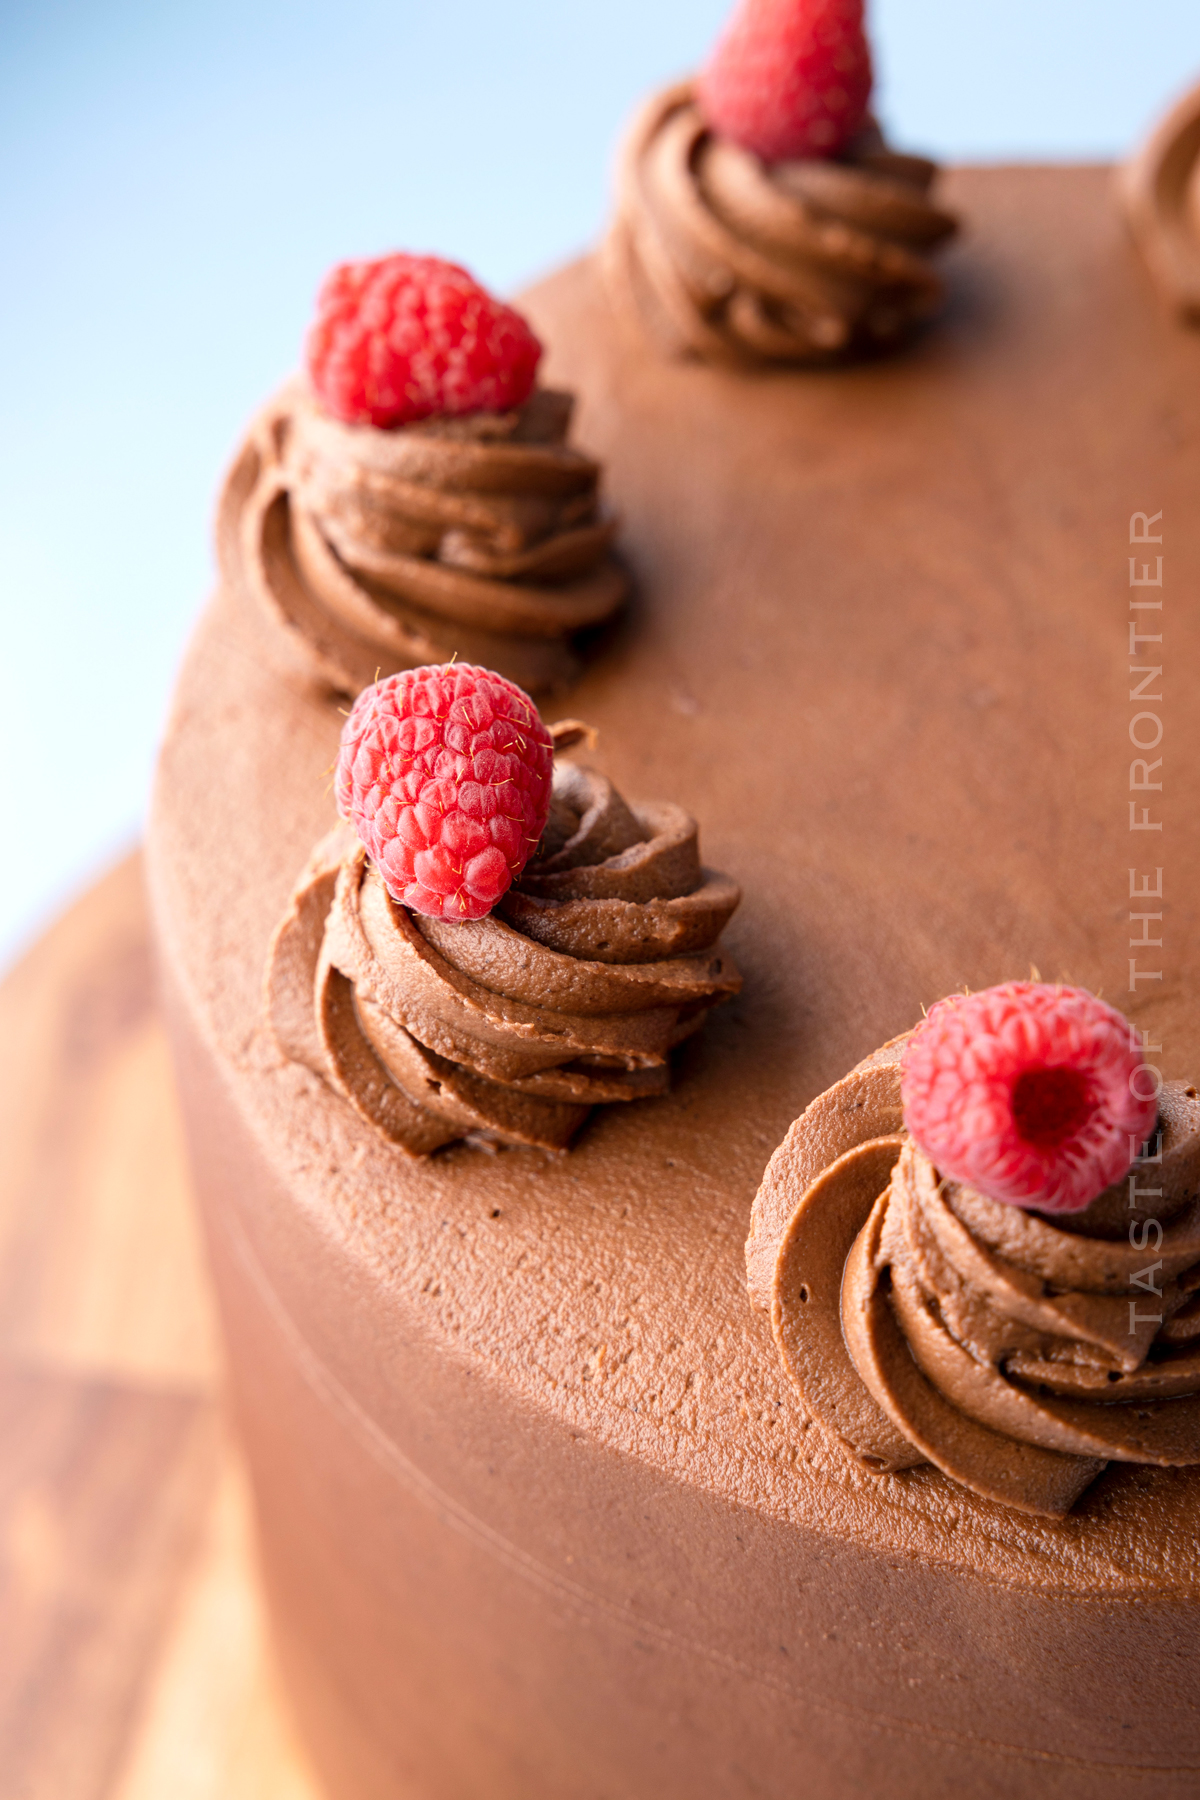
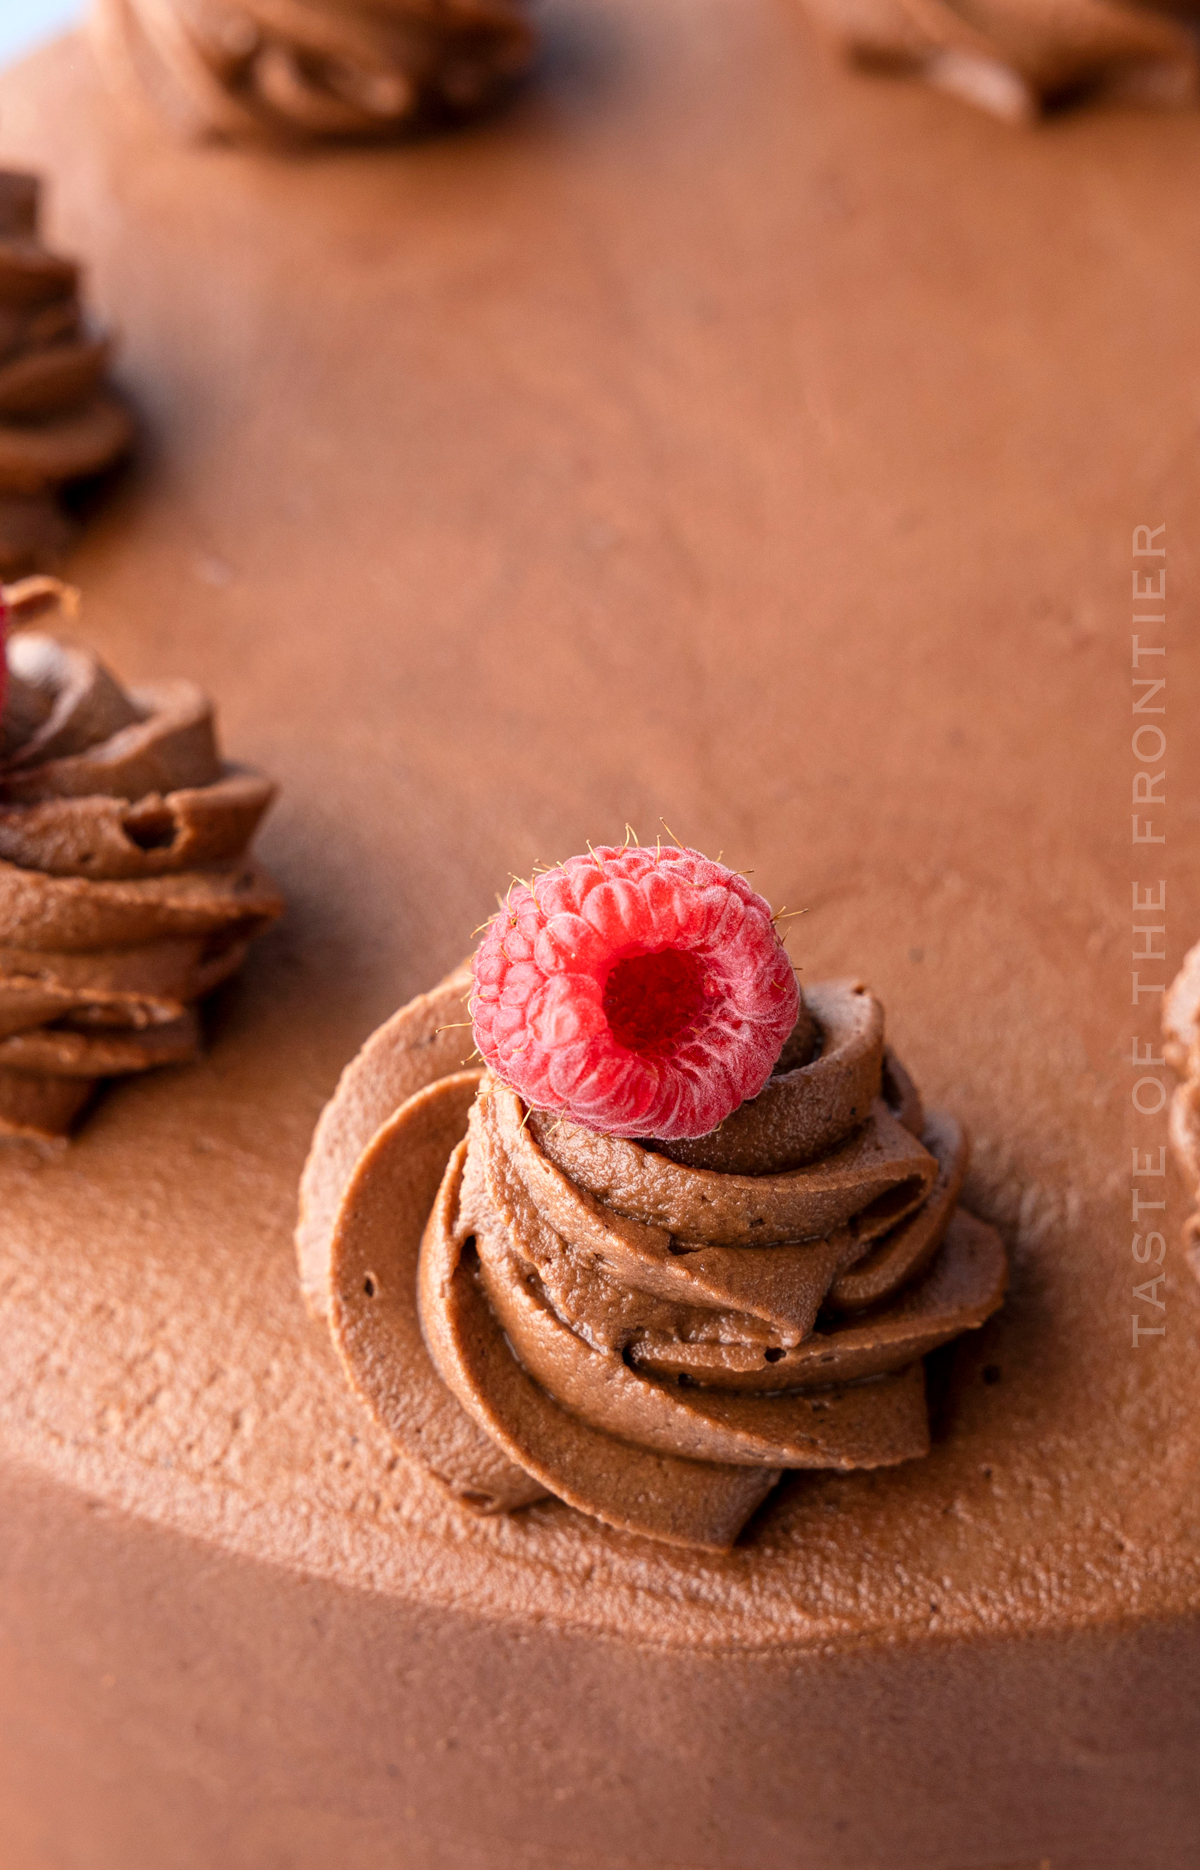
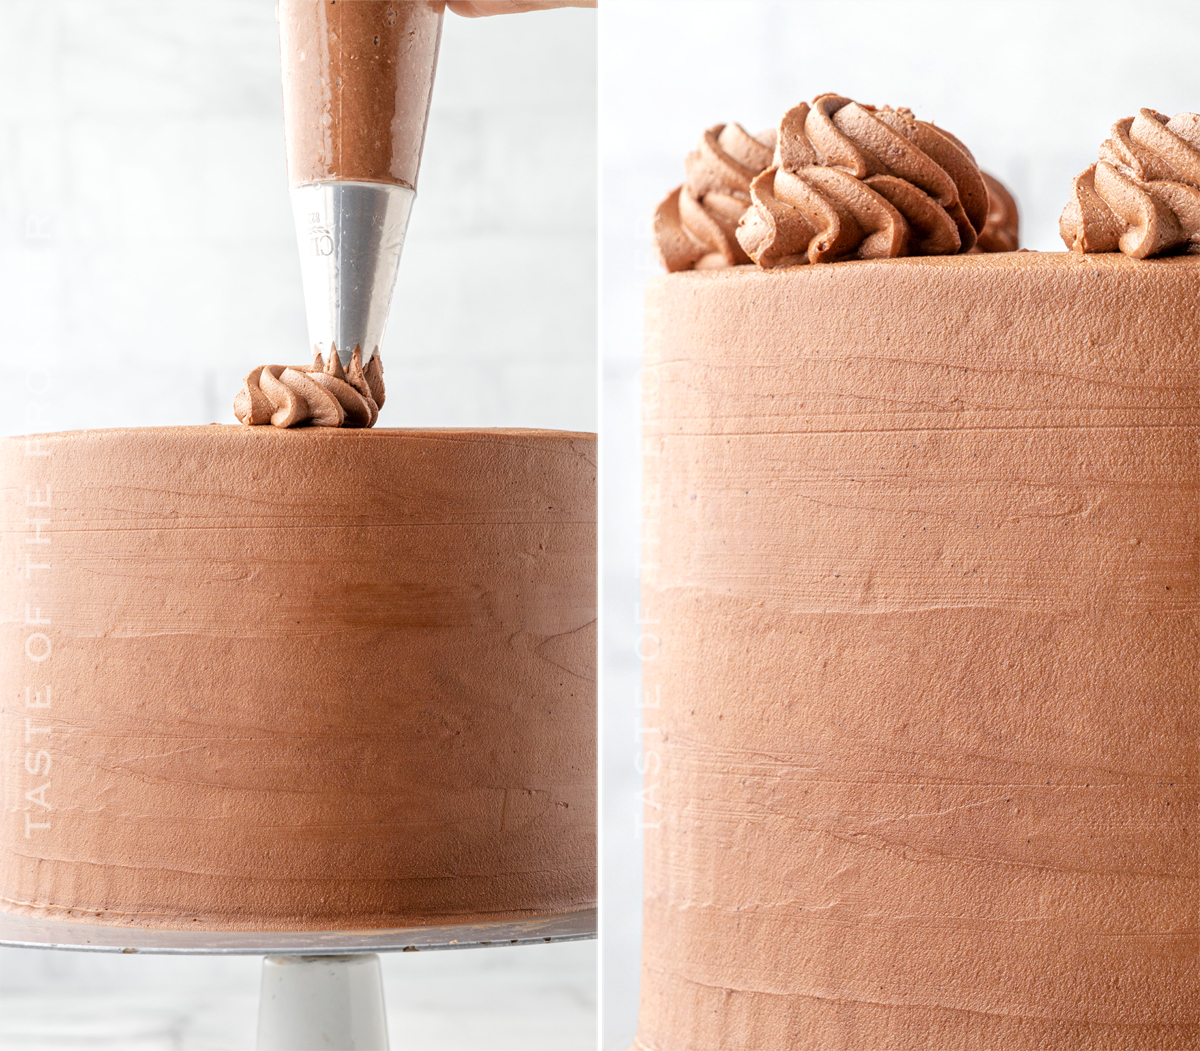
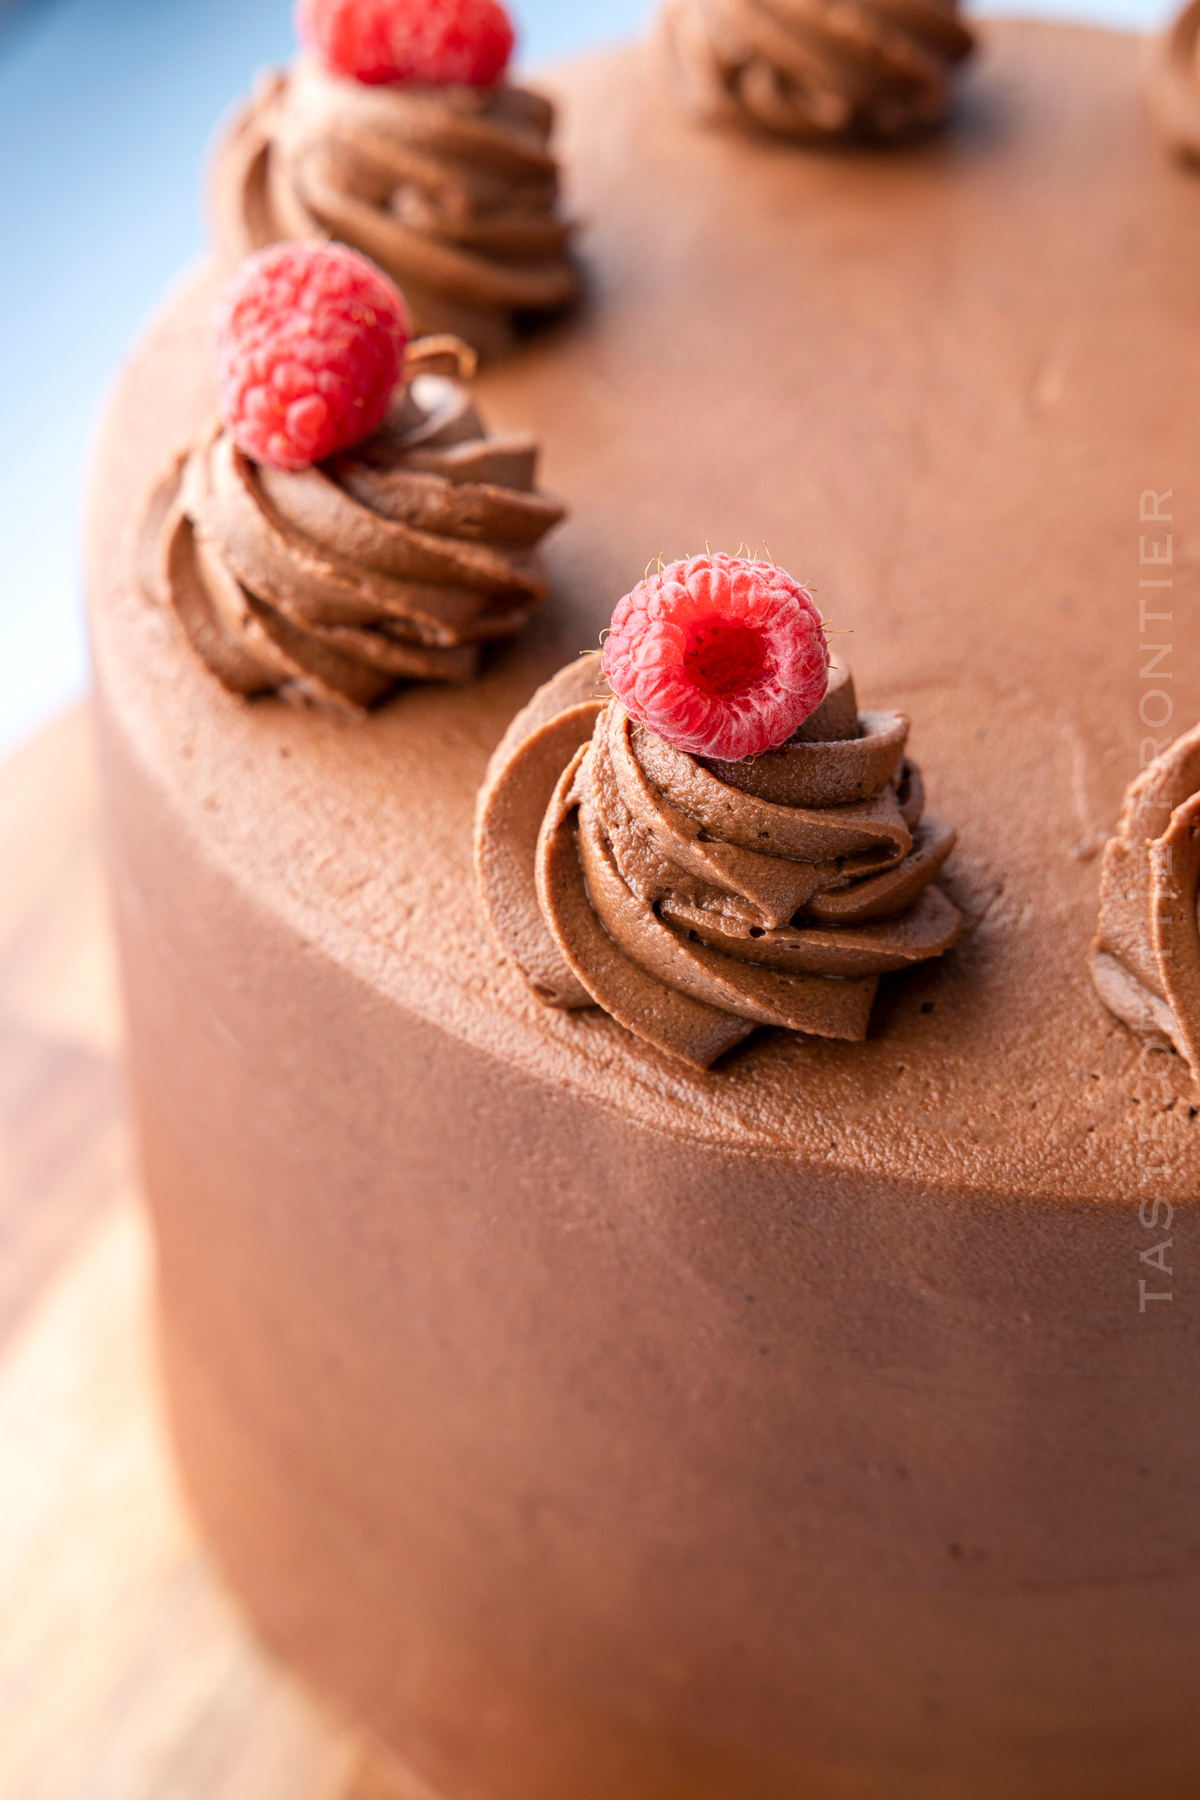
- Pipe swirls of the buttercream onto your cake using a pastry bag fitted with a star piping tip.
- Add some raspberries on top – if desired.
How do I get the buttercream smooth on the cake?
I like to use a large offset spatula to spread the buttercream onto the cake then use a cake scraper to finish off the sides and top.
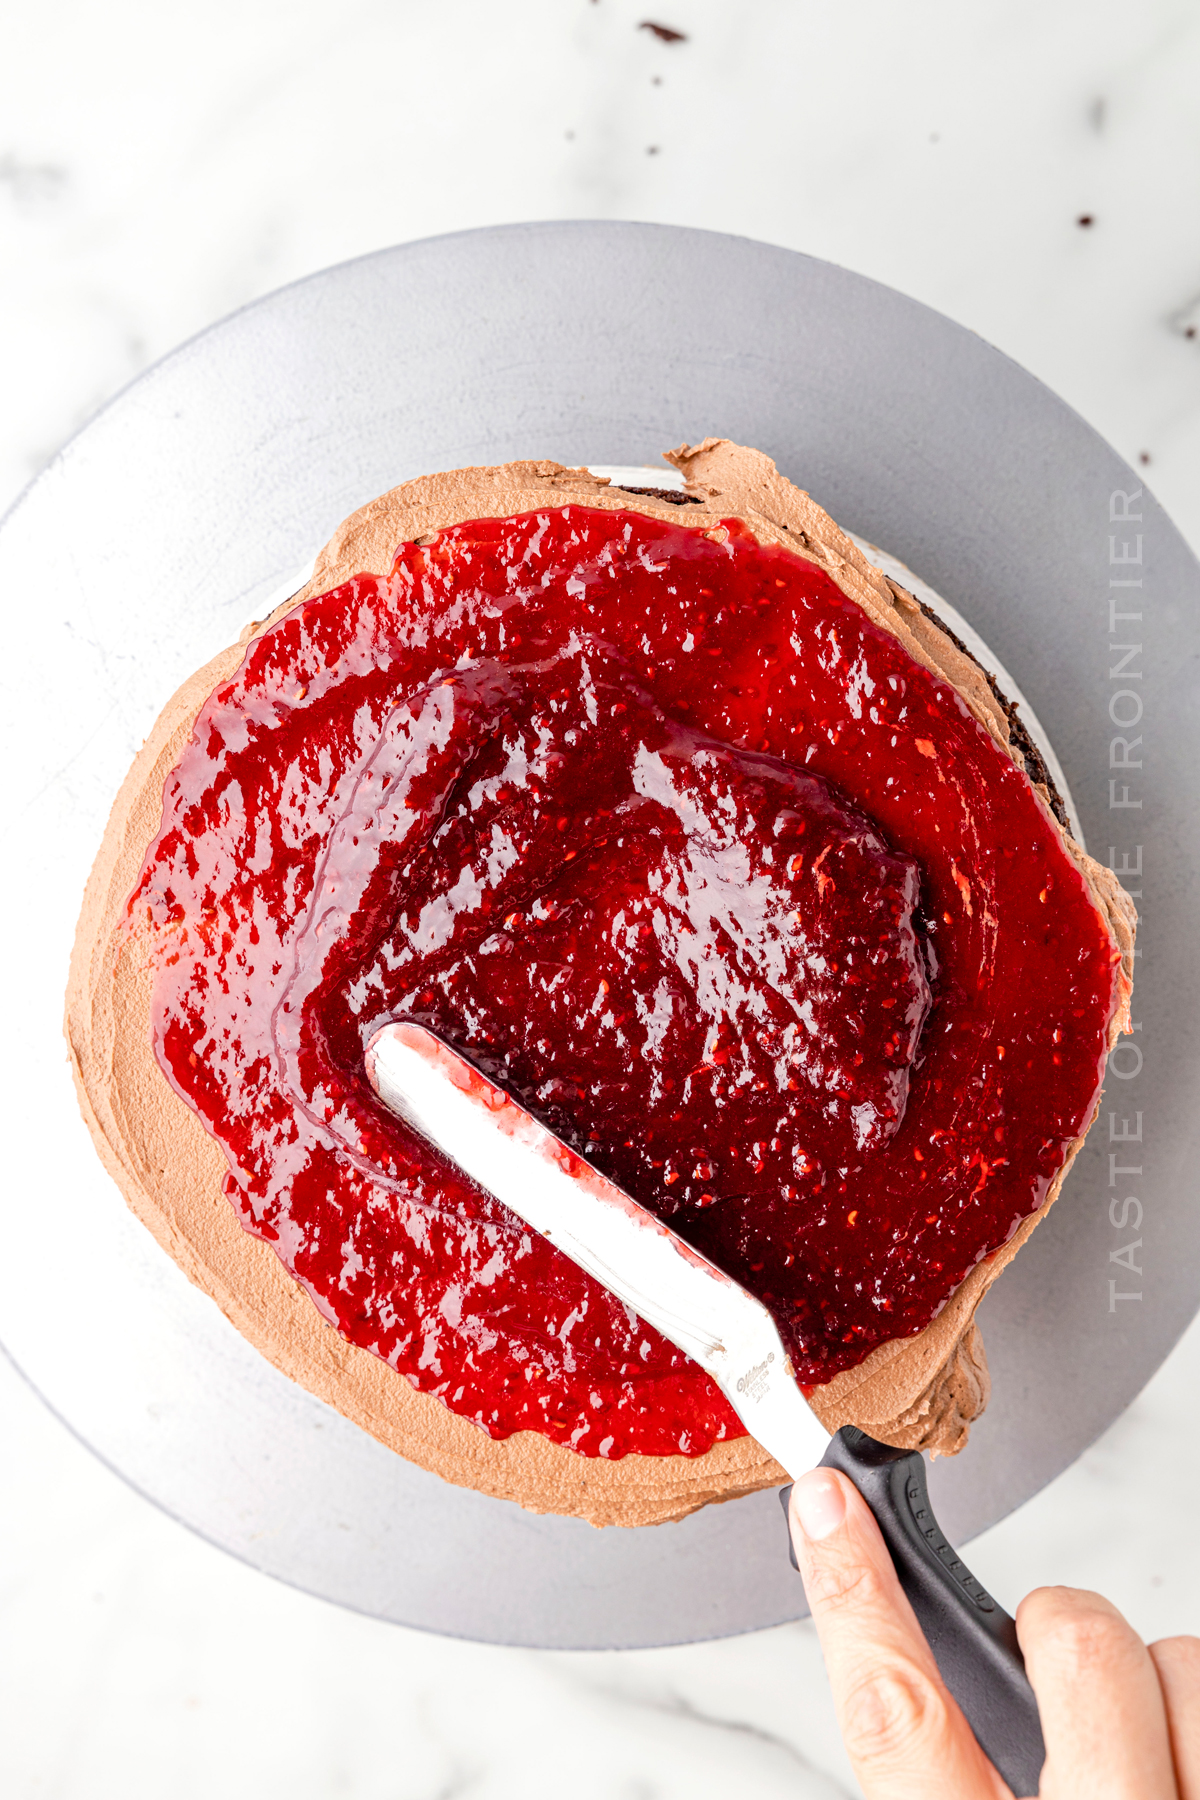
Can I add fresh raspberries to the inside layers?
You can break the raspberries in half and sprinkle them right on top of the raspberry jam
Can I use a whole jar of jam to give it a stronger raspberry flavor?
Yes, you can add more jam to the cake, but you will need to keep the jam in place with a pipped ring of buttercream around the edge of each layer of cake. If you don’t add that ring of buttercream, the cake will be unstable and wobble around when you try to frost it.
Can this chocolate cake be frozen?
Yes, I do it often. Once baked – this cake can be frozen at all stages of the creation process. I like to remove the freshly baked and cooled cakes from the pan, wrap them tightly in plastic wrap and freeze them for later use. (this is also handy when you want to work with cold cakes to keep the frosting from getting too soft.)
I also like to freeze the cake once I have assembled the layers and added the crumb coat. This helps the final frosting decorating go much smoother. This way you don’t have your frosting melting off the side of the cake because the cake or the frosting is too warm. Often times I will get a cake to this stage days before the event I’m making for. Then just finish up the decorating the night before.
You can also gently wrap the completely decorated cake and freeze it until you need it. Remember that the frosting won’t be completely firm and can still be dented if something gets pushed up against it while in the freezer.
Just make sure to thaw it in the fridge the night before as it does taste best when not frozen. I also like to leave it at room temperature for 1-2 hours before serving so the frosting is more creamy than stiff.
How do you prevent the jam from leaking out of the cake?
You will want to make sure you are not skipping the crumb coating of buttercream and the two chill times. The buttercream will set up in the fridge, creating a barrier so the jam doesn’t leak out.
Is there enough buttercream to add a bottom border around the cake?
This just depends on how thick you apply the buttercream to the cake. I had about a third of a cup of buttercream leftover so that I would have had just enough for a bottom border.
Can I replace the oil with butter?
Yes, this cake can be made using 1/2 cup of melted butter in place of the vegetable oil. However, keep it mind that this will change the texture and overall end result of the cake. I prefer using the oil for this reason.
Tips for Making the Best Chocolate Raspberry Cake
- Make sure you use fresh baking soda, or your cake might not rise enough.
- Use good quality cocoa powder because this will affect the flavor the most.
- Don’t use cold ingredients in the batter. Using room temperate ingredients helps the cake rise and mix into the batter easier.
- If your buttercream seems stiff, try mixing it for an extra minute or two to help incorporate air to make it fluffy.
- Don’t skip the chill time for the cake or your layers of cake are sure to slide around.
- Use a lazy susan if you don’t have a cake turntable.
- Allow the cake to come to room temperature for 15 minutes before serving to help soften the buttercream.
Can this frosting be made ahead of time?
You bet! Often when I am working on a cake, it happens in batches. I will bake the layers on one day and make the frosting while they are baking.
Then the layers go in the freezer and the frosting gets refrigerated for up to 1-3 days before I even get around to decorating the cake.
Products I love when making a chocolate cake with raspberry filling…
This cake recipe is SUPER EASY and delicious – and if you’re like me, then you maybe already have some of these items on hand OR maybe you have never made a homemade cake before, & you might be a bit nervous – but you’re going to love it. I have made a list below of the things I absolutely can’t live without when it comes to making this cake recipe. (you can also SHOP MY FAVORITES in my store)
- mixer
- hand mixer
- mixing bowl
- piping bag
- piping tips
- offset spatula
- rubber scraper
- star tip
- offset spatula
- silicone spatulas
- cake pans
- cake turntable
- decorative scrapers
- cardboard rounds
If you love this Chocolate Raspberry Cake recipe, you’re going to love these other cakes too. Please click each link below to find the easy, printable recipe!
Other Chocolatey Desserts
Chocolate Covered Strawberries
If you love this recipe for Chocolate Raspberry Cake as much as I do, please write a five-star review, and be sure to help me share on Facebook and Pinterest!
CONNECT WITH YUMMI HAUS!
Be sure to follow me on my social media, so you never miss a post!
PIN THIS TO SAVE IT FOR LATER
Chocolate Raspberry Cake
Ingredients
Chocolate cake
- 3 cups all-purpose flour
- 3 cups granulated sugar
- 1 cup cocoa powder
- 1 tablespoon baking soda
- 1 teaspoon salt
- 1 teaspoon baking powder
- 3 eggs room temperature
- 1½ cups milk room temperature
- 1 cup vegetable oil
- 2 teaspoons vanilla extract
- 1½ cup boiling water
Chocolate Buttercream
- 1½ cups butter room temperature
- 1 cup shortening
- 1 cup cocoa powder
- 8 cups confectioner’s sugar
- ¼ cup milk
- 2 teaspoon vanilla extract
To Assemble
- 1¼ cups raspberry preserves
- fresh raspberries to garnish
Instructions
Cake
- Pre-heat the oven to 350°F.
- Grease three 8-inch cake pans witheither shortening or bakers release and add a parchment circle to the bottoms. *see notes.
- Whisk the flour, sugar, cocoa powder, baking soda, salt, and baking powder in the bowl of your mixer.
- Add the eggs, milk, oil, and vanilla to the mixing bowl. Beat the mixture on medium-high speed for two minutes.
- Stir in the boiling water.
- Divide the batter equally between the three prepared cake pans.
- Bake for 35 to 45 minutes or until the cake springs back when touched gently in the center.
- Let the cakes cool in the pans on a cooling rack until they have reached room temperature.
- Remove from the pan by gently inverting onto a flat plate.
- Wrap tightly with plastic wrap and place in the freezer until ready to assemble the cake.
Chocolate Buttercream
- In the bowl of a stand mixer- cream, the butter, shortening, and cocoa powder together.
- Place the mixer on a low speed and slowly incorporate the sugar until all of it is incorporated.
- Pour the milk and vanilla slowly into the buttercream and allow it to mix until light and fluffy, about two minutes.
Cake Assembly
- Trim off the domed top of your cakes so they are level.
- Place one layer of cake onto the plate or your cardboard circle.
- Spread a layer of chocolate buttercream on top- about a quarter-inch thick.
- Spread half of the raspberry preserves on top of the buttercream.
- Repeat this after adding the next layer of cake finishing up with a cake layer at the top.
- Spread a thin layer of buttercream around the whole cake and place it in the fridge to set the frosting for 15 minutes. This is your crumb coat.
- Add a thicker layer of buttercream around the cake and smooth out the edges. Place the cake back in the fridge for an additional 15 minutes.
- Pipe swirls of the buttercream onto your cake using a pastry bag fitted with a star piping tip.
- Add some raspberries on top – if desired.
Notes
Bakers release is a combination of oil, flour, and shortening that makes releasing cakes and other baked goods almost effortless. To make Bakers Release – it is as simple as 1,1 & 1. equal parts of all-purpose flour, shortening, and cooking oil – I like to do 1 cup of each.
Mix the ingredients together – whisking well. Store in an airtight container in the pantry or refrigerator. When ready to use, dip a pastry brush into the mixture and spread it over the cake pan. **Once greased, I like to also dust the cake pan with flour for white cakes or cocoa powder for chocolate cakes. It helps with releasing the cake from the pan once it has baked and cooled. You can do this by adding about a tablespoon of either of those and then shake it around over the sink until all of the greased area is coated. Shake out the remaining flour or cocoa before adding the cake batter.
Nutritional information for the recipe is provided as a courtesy and is approximate. Please double-check with your own dietary calculator for the best accuracy. We at Yummi Haus cannot guarantee the accuracy of the nutritional information given for any recipe on this site.



Share Your Thoughts